Midnight Ride of Paul Revere: Fact, Fiction, and Artistic License

Teaser

Did Revere's ride really look like that? Use historical documents to analyze flights of artistic fancy.

lesson_image
Description

Students assess a famous artistic depiction of Paul Revere's ride, based on historical documents.

Article Body

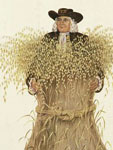
This lesson asks students to use primary source evidence to assess Grant Wood’s famous 1931 painting, The Midnight Ride of Paul Revere. Students must also determine the event's historical significance. This lesson offers a wealth of resources for analyzing artwork as historical evidence and provides a nice example for using artwork along with written documents to learn about the past.

The lesson opens up by asking students to note their initial impressions of Wood's painting. Additional resources are included to help students analyze the painting.

Following the opening activity, students read a series of primary accounts of the event from the British perspective and the colonial perspective. Teachers should consider the lesson plan’s suggestion to jigsaw this activity since the documents range in length and difficulty.

The lesson concludes with multiple assessment options including analyzing the poem "Paul Revere's Ride" by Henry Wordsworth Longfellow, using evidence to distinguish between fact and fiction, and writing a short story. Teachers could also easily create a document-based question assignment to assess students' historical understanding.

Topic
Paul Revere’s Midnight Ride and Analyzing Paintings
Time Estimate
1-3 days
flexibility_scale
4
Rubric_Content_Accurate_Scholarship

Yes

Rubric_Content_Historical_Background

Yes
A wealth of background information is included about Revere's ride as well as relevant poetry and artwork.

Rubric_Content_Read_Write

Yes
Students are asked to read primary and secondary sources and write from the perspective of the historical actors.

Rubric_Analytical_Construct_Interpretations

Yes
Students analyze artistic interpretations of the past and construct historical interpretations of the past.

Rubric_Analytical_Close_Reading_Sourcing

Yes
Students are asked to consider the author’s perspective as they read and analyze primary sources.

Rubric_Scaffolding_Appropriate

Yes

Rubric_Scaffolding_Supports_Historical_Thinking

Yes
Includes guiding questions that scaffold thinking. However primary documents may need further editing and preparation depending on students' reading levels.

Rubric_Structure_Assessment

Yes
Multiple assessment options

Rubric_Structure_Realistic

Yes

Rubric_Structure_Learning_Goals

Yes

Opening up the Textbook: Voices from My Lai

Image
Article Body

This video shows high school students exploring primary sources related to the 1968 My Lai massacre to better understand U.S. public perceptions of Vietnam. The module feature, created for the Montgomery County (Maryland) TAH website, has two sections focused on Vietnam and the My Lai massacre. The scholar analysis provides historical background on U.S. involvement in Vietnam, the My Lai massacre, and public reactions. Classroom practice & teacher analysis features video of classroom instruction along with commentary and reflection by the teacher. The lesson asks students to look critically at the textbook and question it as one perspective on the past. The activities encourage students to engage with complex questions related to the Vietnam War and the American public's reactions to the war—reactions mediated by television news and publications such as Life magazine. The website provides examples of two promising practices:

  • Engaging students in close, careful observation and reading of multiple primary source documents (using group work and comparative documents);
  • Consideration of the textbook as one perspective among multiple historical narratives.
The Lesson in Action

In the Classroom Practice and Teacher Analysis section, we see the lesson in action and the teacher explains some of his instructional choices. The lesson begins the unit on the Vietnam War and starts with a five-minute warm-up question about how textbook authors decide what information to include (or not include).

Students see that while the textbook is one useful source of historical narrative, it is not the only—or necessarily the fullest—perspective, and may leave out key ideas.

After introducing the lesson, students analyze their textbook's account of the events at My Lai and suggest other perspectives they would like to hear to add depth to the textbook narrative. Next, students work with a partner to examine a collection of primary sources including trial testimony from Lieutenant William Calley and other soldiers involved in the massacre, accounts from My Lai villagers, and results from a 1971 telephone survey of public opinion of the case. Students see that while the textbook is one useful source of historical narrative, it is not the only—or necessarily the fullest—perspective, and may leave out key ideas. During the second half of the lesson, the teacher facilitates an in-depth analysis of Paul Conrad's editorial cartoon from the Los Angeles Times. The teacher projects the cartoon on a writeboard, revealing pieces one at a time. This focuses student attention on specific areas before looking at the whole—modeling careful, critical reading of a complex primary source. Throughout the lesson—from initial responses to the textbook narrative to working with primary sources that tell different stories to exploring the creation of a historical narrative—students encounter multiple viewpoints and engage with primary and secondary sources as complex and multifaceted tools for understanding history. At the same time, students learn about American involvement in Vietnam and the American public's evolving perceptions of the war through primary source analysis and historical thinking. Students also explore questions of authority and perspective in present-day historical accounts. You can find a comprehensive lesson plan, complete with primary sources, background information, and classroom worksheets, on the website.

Tennessee 4 Me

Image
Annotation

Tennessee teachers, looking for a state-specific overview of U.S. history? Three years in the making, this project of the Tennessee State Museum outlines Tennessee state history from pre-history to the present day. Each of nine chronological sections—"First Tennesseans," "Indians & Cultural Encounters," "Frontier," "Age of Jackson," "Civil War & Reconstruction," "Confronting the Modern Era," "Depression & WWII," "Civil Rights/Cold War," and "Information Revolution"—begins with an introductory essay on the time period. Two to three subsections per time period offer essays on daily life and work, military and political history, civil rights issues, and other topics; users can click down from each subsection to further
essays on even more specific topics.

Links within the essays lead to extracts from primary sources (such as the journal of early explorer Casper Mansker or a recipe for soap), answers to "Dig Deeper" historical questions, interactive activities (including a Chart of Traditional Cherokee Kinships), and related articles and sources on other websites. A slideshow of enlargeable images of primary sources (artifacts and documents) accompanies most essays, and several essays include embedded audio clips.

Each time period includes a "Teacher's Page" (linked from the bottom of the section's top essay), with lessons and extension activities. Thirty-seven lessons and three extension activities are currently live on the site; broken links may be repaired in future.

"Site Search," in the left-hand sidebar by each essay, allows full searching of the site's content.

Truth in Transit: Crafting Meaningful Field Trips

Image
Article Body

Dawn. The Blue Ridge Mountains, of Pennsylvania, in the western distance, down Chambersburg Pike have an ethereal purple hue as the sun captures their crest. Closer to the ground where we are standing the mist is beginning to lift this mid-October morning. Students and chaperones huddle close together to ward off the autumn chill. All is quiet for this moment I have planned. Reaching into my satchel I pull out my set of Tibetan bells. Asking for perfect stillness from my students and chaperones I bring the bells together. As their ring echoes and trails off, I invoke the Spirit of History to be with us this day as we explore the site of the largest battle of the Civil War. Seven hours later we will head back to West Springfield High School, and my students will never look at a historic site in the same way again.

. . . my students will never look at a historic site in the same way again.

This article will help you to craft deeply rich learning experiences for your students. The lens through which we will use to explore this topic is my annual pilgrimage to Gettysburg National Military Park. Any of the strategies modeled here can be easily adapted by you to use at any historic site you choose.

Prep Work

For any field trip, preparation is a necessity and that includes planning

  • the logistics of getting there,
  • making sure your students are fed, and
  • figuring out how, what, and where you want your students to learn.

Planning is essential, and yes it will take hours, but in the end everyone is rewarded for your hard work. Before you take students, visit the site yourself, several times if necessary. Speak with site staff about your visit and keep a sharp eye and ear attuned to the narrative told at the site. Pick up tidbits along the way that you can use to transform the total experience. If the site has audio-visual programs look at them and determine if you want your students to see them. Doing so will help you to determine your time frame for visiting the site. Your use of time is crucial, particularly if you are visiting a large site such as a battlefield.

Using Student Historians

Early on I learned that what makes a field trip more meaningful for students is getting them involved. I don’t want to simply be a tour guide. For our trip to Gettysburg I ask for student volunteers to teach all of us about what happened to certain individuals at site specific locations, what I term "battlefield vignettes." Working with the National Park Service staff at Gettysburg I assembled file folders of information about seven or eight people who were part of the Gettysburg story. Student historians are then given these folders about a week before the trip to help them to prepare for their presentations. At different stops along the way, we disembark from our motor coach, and the student historians share what they have learned about these characters and what happened to that person at the specific site from which they are speaking. This provides an optimum experience on a variety of levels; it sharpens students speaking skills, it allows peers to see others in action, and it forces the student historians to "get into" the story of their character and be a historian.

. . . student historians share what they have learned about these characters and what happened to that person at the specific site from which they are speaking.


The Teacher's Role on Site

My role on the trip is to provide necessary background information about the battle as we drive along in our bus. At different places we stop I will read dramatic primary source accounts of key moments in the battle. Before I read I ask everyone to take their minds' eye back to that time and place and settle in with the moment of the past. On the crest of Cemetery Ridge, at the Angle, where Pickett's Charge was repulsed, I read several eyewitness accounts of the actual combat that took place where we are standing as well as reflections on the site that were written the day after the battle was over. These prove to be powerful and moving as history becomes transcended.

Assessment

It is important to have students reflect on their experience and the best way to do that is to have them write reflective journal entries about their visit. (See here for example of prompt.) Entries are crafted to plumb not only the intellectual components of their visit but also their feelings, affirming what Ralph Waldo Emerson famously wrote, "There is no truth but in transit." Field trips can be the ultimate learning and teaching experience and provide you and your students not only a slice of history but a lifetime of memories as well.


Search Engines

Image
What is it?

Search engines index the content of the web to create an information retrieval system responsive to queries for information. Descriptions of how that happens change rapidly as programmers and technological developments advance. Wikipedia provides one overview; About.com another; and the Library at the University of California, Berkelely, yet another.

However, more than 85 percent of online searches start with Google. It's the universal default search engine, a ubiquitous tool for beginning online research, and it's now a transitive verb inscribed in dictionaries.

Getting Started

Teaching students to search the internet effectively is an exercise in critical thinking and project planning. But let's face it: a Google search for Civil War, for example, yields over 122 million results in about a quarter of a second, and a Wikipedia entry is likely to be among the top five of those results. It's irresistible to explore the first dozen or so of the responses that appear without looking further. Of course, that's not really how we want students to conduct research. Research, in part, is about framing and refining questions, and good research practices at all grade levels mean coming to the game with a learner-appropriate preliminary plan for locating different kinds of information from different sources. Google for Educators offers Search Education lessons developed by Google Certified Teachers. Three modules—Understanding Search Engines, Search Technique and Strategies, and Google Web Search— Features offer scaffolded approaches from a basic overview to an advanced look at validating site authority. But Google isn't omniscient. Nor does Google—or any search engine—plunge researchers into the invisible or deep web—where academically-related material is likely to live among databases, private websites, and multimedia presentations. 

Doors other than Google open the invisible web.

A few basic research techniques, however, can help students to examine and refine their topic using Google and to evaluate what kinds of materials are most relevant and where these materials might be. Watch a demonstration of Extra Google Search Options, a three-and-a-half-minute video demonstrating how to narrow search results from many thousands to fewer than three dozen through the use of phrases and quotation marks, plus and minus signs. Common Craft videos are always excellent sources of technology how-tos, and Web Search Strategies in Plain English is no exception. The 2.5-minute video explains how search engines work, how to pick key words, and strategies for refining search results. Boolean searches emphasize the judicious use of three little words. Boolean Operators is a concise, three-minute video explaining the uses of and, or, not, and selected punctuation to narrow a search.

Examples

Other search options besides Google help students find specialized resources and to define research parameters. Beyond Google is a downloadable seven-page booklet by Maine social studies teacher Richard Byrne offers a variety of alternative search engines and platforms leading to specific resources to help students broaden and deepen their selection of research sources.

KidsClick offers prescreened, searchable options for younger students.

The American Library Association offers similar gateway for younger students, Great Web Sites for Kids. Noodle Tools guides students and teachers through an entire research process from information-gathering to organizing materials and creating and formatting bibliographies. Noodle Tools includes the subscription service, NoodleBib, a collaborative note-taking tool available to schools and libraries. An extensive set of Free Tools, however, helps students locate research sources, identify the best search engines, create bibliographies (including basics for grades 1-5), and includes a special section of Teacher Resources.

Specialized search engines focus on sounds and images.
Sounds and Images

Looking for audio for a multimedia project? Soungle is a database of royalty-free, downloadable sounds from drums and church bells to 64 kinds of gun noise, 99 trains, 27 horses, and 33 for rain. The database is not transparent, so the challenge is guessing what search terms or keywords may yield results. Compfight is an easy way to search Flickr for images. Set the search menu to Creative Commons only, and search results will yield images in the public domain. Shahi is a visual dictionary that combines content from Wictionary with images from Google, Yahoo, and Flickr to give both text and visual definitions for keywords.

For more information

Consultant Wes Fryer's wiki, Teach Digital, links a compendium of websites, search strategies, and evaluative tools to help "search smarter and better online."

The Internet Public Library (IPL) and Librarians' Internet Index (LII) guide high school students through writing a research paper. How to do research on the web explores how search engines work and how to use them.

Rieger, Oya Y. em>Search engine use behavior of students and faculty: User perceptions and implications for future research. First Monday: Peer Reviewed Journal on the internet. Vol 14, No. 12, December 7, 2009. (http://www.uic.edu/htbin/cgiwrap/bin/ojs/index.php/fm/article/view/2716…).

Weebly

Image
What is it?

Weebly enables you create free websites and and related blogs. The special educator account allows teachers to create classroom websites that include related student websites and projects with linked blogs. It is advertisement-free, no downloads are required, and all work and editing occurs online. Essentially, Weebly helps users become familiar with the construction and possibilities of web-based projects; yet the user-friendly interface lets you and your students concentrate on content and maximizing the use of a variety of tools, sources, and resources. If you can use PowerPoint, you can use Weebly, and while some modification of html and css parameters is possible, it's not necessary. Technological know-how is not requisite.

It's drag-and-drop website creation.

Weebly offers a protected environment: you can choose to develop a site that can only be entered with a password, and you are not required to establish or reveal student email accounts. It's a drag-and-drop construction method with dozens of templates to choose from and features such as on-line photo and text editing, multimedia options. Weebly provides options for html and css customization if you choose—nice, but not necessary for an attractive, functional website.

Getting Started

Weebly has one of the most user-friendly interfaces around. Watch the Weebly demo to get an idea of the possibilities. (Or watch this two-minute overview video on YouTube. Note that a variety of tutorials on YouTube discuss personal and educational use of Weebly and its various apps.) Then, move to your first step: setting up the educator account which calls for your name, email address, school and grade affiliation, selecting a password, and you're on.

Weebly's interface let's you concentrate on content rather than technology.

You'll be invited to create a class site with a student list (up to 40 student accounts free of charge), and you'll have the option to establish privacy settings. Then it's time to get your web site up and running. Simply select the create a site option, title your new site, and let the fun begin with the Weebly editor. The editor nav bar is divided

  • elements: text and image formats for your pages
  • designs: page templates which you'll select according to colors you like, numbers of columns you need, your preferred navigation location, and more
  • pages: add and name pages and place them in your site nav bar

To create the site, simply click on an icon and drag it onto your template. You'll be prompted to edit, add content, or continue to the appropriate next step. Once you've dragged-and-dropped, you'll be encouraged to customize. The photo gallery element, for example, allows you to add captions, resize, adjust placement on the page, and link the image to other files or web addresses. As you add content, you'll also want to look at multimedia options which include uploading and formatting photos, embedding YouTube videos and Flickr images, and google maps. Want to add a blog to your site, perhaps as a communication medium between you and parents, perhaps as an in-class communication venue, or perhaps as a project-specific vehicle for collaboration and student assessment. To create a blog, simply select the pages option, then the new blog nav bar, give your publication a title in the page name field, and your blog is ready to go. It's complete with categories, a blog achive, and an RSS feed. When you're done, click the publish bar, and you've authored a website which you can continually edit, upgrade, and augment. What's tricky about Weebly? If you stick with the WYSIWYG program, you're unlikely to encounter any problems. One helpful hint: you can log in on the weebly home page; your students need to access their sites and files at http://sudents.weebly.com

Weebly is the website platform of choice for National History Day projects.

Weebly pro accounts are available for a reasonable annual fee. Or better still, refer five teachers to Weebly, and you'll upgrade to a Pro account free of charge. Pro accounts add some additional features such as larger file size, audio and video players, the ability to password-protect individual pages, and footer customization options.

Examples

National History Day (NHD) competitions for 2010 provide outstanding examples of Weebly projects. (Note the direct link to Weebly in the lower left hand navigation bar of the NHD home page.) http://www.nhd.org/CategoryWebsite.htm (NHD also talks about the steps for creating an historical website and sells a guide, How to Create a Historical Website written through the Center for History and New Media at George Mason University.)

Educator Jackie Gerstein, uses Weebly for a variety of communicatin and social networking purposes. Her Sample Class Page takes a blogger approach and demonstrates embedded videos and graphics, commentary, and linking, among other presentation methods.

Ms. Shield's 21st Century 3rd Grade and Andy Birch's Fifth Grade Classroom offer further examples of Weebly sites as classroom management and social networking tools. Andy Birch's site also links to student blogs.

Roads to Antietam

Teaser

You're a Union general on the eve of Antietam. You know Lee's plans. What will you do?

lesson_image
Article Body

With so many topics to teach and so little time, many teachers find it difficult to cover military history. This lesson on the Battle of Antietam provides an excellent opportunity to both teach military history and promote historical thinking skills.

Students will hone these skills as they analyze two documents written by General Lee on the eve of the Battle of Antietam. The first document, Lee’s 1862 Proclamation to the people of Maryland, sheds light on Lee’s motivations for invading Maryland. The second document, Special Orders #191, is Lee’s marching orders that were famously intercepted by the Union Army before the battle. Focus questions that support close reading and historical thinking accompany each of these documents.

After analyzing the documents, students work in groups to create a battle plan that could be used by the Union Army to counter Lee’s plans as revealed in Special Orders #191. Each group draws their battle plan on a laminated map, and presents it to the class. This portion of the lesson is creative and interactive, but teachers are not provided with clear information about what would be an effective, historically accurate battle plan. Teachers may want to devise clear criteria for students to consider when developing the battle plan to prevent this from devolving into an ahistorical activity in which students draw up unrealistic or anachronistic plans. Alternatively, teachers and students could generate criteria together as they review the groups’ plans, but teachers will still want to be prepared to guide students in judging these plans in reasonable ways.

For homework, the lesson specifies that students are to research the battle tactics used by General McClellan to counter Lee’s plans at Antietam. This has potential to be a very useful assignment; but again, teachers will need to be attentive to the criteria students use for evaluating McClellan’s tactics.

Topic
Civil War, Battle of Antietam
Time Estimate
2-4 class periods (50 minutes)
flexibility_scale
3
thumbnail
Rubric_Content_Accurate_Scholarship

Yes

Rubric_Content_Historical_Background

No
Little background information is provided. Teachers will need to seek background information about the Battle of Antietam before class.

Rubric_Content_Read_Write

No
Students carefully read primary documents and answer focus questions, but the lesson does not include a significant writing assignment.

Rubric_Analytical_Construct_Interpretations

Yes
Students use primary documents to draw inferences about General Lee’s reasons for invading Maryland.

Rubric_Analytical_Close_Reading_Sourcing

Yes
Students carefully read two documents about the Battle of Antietam and consider the source of the documents.

Rubric_Scaffolding_Appropriate

Yes
Appropriate for grades 8-12, but it may need to be adapted to meet the specific needs of particular classrooms.

Rubric_Scaffolding_Supports_Historical_Thinking

Yes
Focus questions are provided to help students analyze the two primary documents. Teachers may wish to edit and adapt these questions to meet the needs of their students.

Rubric_Structure_Assessment

No
Students are assessed on the quality of the battle plans that they devise and their own assessment of McClellan’s battle plan. However, the lesson does not provide clear criteria for what would constitute a good battle plan.

Rubric_Structure_Realistic

Yes
The lesson provides clear directions and will work in many secondary US history classrooms.

Rubric_Structure_Learning_Goals

Yes

Slave Receipts

Bibliography
Image Credits
  • Accessible Archives
  • Harper's Weekly
  • Historical Maps of Pennsylvania
  • Library of Congress
  • New York Public Library Digital Gallery
  • University of Illinois at Urbana-Champaign Library
Video Overview

Historian Tom Thurston analyzes a slave receipt that records the sale of a female slave named Mary and her child, Louisianna, for $1,000 on September 17, 1853. Thurston models several historical thinking skills, including:

  • (1) close reading of the 1853 slave receipt to investigate the details of a single transaction as well as the larger significance of printed receipts and the information they convey;
  • (2) drawing on prior knowledge of life in the mid-19th-century in a country nearing Civil War; and
  • (3) placing the slave receipt within a larger context of the law, finances, and the geography of slavery.
Video Clip Name
Thurston1.mov
Thurston2.mov
Thurston3.mov
Thurston4.mov
Video Clip Title
Looking at the Document
Close Reading
Slavery and the Law
Historical Context
Video Clip Duration
3:20
2:14
3:38
2:57
Transcript Text

Slavery, legally sanctioned in the south, and for a long time in the north as well, was supported at every turn by legal structures. So, something that I like to use a lot in teaching, just to get students thinking about this, are—these are receipts, these are receipts. And, the one I'm holding right now is dated Norfolk, September 17, 1853. It's a printed receipt that's been filled out. It's something that, it's very similar in a way, to something that you might buy at an office supply store. If you went and needed a book of receipts because, you know, you had a business.

It's got a blank space that you can fill in the place and date. And then it says 18-five and blank.

So just like today in writing a check you might have—or a set of receipts—just to make things easier they might write two-zero-zero and then you can put in 2009, or 2008, or something like that. Just to make it just a little easier in filling out a receipt. It's got this, it's for—it's obviously a book of receipts that you can fill out all through the 1850s. Then it says, "Received of 'blank,' 'blank' dollars, being in full for the purchase of 'blank' Negro slave named 'blank.' The right and title of said slave 'blank' warrant and defend against the claims of all persons whatsoever, and likewise warrant 'blank' sound and healthy, as witness my hand and seal," and then the title of this. And it's a very elegant 19th-century receipt. It's in a nice filigreed kind of handwriting, it's got lovely illustrations on the side that depict kind of the engines of commerce for the time. There's a steamboat and there's a clipper ship and there's a railroad.

And it says, "Murphy and Company, Printers, Baltimore." Thinking about it, how many people are involved in this receipt? It's been printed by a printer in Baltimore, but it's been printed for probably a lot of people. But, this one in particular, it's noted it's sold by a bookseller in Richmond. This particular receipt is dated in Norfolk.

Now, if you were teaching students, using this for the classroom, one of the first things you might want to do is list all of the locations that are on this receipt and any of the other receipts, you know, so that students get a sense of the geography of the place. Like, where is Baltimore in relationship to Richmond? Where is Norfolk and why might this receipt be dated in Norfolk?

The thing, as an historian, that strikes me about these documents is, first, how mundane they are, how banal they are, how similar they are to the kinds of—the book of receipts that you could pick up today. But then, to realize that the people that are kind of in this kind of elegant handwriting, that are signing their names to this receipt, are engaged in the sale of humans.

This particular receipt from Baltimore, dated in 1851, "warrants and defends against the claims of all persons whatsoever and likewise warrants sound and healthy and slaves for life." So, it's almost identical, but it adds the little phrase "and slaves for life," that none of the others do. So, you ask yourself, "Well, what might account for that little bit of fine print, that little legal boilerplate being added to this receipt?"

People keep records of property in a way that they don't keep of people, and they lay—these records stay around with us for a long time.

You often will hear that, well, the Emancipation Proclamation didn't free any slaves really, because it only was under effect for those areas that weren't under the control of the Union Army. But what it did do, was take this huge amount of capital that was vested in slaves and wiped it out. It just erased billions of dollars of capital. It's one of the reasons that New York City was such a hotbed of pro-slavery sentiment, because the banks and the trading houses in New York City were very invested economically.

We know that, in this particular one, "Received of Charles H. Shield, Esquire, 1,000 dollars, being paid in full for the purchase of a Negro slave named Mary and her child, Louisianna. The right and title of said slave, I warrant and defend against the claims of all persons whatsoever," and it's signed by William W. Hall. So, Charles Shield and William Hall are engaged in the transaction of Mary and her child. But this is a legal document. Think about what is the backing? What is the legal claim that this receipt gives to the bearer? So that there's a certain#&8212;in other words, it's kind of to demonstrate that I have the legal right that I've been given by the seller, to the ownership of Mary and her child. The other thing, of course, you keep receipts for, is in case you have to return something.

It's very similar when you think about it, to the kinds of promises that you make when you're buying anything. Here—there's a warrant. In other words, someone is making a kind of authoritative claim and "defend against all claims of all persons whatsoever." So, by that, in other words that, "I have legal title to these people, and I warrant, I signed this in warrant that in fact, I'm transferring that title to the bearer, and I likewise warrant them sound and healthy, as witnessed by hand and seal." So, they're making a claim about these people, and it's not surprising that they make a claim about this. As I said, the law is imbued in every aspect of slavery, including all of these kinds of transfers, these kind of transfers, the sale of slaves. And there's a whole kind of, a set of legal laws about, "Well, what would happen if you sold a slave to someone, and the slave died? What if the person knew that they were ill? So, what does it mean to say that someone is healthy?" and what, what are the kinds of—these things come up. The courts serve the function of making sure that the business of slavery proceeds in an orderly fashion.

This is all about the buying and selling of people. But, there's this huge set of laws that are protecting every transaction. So, a lot of this printed language is what a lot of people, they'll refer to it as "boilerplate." This is the fine print, the fine print of the sale of slaves, that has a special meaning for every jurisdiction that this receipt is made out in.

The state, whether it's Virginia here or elsewhere, does have an interest in knowing about this, in part, just to keep track, but also because these transactions are often—they'll say "paid in full," but they're really also backed by loans. People are buying slaves on credit. It's very speculative. So, there are banks, insurance companies, who also have a stake in the ownership of Mary and her child, Louisiana, that may go far beyond Norfolk and the environs.

Now, one thing that this document won't tell you is, in and of itself, and I can't say that I know the answers to this myself, but who William Hall and Charles Shield are, but you can kind of make some educated guesses. This is happening, the sale is recorded in Norfolk, Virginia. Norfolk is, it's on the coast. It's 1853. Virginia is an old part of the kind of slave south of the Chesapeake [region]. There are hundreds of thousands of enslaved people in Virginia. But, the real money in 1853 to be made in slavery, is not in Virginia. It's in the new southwest. It's in places like Louisiana and Alabama, Mississippi.

A lot of legal cases developed over this because people wanted to make sure they were getting maximized profits for the sale of the estate, including slaves. It was found that "items sell best when sold separately." In other words, given the opportunity to sell a family, self-contained as a lot, to an individual, or to sell them as individuals, more money would be made selling them as individuals.

And, because the courts have a fiduciary responsibility in making sure that the heirs get the best bargain that they can from the estate, they're mandated to sell separately. So, it reminds one that there are hundreds of thousands of families that are being broken up through these types of trade. It's also a good thing to stop and think about how often we talk about the transatlantic slave trade, but to consider the domestic slave trade as well, as being a great tragedy and something that continued to wreak havoc for years and years. Some of the saddest documents that one can find are in African American newspapers and magazines, sometimes 10, 20 years after the Civil War. They're often called "Information Wanted" notices, looking for a mother or a sister or a child, still trying to find their family members.

Toolbox Library: Primary Resources in U.S. History and Literature

Image
Annotation

This website features eight "toolboxes" designed to enable secondary teachers to enhance existing units or collaborate with university faculty and create in-depth summer seminars on prominent themes in American history. Topics include: American Beginnings: The European Presence in North America, 1492-1690; Becoming American: The British Atlantic Colonies, 1690-1763; Living the Revolution: America, 1789-1820; The Gilded and the Gritty: America, 1870-1912; The Triumph of Nationalism/The House Dividing: America, 1815-1850; The Making of African American Identity: Volume I, 1500-1865; The Making of African American Identity: Volume II, 1865-1917; and The Making of African American Identity: Volume III, 1917-1968. Each "toolbox" includes roughly 50 historical documents, literary texts, and works of art, divided into topics and accompanied by annotations, substantive discussion questions, an illustrated timeline of the era, and links to numerous additional online resources. Three more "toolboxes" are coming soon: The Unresolved Crisis: America, 1850-1870; Becoming Modern: America, 1918-1929; and Making the Revolution: America, 1763-1789.

Adapting Documents for the Classroom: Equity and Access

Image
Article Body
What Is It?

Preparing and modifying primary source documents so that all students can read and analyze them in their history classrooms.

Rationale

Although they are useful for engaging students in the past, and teaching them to think historically, primary source documents often use antiquated or complex language. This can pose a challenge even for able readers, let alone those who read below grade level. Adapting a variety of historical documents for use in the classroom will allow students greater access to important reading and thinking opportunities.

Description

Adapting documents for the classroom includes the use of excerpts, helpful head notes, and clear source information. It means adjusting documents for non-expert readers and making them shorter, clearer, and more focused. Adaptations can also include simplifying syntax and vocabulary, conventionalizing punctuation and spelling, cutting nonessential passages, and directing attention to a document's key components.

Teacher Preparation
  • Choose a document that is relevant to the historical question or topic that    your class is studying. Consider what you want students to get out of the    document. Will they try to unravel a historical puzzle? Corroborate    another document? Dive deeper into a particular topic? Write a focus    question for the lesson and the document.
  • Make sure that the source of the document is clear. State whether you    found it online or in a book, clearly identify when, where, by whom, and    for whom the source was originally created.
  • Create a head note that includes background information and even a brief    reading guide. This helps students to focus on what they're reading while    using background knowledge to make sense of it.
  • Focus the document. Although some documents may seem too important    to edit, remember that students may be overwhelmed by passages that    look too long. Judicious excerpting with a liberal use of ellipses makes any    document more approachable and accessible. If students are confused by    ellipses, shorten documents without them.

Consider simplifying the document. This can include the following modifications, but use them sparingly and carefully:

  • Cut confusing or nonessential phrases to make it shorter and easier to    follow
  • Replace difficult words with easier synonyms
  • Modify irregular punctuation, capitalization, or spelling

Every adaptation is a tradeoff, so when in doubt, consider whether a particular adaptation is necessary for your students to access, understand, and analyze the document. Work on presentation. Brevity is important, especially in making a document student-friendly. Other techniques to render a document approachable include:

  • Use of large type (up to 16 point font)
  • Ample white space on the page
  • Use of italics to signal key words
  • Bolding challenging words
  • Providing a vocabulary legend
In the Classroom
  • Devise a focus question to use with prepared documents. Introduce the    question to your class and explain that reading each document will help    them to answer it. (The focus question used in the example is "Why is the    Homestead Act historically significant?")
  • Explain that the document has been adapted to make it clearer and more    useful for today’s lesson. You can provide students with the original and    the adapted documents; or give them the adapted document, while    projecting the original on a screen.
  • Direct students’ attention to parts that have been added to the document.    Show them the document’s source information—its author, and the    circumstances of its publication—while discussing how such information    can help them understand the contents of a document. Show them the    head note.
  • Identify words that have definitions provided, reminding students to    underline or highlight other difficult words in the document in order to    build vocabulary skills.
  • Encourage students to notice any italicized words which indicate    emphasis and to make notes in the margins as they read.
  • Have students answer the focus question, using information and quotes as    evidence from the document to support their answers.
Have students answer the focus question, using information and quotes as evidence from the document to support their answers.

Extension: As students become more adept with using documents, discontinue some of the reading supports. A useful companion lesson is to let students compare the original document with the edited version, to make explicit the modifications and consider whether they changed the document’s meaning or not.

Common Pitfalls
  • Candidly explain that students are working with documents that have    been specially prepared for the classroom. A phrase such as "Some of the    language and phrasing in this document have been modified from the    original" posted at the bottom of the page may be useful. Make sure the    original document is available to students and allow anyone interested to    compare it with the adapted version.
  • Do be careful, however, that the adapted document doesn't seem less    valuable than the original. Emphasize to students that all historians    struggle with using documents from the past. Adapting documents is    simply a tool to help novice historians develop their skills and access    rich content.
  • Use this method also when students are using multiple documents. In this    case, instructional steps may be added to assist students in considering    how documents work together and to help them answer the focus    question.
  • The focus question should require that students read and understand the    document, and use it as evidence in supporting their answers.
An Example for High School Education

See here for original document, here for a transcribed version, and here for an adapted version of the Homestead Act of 1862.

An Example for Middle School Education

See here for a transcribed version of "What to the Slave is the Fourth of July?" by Fredrick Douglass, and here for an adapted version of the document for use in a middle school classroom. To view the original document, see Foner, Philip. The Life and Writings of Frederick Douglass, Volume II Pre-Civil War Decade 1850-1860 (New York: International Publishers, 1950).

An Example for Elementary Education

See here for an original version of John Smith’s "A True Relation." See here for an adapted version appropriate for an elementary school classroom.

Further Resources

For more examples of modified document sets, see Historical Thinking Matters. Select "Teacher materials and strategies," select one of the four topics, and then select "materials" and "worksheets." For original and transcribed versions of milestone documents in US history, see 100 Milestone Documents from the National Archives and Records Administration.

Bibliography

Biancarosa, Gina and Catherine E. Snow, Reading Next—A Vision for Action and Research in Middle and High School Literacy: A Report to Carnegie Corporation of New York, 2nd ed.Washington, DC: Alliance for Excellent Education, 2006.

Wineburg, S. and D. Martin. "Tampering with History: Adapting Primary Sources for Struggling Readers." Social Education (ex. 58, no 4) (2009).