Elizabeth Glynn on Using Art to Create Interdisciplinary Classrooms

Date Published
Image
Worksheet, Connections, Submitted by author
Article Body

The first day of my U.S. History class, I showed my students an image of Nam June Paik's multimedia art installation, Electronic Superhighway: The Continental U.S., Alaska, Hawaii on my interactive whiteboard. The students and I talked about the piece and then I asked the students to each come up with a mood word, one word that would describe the mood of the United States today. The students put their mood words on sticky notes and we placed them on the image of the artwork. Once this was done, I explained to my students that the mood word activity was part of a yearlong project.

Photo, Mood Words, Submitted by authorA joint effort between Melanie Buckley, an American Literature teacher, and me, the goal of this project, which we call "Visual Art through the Ages," was for students to develop the writing skills to express connections between art and U.S. History. Each step of this project was guided by the essential question "How did we become the United States?" and related back to Nam June Paik's piece. Buckley and I created and formulated the project during the Clarice Smith National Teaching Institute held at the Smithsonian American Art Museum in Washington, DC. Paik's installment, to Buckley and I, visually demonstrates how the United States is not a representation of one culture but many and it took many people, events, and cultures to create the United States. It inspired us to consider how we could combine U.S. history and literature to demonstrate the same idea.

For each unit of study, the students learned art vocabulary, analyzed art from the period, practiced using their new vocabulary to express their observations, and created mood words that they compared to the words they created on the first day. The idea for the art analysis project was that it would be a concluding activity for each unit that could be done in less than 15 minutes.

Making Sure You Can Talk the Talk

Since Buckley and I are not art teachers, we first had to learn how to analyze art using the elements of art ourselves. The elements of art are different aspects of art, like line, shape, and color, that can be found in art pieces and are usually shown in a chart. After I introduced the project, the students learned (for many it is a refresher from art class) the elements of art and then as a class we analyzed a piece of art using the elements in the chart below. We asked the art department to do this piece of instruction for the students.

Chart, Elements of Art, Submitted by author

Now, with this emphasis on art, many students were very confused. They kept asking if they were in an art class or U.S. History class, and once we began writing during the art analysis, they were unsure if they were in U.S. History class or English class. This confusion that the students began to have over what we were doing was what I had hoped for. I wanted the students to realize that all of their subjects in high school are connected and can be taught together.

The Process

Worksheet, Art Analysis, Submitted by author

The first day I presented the project, I took the students step by step through the process. It began with an art analysis worksheet. The worksheet was divided into five numbered steps. Dividing up and numbering the steps allowed the students to work on one at a time (this worked best with the time constraint).

Worksheet, Mood Word, Submitted by authorWe began by watching a slideshow of the six pieces of art Buckley and I had selected for the Age of Discovery/Colonial Era unit. Each student during the slide show worked on step one, creating their mood word and then writing two sentences on why they selected this word. Once they completed this first step and I checked it, they moved on to step two.

Handout, Art Selection, Submitted by authorStep two was where students analyzed a piece of artwork. The students selected a small, 2 x 2 print-out of one of the six art pieces and glued it on their sheet of paper under the elements of art chart. The students took time to circle and draw lines to two or more aspects of the elements of art they found in their images. The first time students did this, they found it silly but after working through one or two columns of the chart, they began to really look hard for different aspects. For some of them, it became a competition to see what they had in their paintings compared to their classmates.

Worksheet, Elements, Submitted by authorOnce everyone finished finding art elements, we moved on to step three: writing four sentences that incorporated elements of art that they found in their images. Each sentence had to include one element of art linked to where they found it in the image. The handout that I created for them to work on had examples. The whole process required students to move through skills that started with observation and ended with synthesis. Identifying the elements of art in the images used observational and analytical skills. Writing the four sentences let them articulate what they had observed.

Worksheet, Synthesis, Submitted by authorFor the fourth step of the worksheet, the students had to connect each of the sentences that they created in step three to a specific event or person in the time period we were studying. This part was by far the hardest step. Many students immediately put their hands up and declared they were stuck! They didn't know what to include, what connections to make, or how to even begin. This step focused purely on synthesis and for many, this was a new skill.

I helped the students to recognize that they had to be creative. They could talk about anything and everything in the time period, but they had to connect it to the image. The first thing I did for many who were stuck was prompt them to make a list of four events or individuals that they remembered from the unit. Second, I told them to identify four aspects of art in their artwork that they were really drawn to. Finally, I asked them to connect an event/individual to each aspect. I told them to think back to their mood word for the unit and find a connection.

Still, some students had the most problems with this step. Many took their papers home to work on the sentences for a longer time, but others loved this creative step and quickly wrote four sentences. This step also helped them to realize that art can assist in learning about the past. Art is an accurate source that can recreate the past, just like any other primary source. For some, using art to learn about the past is easier and more meaningful than studying and analyzing a document.

The fifth and last step of this worksheet was to write four sentences summarizing what each student felt was the whole point of the artwork. Taking into account all of the steps, from the mood word to the art analysis and synthesis, how does this image relate to the time period? With all the other steps complete, the students found this easy to articulate. I loved reading their responses and seeing their "aha" moment when they saw their connection.

Worksheet, Connections, Submitted by author

The Bigger Picture

With each unit's art analysis, the students improved. I noticed that when I used an artwork in a PowerPoint or one on a worksheet, they analyzed it using the elements of art without me prompting them. The students began to see this process as a natural ending to the unit. They became excited about the images selected. Some student even began to write down mood word ideas at the beginning of the unit.

The art analysis activities were just one part of the overall yearlong project. At the end of the year, the students will complete a podcast on one piece of art that they feel connected to. These podcasts will be created in groups (based on art work in the same time period) while at the Smithsonian American Art Museum. All of the images Buckley and I used are from the museum's collections and, with the exception of one, are all on display.

In the podcast, the students will connect their selected art piece to Paik's installment to answer the essential question, how did we become the United States? The students will explain in the podcast how their selected piece of art visually displays one step toward answering this question. In one to two sentences, they will contrast their pierce of art to Paik's piece and explain how their piece helped to create the United States.

For more information

For more ideas on teaching with art, check out the National Endowment for the Humanities's Picturing America resources, or the Metropolitan Museum of Art's guidelines on analyzing composition in paintings. Interested in learning more about the Smithsonian American Art Museum and its resources, both online and in DC? Read our National Resources entry on the institution.

Here at Teachinghistory.org, Daisy Martin has suggestions for using visual arts to enrich student understanding. And visual primary sources, including art and photographs, are vital for lower-elementary learners, says 1st-grade teacher Jennifer Orr in a blog entry.
George Washington, A National Treasure

Article Body

This site walks participants through an exploration of Gilbert Stuart’s Landsdowne portrait of George Washington using three different filters: symbolic, biographic, and artistic. Each filter highlights a different element in the portrait and provides unique information and a distinct interpretation. After working through the interactive presentation, students should be able to effectively interpret the portrait as a primary document. They can also use these filters and related questions to analyze additional artistic works. The site provides a series of lesson plans on George Washington’s life.

Hermitage Foundation [VA]

Description

The Hermitage Museum and Gardens consists of an early 20th century historic house museum with a worldwide art collection and contemporary exhibition galleries, surrounded by twelve acres of formal gardens and natural woodlands, educational wetlands, a Visual Arts School, and a Studio Artists Program.

The Foundation offers a variety of tours and special programs which can be catered to schoolchildren, individuals, or adult group tours. The Foundation also offers periodic special events, including special art exhibits and presentations. The website offers visitor information, a history of the site, and an events calendar.

Historical Evidence in the Material World

Image
detail, MOMA, American Paintings and Sculpture home page
Article Body

On more than one occasion, teachers participating in our Teaching American History (TAH) project have speculated that one reason their middle school students often have trouble understanding historical texts may be because they have not yet developed the ability to imagine the past. Because they are young their experience is limited and many have yet to discover museums, historic houses, or other places of historical interest. In addition, the historical past is not immediately evident on the surface in New York City, where it is often difficult to see through the many layers of changes in the landscape and the built environment.

. . . one reason their middle school students often have trouble understanding historical texts may be because they have not yet developed the ability to imagine the past.

As a museum educator, I have been encouraging teachers to bring the tools of art history and material culture studies to their classrooms by presenting works of art and architecture, photographs, and historical artifacts to students. In this way, the definition of the primary source is expanded beyond the written word to include the visual and the tactile; the historical source material available for consideration and evaluation is greatly increased; and students are offered the possibility of a sensory as well as intellectual encounter with the past.

In periodic visits to art museums, historical collections, and historic houses in New York City, as well as in a series of after-school workshops, our group of middle school teachers has explored a range of art and artifacts with an eye toward conducting similar explorations with their students. Teachers are learning a process of investigation that involves observation, deduction, speculation, and interpretive analysis to uncover the meaning of art and objects.

The technique, standard in museum education, is simple and direct: It asks students (or anyone seriously approaching a work of art) to begin by describing the object, to analyze its structure, to consider the circumstance of its creation, and only then to propose an interpretation of the meaning of the piece.

. . . students are offered the possibility of a sensory as well as intellectual encounter with the past.
Exploring Art and Artifacts

Here are the basic guidelines for exploring a work of art or artifact of culture:

1. Sensory experience is at the heart of our interaction with works of art or artifacts of culture. Observe the piece for at least one full minute—this is surprisingly long for many students.

2. Take note of your first response. Aesthetic response is personal and often emotional. It deserves our attention. Here students can register their reaction and then set emotion and opinion aside.

3. Describe the work. Make note of the obvious in neutral language, e.g. "seated female figure in green dress, landscape background . . ." This constructs a visual/verbal inventory that serves to focus our viewing. It is especially important in conversational settings with students because we cannot assume that we all see the same things. Articulating the description brings everyone to a kind of consensus about what is being looked at.

Articulating the description brings everyone to a kind of consensus about what is being looked at.

4. The formal elements of a work of art or artifact of culture constitute the language by which it communicates. Analyze the piece by examining the use of line, shape, color, form, composition, format, medium, etc.

5. Consider the context where the work would originally have been seen; the purpose it might have served; the physical condition in which the work has survived; when, where, and by whom the piece was made; and the title. All of these conditions contribute to the meaning of an object.

6. Make historical connections. How does the piece connect with the broader historical context? Young students exercise their chronological thinking here to contextualize the piece at hand. Recalling contemporaneous events and issues, students consider how the object relates to the larger historical picture. Steps five and six often require additional research outside the object itself.

7. Reevaluate your response. Has it changed? Has it become more nuanced? Is it possible to appreciate the work on multiple levels (intellectual, emotional, historical)? Close reading of objects deepens our understanding of the historical past and teaches us to consider the evidence before forming opinions.

This process has been developed primarily for group conversations, the principal mode of teaching in the museum context. In the classroom or on a self-guided museum visit, teachers may have their students work individually or in small groups to create a written record of their investigations. This allows the students to choose the object of their investigations, either from the museum collection, a museum's online resource, or a collection of photographs or reproductions.

Whether in the classroom or the museum, requiring students, even reluctant artists, to draw their chosen object serves to slow down their observation process and forces them to notice all the aspects of the piece from overall structure to fine details. In this way, they are firmly grounded in the actuality of the object before advancing speculation about its function, meaning, or historical significance.

Enjoying the Past

When conducted in a disciplined yet free-flowing and open-ended fashion in the hands of an experienced teacher, this type of engagement with art and artifacts empowers students to enjoy the materiality of the past, develop their powers of reasoning, make critical historical connections, and furnish their historical imaginations. It encourages students to propose possible alternative meanings and to develop the ability to hold multiple, sometimes contradictory interpretations simultaneously. This method provides authentic contact with art and artifacts and teaches close reading of objects, thereby engaging students in the type of work historians do on a daily basis.

At the very least, aesthetic experience can spark excitement and curiosity in students. Many times, teachers have remarked to me that a particular student who is not normally engaged in the classroom was very responsive to a work of art or more generally to the excitement of a museum visit.

. . . a particular student who is not normally engaged in the classroom was very responsive to a work of art. . .

A few years ago, I had an experience that forever convinced me of the value of this work. I was working with a group of 4th-grade students in a series of classroom visits in which we had looked at, considered, and discussed a variety of works in the collection of the Metropolitan Museum of Art. With the goals of sparking their curiosity, introducing the idea of connections between art, history, and culture and developing their critical-thinking skills, we looked at projected images of art and artifacts from Ancient Egypt, colonial America, and the modern period.

On a class visit to the museum, students were eager to encounter the real thing in person. As we made our way to our destination, Romare Bearden's six-panel collage entitled The Block, I could feel the excitement mounting. As the children seated themselves in front of the work on the floor there were murmurings of recognition among the students who remembered seeing photographs of the piece in their classroom. As I was about to invite the students to look quietly at the work, 10-year-old Leticia, who was normally very quiet in class, raised her hand impatiently, bursting to say what was on her mind. "I think art is about ideas," she said. "It's about the ideas the artist has—and those can change. And it's about the ideas we have when we look at it." This is precisely the lesson I wish to share with my TAH teachers and their students.

Picturing America

Article Body

Picturing America, a recent initiative from the National Endowment for the Humanities, contains a wealth of resources for using art in the classroom. The site contains links to four lesson plans that teach students how to analyze art, for example, teaching the basics of composition. The site contains over 20 pieces of art from various periods in U.S. history. A short essay with background information and analysis accompanies each piece of art. There are resource guides for using art, including a guide designed specifically for younger students.

Using Visual Fine Arts to Enrich Understanding

Image
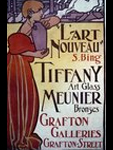
Poster print, 1867, L'art Nouveau S. Bing, Tiffany, art glass, Meunier bronzes
Question

What resources or techniques would you recommend for teaching using art and its analysis in the social studies/U.S. history classroom? I have already read "Historical Evidence in the Material World: Art History, Material Culture, and Historical Thinking" on your site. In this instance, we are concentrating on the visual fine arts – painting and photography.

Answer

Things have changed since teachers had to go through their private and local libraries to create slideshows using art to teach history. Now with a click of a mouse and a projector, we can show students provocative works of art. And while including art in your teaching will, no doubt, engage some of your reluctant students and add variety and aesthetic appeal to your curriculum, deliberate methods are required when teaching students to analyze the visual fine arts as a means to learn about the past. And those methods require slowing down when we observe and discuss a piece of art.

It may be useful to think about three things as critical to teaching students how to analyze art as historical artifacts:

  • Close reading (and we use the term “reading” broadly here, referring to observing the item closely);
  • Feeling and considering the emotional impact of the piece;
  • Considering the historical context of the piece.
  • You’ve started with a good entry that introduces some key aspects of using art. Author Carolyn Halpin-Healy, talking about how to use material culture, explains that analyzing these kinds of sources should “begin by describing the object--to analyze its structure, to consider the circumstance of its creation--and only then to propose an interpretation of the meaning of the piece.” She goes on to identify specific steps in this process that include the key aspects above.

    Deliberate methods are required when teaching students to analyze the visual fine arts as a means to learn about the past. Those methods require slowing down when we observe and discuss a piece of art.

    EDSITEMENT
    We have other resources at teachinghistory.org that address art analysis. Visit this review of a lesson plan that uses art and documents to investigate Paul Revere’s ride. The lesson comes from Edsitement, a site created by the National Endowment for the Humanities [NEH] that includes lesson plans using a variety of material culture for both World and American history. These plans can serve as inspiration, models, and resource banks for analyzing art in the history/social studies classroom.

    And don’t miss the NEH’s Picturing America program. It was designed to encourage and support teachers in using art to teach history and social studies. This tremendous resource includes a set of artistic works to use in the classroom, information about the works and artists, links to other sites with resources for teaching with art, and a teacher’s resource book.

    See this entry to listen to two educators talk about how they use Picturing America in their Teaching American history grant. The third video in this series may be most helpful to you since it concerns the ideas of slowing down with a piece and closely observing it while considering one’s emotional response to it.

    There are also many resources designed for teaching photo analysis in the history/social studies classroom.

    PHOTOGRAPHS
    At teachinghistory.org, see our “Using Primary Sources” feature for links to worksheets that can be used to analyze varied kinds of sources, including photos and art. See both our entry about the National Archive’s worksheets and the Library of Congress’ worksheets. In the Library’s excellent Prints and Photograph collection, you can also find help in preparing to teach students and teachers about analyzing photos as historical sources rather than as truth-telling images. Check out their resources on Dorothea Lange’s iconic migrant mother photo here and here to help you use this photo to illustrate the choices and selection that the photographer makes.

    See “Using documentary photography” for a comprehensive guide that uses the photos of Jacob Riis to illustrate the process of photo analysis. Especially helpful may be the guide’s list of questions.

    Good luck! And we’d love to hear what was most helpful to you.

For more information

For other helpful resources see:

  • Check out the Fall 2010 newsletter that focuses on the use of images in the History classroom;
  • A guide to using K-W-L charts for helping students analyze photos;
  • This question for a guide to online photo archives;
  • The “What is Historical Thinking” video on our home page. It can help make clear some of the key facets of analyzing any historical source; and
  • Search “website reviews” in the History Content section to locate websites that have art and teacher resources for using that art in the classroom.

Amy Trenkle on Experiencing the First Amendment

Date Published
Image
Photo, students learning linoleum-cut printing
Article Body
Welcome our blog's first guest writer!

In the future, look for more entries by practicing teachers we've selected to bring you their experiences connecting students with primary sources and/or using technology and digital resources to support and enrich their teaching. Teachers will come from elementary, middle, and high school; some have been teaching for years and some have just started out. Each will have their own unique insights on teaching U.S. history and social studies.

Amy Trenkle teaches 8th-grade U.S. history at Stuart-Hobson Middle School in Washington, DC. A National Board Certified Teacher in early adolescence social studies/history, she has taught in DC since 1999. Amy believes in experiential learning and using the museums in her city and across the country to make concrete connections for her students to their history curriculum. She has served on several advisory boards to local museums, including the Smithsonian Center for Education and Museum Studies, the National Museum of American History, the Newseum and the National Building Museum. An active participant in the DC Council for the Social Studies, National Council for the Social Studies, and DC Geographic Alliance, Amy the received the DC History Teacher of the Year Award in 2005 as sponsored by the Gilder Lehrman Institute of American History. Currently, Amy is serving as an adjunct professor of education at American University.

Picturing the First Amendment

This year, celebrating Constitution Day was a school-wide affair.

Thanks to a special grant opportunity offered through the Newseum and 1 for All, students at my school became aware of, or reviewed, their First Amendment rights.

Students took a field trip to the Newseum, where they had a class taught by a Newseum educator about the First Amendment, and then visited the First Amendment Gallery, both highlighting issues related to the First Amendment today.

Upon returning to school, students in each grade level shared what they learned in different forms. The 5th grade made sidewalk chalk drawings, the 6th graders made a mural about their First Amendment rights, 7th graders left their impressions of the First Amendment via window drawings with washable window paint, and 8th graders made a linoleum print about the First Amendment.

Finding Your Freedoms

As the 8th-grade U.S. History teacher, I really wanted to emphasize the importance of the First Amendment—we will be studying it more in-depth later this year, but what a great opportunity to bring it to life now! To prepare my students for this trip, we took a walk around several blocks near the school. Students listed as much evidence as they could for our five First Amendment rights in action. I directed them not to just look for signs, but to listen for them and to really observe.

Students came up with the following:

  • Assembly: We are all walking as one group on the sidewalk.
  • Religion: The Imani Temple Church, Tibetan worship flags, a cross (for Christianity)
  • Speech: the Redskins sign, bumper stickers on car, mayoral candidate signs
  • Press: Newspaper stands, Washington Post newspaper

Armed with our examples in our neighborhood, I felt we were ready for our field trip. We had a great time—the students LOVE going to the Newseum. As a teacher, I felt that they deepened their understand of the First Amendment and connected it to what we did in class.

What Do Freedoms Look Like?

Our final activity, upon our return, was to synthesize what we learned through a print. Students were first asked to choose one of the five parts of the First Amendment to focus on. They then were tasked with finding a quote, lyrics, or saying that they felt related to that part of the First Amendment, and to cite it. Then, they drew a sketch of how they would illustrate this on a print.

The next day a local artist, Alexandra Huttinger, came in and taught the students how to make linoleum-cut prints. Each student carved his/her own linoleum and then printed their print. They then wrote what their print was about. These will be displayed in our school's foyer.

Taylor chose to focus on the Freedom of Assembly because "the right to assemble is very important to me." She chose to illustrate her drawing as she did because "to protest you could have megaphones and signs." From this activity she learned "that our First Amendment rights are important to us as Americans."

Virgil chose to illustrate the Freedom of Petition "because it got my attention because I remembered the Tea Partiers." He used a quote from his father: "We have a right to protest against things that we feel are not right." He chose to illustrate his right as he did "because people signing a paper to get things or to relieve things is a form of petition." As for the activity? Virgil says, "It is a really fun experience!"

Ashley chose to highlight Freedom of Speech. "I chose to focus on this particular part of the First Amendment because I think that the Freedom of Speech is used the most," wrote Ashley. She used a quote from Benjamin Franklin that she found on thinkexist.com: "Without the freedom of thought, there can be no such thing as wisdom, and no such thing as public liberty, without freedom of speech." Ashley explains her choice: "I chose to illustrate the First Amendment as I did because I thought it really illustrates what my feelings are about Freedom of Speech. The mouth represents speech and the flag as the tongue in the mouth represents freedom." She "enjoyed learning how to print and about our First Amendment rights again."

Whether it was new or a review for students, I felt, as a teacher, that my students were thinking about the First Amendment and their rights on Constitution Day. I'm very proud of their work!

For more information

Visit the Newseum's website to explore the museum's resources for students and teachers yourself.

Also check out 1 for All, a nonpartisan educational campaign seeking to celebrate and publicize the rights granted by the First Amendment. The website offers lesson plans for all grade levels, and links to further resources.

Chicago History Museum [IL]

Description

The Chicago History Museum presents Chicago, IL, and select national history. Permanent exhibits include Chicago economy, disasters, community life, innovations, leisure, recreation, and history dioramas. Collections consist of more than 22,000,000 prints, photographs, architectural artifacts, archival documents, published materials, paintings, sculptures, oral histories, films, costumes, decorative arts, and industrial artifacts.

The museum offers traditional and interactive exhibits, media presentations, a sensory exhibit for children and families, hands-on activity stations, guided tours, self-guided tours, history tours by boat, step-on guides, 45-minute audio tours, Saturday walking tours, film screenings, teacher workshops, and research library access. Audio tours are available in English and Spanish. The website offers educational games, an artifact spotlight, virtual exhibits, a teacher's guide, unit plans, pre- and post-visit activities, lesson plans, and a curriculum.

Rufus Porter Museum [ME]

Description

The Rufus Porter Museum is located in Bridgton, Maine, the site of some of Porter's most famous workers. Rufus Porter is notable for his fantastic works of landscape art, especially murals, and for being the founder of Scientific American.

The home offers guided tours and exhibitions of Rufus Porter's works. The website offers a biography of Porter, a history of the museum, visitor information, and an events calendar.

Hancock Shaker Village [MA]

Description

The 20-acre Hancock Shaker Village was once a thriving Shaker community, but is now an outdoors museum which presents the history and culture of the Shakers. Collections include 20 historic buildings and more than 22,200 artifacts including furniture, tools, vernacular equipment, household objects, art, textiles, graphics, and archival documents. Shaker beliefs included using dance as a communal form of communication with God, equality of the sexes, group ownership, and celibacy.

The village offers self-guided tours; docents; exhibits; animal encounters; traditional craft demonstrations; a program on Shaker music; a children's discovery room; 19th-century-style lessons in a historic schoolhouse; guided tours of the 1830s Brick Dwelling, 1826 Round Stone Barn, and Laundry/Machine Shop; specialty guided tours; curriculum-based tour outlines for teachers; heirloom gardens; heritage livestock; research library access; a hiking trail; cafe; and a picnic area. Guided tours are only available between late November and mid April. During that time, self-guided tours are unavailable. Appointments are required for research library access.