Joe Jelen on Pocket Camcorders

Date Published
Image
Photography, Pocket Camcorder, 12 Sept 2008, Flickr CC
Article Body
What is a pocket camcorder?

A pocket camcorder shrinks the technology of a video camera to the size of your pocket. While not the highest-quality recording device, pocket camcorders offer an easy way to point and shoot video. Although camcorders have been used in classrooms since the 1980s, greater availability of pocket camcorders has revolutionized the way we think about using video in the classroom. Before, a teacher was lucky to check out one camera for use in his classroom. Today, with pocket cameras costing around $150, schools can afford to have multiple camcorders in teachers’ hands. In addition, the pocket camera affords increased flexibility in storage and editing over its predecessors.

How Can I Afford One?

Pocket camcorders are relatively inexpensive with continually falling prices. Most pocket camcorder models cost between $150-$250. The difference in price is largely dependant upon the quality of video it produces and its memory capacity. When searching for a pocket camcorder, you should consider what it will be used for in the classroom. For most projects high definition video and zoom capabilities are valuable, but not a requirement. However, battery life and ease of uploading should be considered. Controls for recording and playing back video should be easily found on the unit. Many media centers have invested in these devices, but if yours has not and you would like to have a few cameras in your own classroom, funding need not hold you back. Currently, there is a 2-for-1 deal on Flip brand video cameras at the nonprofit DigitalWish.com. Also, you can look into buying refurbished pocket camcorders online for around $75.

Increasingly we see smartphones with video capabilities in students’ hands. This will likely make the pocket camcorder technology short-lived. But for now the pocket camcorder offers all students a chance to learn by creating video. I feel there is no need to worry as the same teaching techniques can be applied with the new smartphones as these devices become widespread.

How Can I Use It?
The new National Curriculum Standards for Social Studies put out by the National Council for the Social Studies includes a number of products that could be created with a pocket camera.

To use a pocket camcorder, you will either need a computer on which to upload the stored video (most often via USB) for editing and sharing, or a way to project video from the pocket camcorder to a television or LCD projector (usually via HDMI cable). Once you figure out the logistics of students presenting or sharing their videos, you’ll need a reason to have students use the cameras! I believe the pocket camera’s true benefit is providing students authentic learning and assessment opportunities. The new National Curriculum Standards for Social Studies put out by the National Council for the Social Studies includes a number of products that could be created with a pocket camera. Students could take pocket cameras home to conduct interviews of those that have witnessed historical events. Or, they could create a public service announcement publicizing healthy habits. Students could also use their cameras to capture visual evidence of culture in their community or create a documentary on a community issue. I have also seen teachers assign students the task of recording and narrating trips to historical sites to share with classmates. I had students create CommonCraft-like videos in which they explained a constitutional amendment “in plain English.” In this project students created a script and a storyboard, and used black-and-white cutouts to help explain their assigned amendment. If rehearsed properly students could shoot their two-minute video in one take and did not need to spend time editing. Aside from a pocket cam, the only other additional piece of equipment necessary is a tripod that will allow the camera to face downward to record action beneath.

The social studies classroom offers many avenues to incorporate the pocket camera into instruction and assessment. I hope that you experiment with other uses for the pocket camera and share them with us here.

For more information

Find product reviews for pocket cameras.

In an earlier blog entry, Jennifer Orr describes using pocket camcorders with her 1st-grade students.

Watch students make movies in our video on the Prince William County, VA program 'Of the Student, For the Student, By the Student.' Students could use pocket camcorders to make their own videos at historic sites.

Joe Jelen on the New York Public Library Digital Gallery

Date Published
Image
Photographic prints, Among first to enter action, 1940s, United States Army--Sig
Article Body
Overview

The New York Public Library offers a digital gallery of many photographs and artifacts from its collections. The NYPL–Digital Gallery features a searchable index of thousands of pictures and artifacts related to a wide variety of subjects in American history. Best of all it is free and easy to use.

How to Find What You’re Looking For

Next time you are looking for a photograph of an important historical figure, try using the NYPL-Digital Gallery to search for images of him/her. A simple search in the NYPL search engine box on the home page can unearth thought-provoking photographs, like this candid shot of President Grover Cleveland. This image says a lot more than the images one would obtain from a basic Internet image search.

Also from the home page, try browsing by subject and look for documents related to your state. There are many great images that capture towns and cities in the past. This is a fantastic way to tie in local history. On a digital map, instruct students to locate where an old building once stood using a site like WhatWasThere.com. Students could also compare this detailed 1911 collection of photos of 5th Avenue to a Google Maps street view of 5th Avenue today to show students the impact of urbanization.

The NYPL-Digital Gallery can also help locate sources that might display social change over time. For instance, you might find pictures showing how bridal fashion has changed over time. If you click ‘Browse Sources’ and type “brides” into the ‘Explore Subjects’ search box, you will see a link to pictures tagged by this subject from 1400 through 1939.

Instructional Ideas

One of the skills we want to teach history students is how to ask the right questions. A way to practice this might be with the use of interesting images, like this one, of a “courting stick” in action. This photo begs students to ask many questions. A courting stick is a long, hollow tube around six feet long with a mouthpiece at each end. It allows courting couples to discreetly speak with one another while maintaining the appropriate physical boundaries. If you simply browse the depths of the NYPL-Digital Gallery for 10 minutes, you are bound to stumble across a treasure like this that will capture your students’ historical curiosity.

Another idea is to have students create a digital timeline incorporating images found in the Digital Gallery to demonstrate the concept of change over time. This assignment asks students to analyze changing American culture. Students could use the subject search feature of the Digital Gallery to find images related to sports, weddings, leisure, and other cultural phenomena in America over the last 250 years.

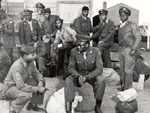
Allow yourself an opportunity to explore this vast collection of primary sources for use in your classroom. Give your students time to investigate the Digital Gallery as well. After all, this is one way historians craft questions about the past. In my browsing, I stumbled across this revealing group of photos related to African Americans serving in World War II. The photos capture the many ways African American men and women served during the war.

The NYPL-Digital Gallery is a one-stop-shop for primary sources on every topic in American history, and it is organized in a logical way, making it easy to collect documents and images.

The NYPL-Digital Gallery is a one-stop-shop for primary sources on every topic in American history, and it is organized in a logical way, making it easy to collect documents and images. As you search for images you may want to create a collection of images for a class. You will note, above each image is a button to “select” the image. By selecting a picture it is stored in “My Collection,” accessible from the home page and from the menu bar at the top of each page. This function is handy when building a lesson around a group of documents. As you find new ways to use the NYPL-Digital Gallery I hope you will share them with us here.

For more information

The NYPL Digital Gallery is only one of hundreds of primary-source archives online. Search our Website Reviews for more storehouses of visual, textual, and multimedia materials! Once you've found sources, Using Primary Sources gives you tips on modeling analysis for students.

Joe Jelen on Google's Art Project

Date Published
Image
Detail, painting, The North-West Passage, 1874, Sir John Everett Millais, Tate
Article Body
Bringing Back the Arts

Unfortunately, the arts are being squeezed out of school budgets and students’ schedules. Most would agree, though, that the arts play a vital role in fostering students’ creativity and helping students ask the “big questions” about the world around them. Fortunately, integrating the visual arts into any classroom just became a bit more fun with the launch of Google Art Project.

The Art Project lends itself particularly well to classrooms with interactive whiteboards with which students can feel like they are standing in the museum.

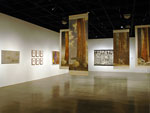
Google Art Project allows viewers to explore selected museums and zoom in on works of art. For those familiar with Google Map’s “street view” feature, the site functions in much the same way. Users feel like they are walking through the museum and can look up and down at museum features. When a work of art catches your eye, simply click on the image and you can zoom in on incredible detail of the painting or sculpture (see Google’s video about using Art Project). The Art Project lends itself particularly well to classrooms with interactive whiteboards with which students can feel like they are standing in the museum. I personally like the ability to take my time with a painting and have another browser tab open to find out more about a painting as questions arise in my head.

Virtual Field Trips

Detail, painting, 1863-1865, James McNeill Whistler, Freer Gallery of Art, Google Art ProjectMy students get excited anytime I mention the words “field trip,” and with good reason. Field trips not only offer students a get-out-of-school-free card, but also offer them a chance to learn through interacting and experiencing. When money and time are tight, field trips are cut. That is why I am thrilled that technology is allowing students to take virtual field trips. These virtual field trips are growing more interactive and more content rich every day. Google Art Project is the latest development in expanding student access to these rich sites.

A benefit of viewing works of art in a museum is being able to see and appreciate their relative size. As a simple image, one cannot appreciate how small the Mona Lisa is or how large Pablo Picasso’s Guernica is. With Google Art Project, students can get a sense of this by seeing paintings hanging in the museum without leaving their classroom.

Google Art Project provides information and related material when you click on a work of art. You and your students can also create collections of selected pieces to share. This makes it very easy to set up a gallery of artwork from a particular time period or region from different museums.

Using Art in the Classroom
One instructional technique may be to require students to play art detective as they solve when and where an artist lived and produced their work.

The Art Project offers several interesting possibilities to link history with the visual arts. A nice way to begin a lesson might be to have students “walk into the painting,” where students pretend to actually enter the painting and describe the scene using all their senses. Understanding works of art often requires students ask the same inquiry questions they ask in history class. Therefore, one instructional technique may be to require students to play art detective as they solve when and where an artist lived and produced their work. It may also be useful for you and your students to brush up on some of the terminology with which to discuss visual art. This way, students are seeing another adult (aside from their art teacher) model an appreciation of art.

Detail, painting, The North-West Passage, 1874, Sir John Everett Millais, Tate Britain, Google Art ProjectAnother instructional idea that blends history with understanding art is to select a group of romantic paintings, a group of realist paintings, and a group of impressionist paintings and discuss the different styles of paintings and the emotions each elicits. For example, many romantic paintings glorify subjects and can stir feelings of nationalism, while realist paintings can capture the daily hardship and struggles individuals must endure. Teachers can discuss with students how different styles of paintings capture prevalent ideas and emotions of the artists’ societies.

Art is also a great way to teach students about culture. Students could use Google Art Project to put together a collection of art related to a specific culture. Paintings can also teach students about trade networks. Often, paintings feature items or styles not native to the artist’s home country. Thus explaining, for instance, how the porcelain cups, featured in a painting, found their way from China to Spain could be a good lesson for students.

Some of the museums in the Art Project have interesting lesson plans that can accompany works of art in the museum. Check out these lesson plans from the Smithsonian and lesson plans from the Museum of Modern Art.

While the current offerings of museums are limited in the Art Project, the possibilities of the site are exciting as art becomes democratized.

Certainly, nothing can compare to physically being in the museum, but Google Art Project is making the world a little smaller, allowing us to visit multiple museums from one site.

For more information

Joe Jelen introduces you to other useful tech and digital tools in his blog entries on document cameras and online timeline tools. He also models one technique for using whiteboards to explore visual primary sources in the video "Zoom-in Inquiry."

Teachinghistory.org's co-director Daisy Martin has some suggestions for teaching with the visual arts, with plenty of links to further arts-related resources. Also try browsing our Museums and Historic Sites database for art museums in your area!

Teaching American History Program Invites 2011 Applications

Date Published
Image
Detail, homepage, Ed.gov
Article Body

On Feb. 2, the Department of Education released the Teaching American History Grant Program Notice Inviting Applications for New Awards for Fiscal Year (FY) 2011.

According to the Department, the Teaching American History program is

designed to raise student achievement by improving teachers' knowledge and understanding of and appreciation for traditional U.S. history. Grant awards will assist LEAs [local educational agencies], in partnership with entities that have content expertise, to develop, document, evaluate, and disseminate innovative and cohesive models of professional development. By helping teachers to develop a deeper understanding and appreciation of U.S. history as a separate subject matter within the core curriculum, these programs will improve instruction and raise student achievement.

The TAH program has reached out to U.S. history teachers across the nation since 2001, when it awarded its first 60 grants. Last year, 124 applicants received grants. Learn more about the program at ED.gov—browse the abstracts of previous award recipients, learn how to apply, and read FAQs on eligibility, project priorities, and other topics. If you're applying (or are already a grantee), you may benefit from the Department of Education's webinars on grant management. Sign up, or read transcripts for past webinars.

Curious to see what others have learned from participating in TAH Grant projects? We have a section dedicated to highlighting TAH! Project Spotlights look at projects that share the resources they've created online, and Lessons Learned lets you in on the experiences of educators, project directors, historians, evaluators, and others who have participated in TAH projects.

Elizabeth Schaefer's Vocabulary in Motion!

Date Published
Image
Photo, Final Game of the Season, Mar. 13, 2010, timlauer, Flickr
Article Body

My middle school students contain tremendous physical energy and can struggle with the transition into the adult world of sitting still. Meanwhile, real kinesthetic learning is one of the most difficult areas to incorporate effectively into your history classroom. Last year, to meet my goal of getting the students moving in a relevant and productive manner, I created Policy Pull-Out—a fun and interactive game related to the key concepts of American Expansion.

Background Information

Picture students moving around, excited about history vocabulary, with all learning levels engaged. Welcome to Policy Pull-Out! As the winter months drag on, allowing the students to be active will be extra important to their moods and their excitement about learning. This game will also reinforce and add a dimension to ideas vital to American history class.

Picture students moving around, excited about history vocabulary, with all learning levels engaged.

Policy Pull-Out was created to specifically support and review for DC's 8.5.2: Explain and identify on a map the territorial expansion during the terms of the first four presidents. The game has been played with 8th grade in American History but I feel could be age-appropriate from 4th through 10th depending on your students and your spin on it. Although a teacher hopes that students always picture history in 3-D, that concept seems especially important in this unit. The students should be able to reflect on what expansionism means, what Manifest Destiny looks like, and what isolationism feels like. Once the students have a deeper understanding of these political concepts, they can begin putting themselves in the position of 1800s decision makers imagining the benefits and foreshadowing the issues that will arise.

The Concept

Policy Pull-Out stemmed from a game that I had played as an after-school coordinator, called “Huggie Bear.” In Huggie Bear, the students mingle around until the teacher calls out a number. Whether the number is seven or two, the students have to gather in a group of that number of students. If students do not find a group that size or cannot find a group fast enough, they are out.

In Policy Pull-Out, we use history-related calls demanding different numbers of people group together or do a specific action. The motions they use in these calls directly relate to understanding the meaning of the words.

The Calls

As mentioned, the students mingle in place until they receive one of the following calls:

  • “Diplomacy” – (ALL) Everyone continues moving around but has to shake hands with everyone.
  • “Isolationism” – (one person) Stand in place alone and cover your eyes.
  • “Negotiate” – (two people) Find a partner and shake hands.
  • “Expansionism” – (three people) Three people need to hold hands (with the ends unbound and spread out as far as they can).

Once the students have those four calls, I then add on three more rules:

  • “Manifest Destiny” – (ALL) Everyone runs out to the borders (basketball court lines) to show we are spreading our territory to the coasts.
  • “Expansionism + number” – (Teacher picks) Same except the number expanding changes.
  • “George Washington” – (Representing his farewell address – three people) One person shakes a finger at the other two who stand back to back.
The Process

First, you need to secure an adequate space. For teachers whose weather permits, I recommend trying this outside. For other teachers, a gym or large classroom would be appropriate. A basketball court is a useful playing field because it allows definite borders.

The students love this game and are always very excited to be doing an activity out of the norm.

Before leaving the classroom, I recommend reviewing the first four calls and having a volunteer demonstrate each one. The students should have already been introduced to the key concepts and vocabulary but this would be a good time to discuss why certain words represent certain motions and allow them to make the connections for themselves. Perhaps they could even add to the game with their own ideas! You can give students the option of a cheat sheet depending on the situation.

After the class has arrived at the chosen location, the games can begin! The students love this game and are always very excited to be doing an activity out of the norm, but it is important to anticipate problems and set up ground rules about student-to-student contact, referee absolutes, and what to do when you are out. In the past, the students have been very invested in playing the game and are afraid to be taken out as long as you define clear borders. I limit the first round to four calls and then add as we go by gathering the group back together.

At the end of the game, debriefing is necessary in order to reinforce the purposefulness of the game: Did anyone feel safe when they were isolated? Did anyone prefer expansionism? How did you like running to the borders for Manifest Destiny? Do you think that our early presidents may have experienced some of these feelings? As the individuals within a class will form different opinions of their favorite motions, there are mixed opinions about the policies that would be best for our country.

Policy Pull-Out will reinforce the connection between human history and geography to help your students remember and understand why our 50 states exist today!

This conversation should be a jumping-off point for more directly connected historical thinking activities. As the following step in scaffolding, I recommend using a collection of primary sources including documents that supported expansion and ones that warned against it. As another logical step, several research assignments could stem from this. For example, the students could compare George Washington to the later presidents that preferred expansionism, or research the motivations of different presidents who did expand (e.g., Thomas Jefferson’s motivations compared to James Monroe’s). Policy Pull-Out should be viewed as an early scaffold to more critical thinking about these concepts.

I hope that you and your students enjoy this game! It has been a highlight of my teaching. When spun correctly, Policy Pull-Out will reinforce the connection between human history and geography to help your students remember and understand why our 50 states exist today!

For more information

For more suggested activities for secondary-level classrooms, read Schaefer's blog entries on teaching 9/11, the Declaration of Independence, and mental mapping.

One of the most notable developments in early American expansionism was the Louisiana Purchase. Listen to historian Leah Glaser analyze a letter from Thomas Jefferson to Congress, asking for funding for the Corps of Discovery, or search our Website Reviews for materials on the Purchase and the Corps. Digital collections such as the Library of Congress's George Washington Papers, Thomas Jefferson Papers, and James Madison Papers can also provide insight into early presidents' policies and thoughts.

Michael Yell Motivates Students with the Mystery Strategy

Date Published
Image
Photo, Michael Yell's classroom
Article Body

The word history comes from the Greek historein—meaning “to inquire.” Recommendations for using inquiry [for learning history] have a long tradition.

People learn through inquiry. . . . inquiry is an approach consistent with current theory and research on human learning. When understanding is needed, inquiry appears to be one of the best ways to get there.

–Keith C. Barton and Linda S. Levstik

Teaching History for the Common Good

As teachers of history and social studies teachers, I am convinced that we can regularly experience the motivating effects of having students ask questions, think, and interact while inquiring into historical events, issues, people, and ideas. To deeply involve our students in the study of history, inquiry is indeed the best way to get there. And posing historical questions as mysteries is an excellent way to involve the students in discovery.

This strategy presents a mystery, but does not provide answers—rather students develop answers for themselves by analyzing clues.

Having our students get involved in the process of inquiry is not a matter of simply telling them “here is a problem, here are some sources, now go for it.” That approach will prove no more motivating to most than simply telling them to open their notebooks and then listen to a lecture. However, there are practice-proven strategies that are available to the teacher in order to thoughtfully engage their students in the inquiry process. Mystery, along with Discrepant Event Inquiry (explained in my previous blog), is a highly motivating strategy that will do just that.

Your students are in groups of four discussing topics about the colonization of what would become the United States, and you bring up the lost colony of Roanoke (perhaps in a Discrepant Event Inquiry). Students express an interest in the topic and begin to pose questions that they would like to answer about the colony. When the students next come into class, each group is given a manila envelope containing 12 strips of paper each with a Roanoke fact that they will put together as clues, discuss, and use as they hypothesize on what might have happened to the lost colony.

Using the Strategy

This strategy presents a mystery, but does not provide answers—rather students develop answers for themselves by analyzing clues. Using the strategy of mystery is not only sound in terms of student interaction and thinking—it is motivating and fun. Mystery combines cooperative learning with inquiry as small teams work together to share and analyze clues and develop tentative hypotheses, as the strategy presents the mystery to be solved, but not the answer. In using the mystery strategy you will find student’s curiosity is piqued, they are motivated and interact, and they are thinking and inquiring,

They must develop tentative hypotheses that would explain the phenomena they are studying.

As with Discrepant Event Inquiry, students have been confronted with a puzzle, but in this case, they are also given historical evidence, in the form of clues. In working with these clues, students begin by organizing the clues according to similarities and common attributes, and developing a label for each category. It is then that the groups must begin to identify and explore relationships between the clues and go beyond them by making inferences as to how they fit together and what they mean. Finally they must develop tentative hypotheses that would explain the phenomena they are studying. Finally, the class discusses and evaluates the various hypotheses that have been developed.

Breaking the Strategy Down

Prior to beginning the strategy, peak student interest in something unknown or mysterious in the historical era that you are studying (such as the lost colony of Roanoke) and have them begin to develop the questions that they would like to try to answer.

There are three steps in the Mystery strategy:

  1. Prepare a set of clues for a mystery that will be given to each group (I develop about 12 clues and each group will receive the same set). Although the clues can take many forms (quotations, short primary source documents, pictures, charts or graphs), I begin by using short written clues that contain basic information about the topic in question. For example, the Roanoke mystery might contain clues such as “three years after John White left the Roanoke he returned to find it empty,” “there was no trace of the colonists,” “on a post was carved the word CROATOAN,” “there was a nearby tribe called the Powhatans,” “there was no sign left by the colonists that they had fled from danger,” etc. There must be enough clues to help students begin to formulate a number of hypotheses. The information can come from readings you have done, resources that you find via the Internet, from DVDs—even from the textbook
  2. Pass out a set of the clues to each group. The group members then distribute and share clues amongst themselves, organize the clues into groups by similarity, label the groups, compare them, and use the information to develop a hypothesis about the Mystery topic.
  3. You select a format for the presentation of student hypotheses. This can take the form of a class discussion and/or through written products. Whatever format you choose, students should share and defend their ideas and the class should engage in a synthesizing discussion.
Final Thoughts

Organizing information, making sense of data, and developing reasonable hypotheses and explanations based upon evidence are all essential components of inquiry, and all essential skills and habits of mind for our students.

Using inquiry in the classroom does take some work, but it is good work.

To engage our students in this type of thinking, in this type of work, is not only more important than recall alone, it is more fun for them and for us as teachers. With such strategies as Discrepant Event Inquiry and Mystery we help our students develop questions and reason through information in attempting to answer those questions.

Using inquiry in the classroom does take some work, but it is good work. The journey from teaching history as a body of content to be memorized to teaching history as inquiry, as a way of thinking and questioning, is a powerful one. It is important for history teachers to incorporate primary sources into their lessons, not as an end in itself, but as a means to further students’ inquiry into eras, people, and ideas of the past. In my next blog, I will share one of the strategies I have found is excellent for the use of primary sources in the history classroom.
Bibliography

Barton, Keith C. and Linda S. Levstik. Teaching History for the Common Good. Routledge, 2004

Harvey F. Silver, et al. The Strategic Teacher: Selecting the Right Research-Based Strategy for Every Lesson. Alexandria: Association for Supervision and Curriculum Development, 2007.

For a complete description of both the Discrepant Event Inquiry and Mystery strategies, see Yell's article "Engaging World History Students in Inquiry: Using Our Thinking Factors” in an upcoming issue of Social Education.

For more information

For more on Discrepant Event Inquiry, another strategy that engages students with history mysteries, check out Yell’s blog entry "Developing a Climate of Engagement".

In the Teaching Guide "Mystery Strategy for Elementary Students," former elementary teacher Lisa Cooper explores a strategy for introducing younger students to history investigation.

Conference-going for the Educational Professional

Date Published
Image
Photo, conference participants, submitted to Teachinghistory.org
Article Body

Networking, power lunches, panels, name badges, exchanging information on the newest developments in the field and listening to the biggest names describe their paths to success—that's the business of business, isn't it? Not necessarily!

The word "conference" may bring up images of smoothly exchanged business cards and sales professionals competing to make the best impression, but conferences aren't just a boardroom cliché. Every field has organizations that bring members (and interested outsiders) together to socialize, discuss the state of their work, and exchange ideas—from science to business to the arts to, of course, education!

Attending a Conference

Maybe you've never been to a conference for educators. Attending a conference can take some time, money, research, and planning, but the investment can pay off in new colleagues, new ideas, new knowledge, and new skills. Plus, you can snag some free giveaways in the exhibition room!

Conferences usually take place over a full day or several days, and are arranged around a general theme. One year might be "Diversity in the Classroom" and the next, "Great Debates: Engaging with Controversy." Registration allows you to take part in all of a conference's main activities.

Come home inspired and ready to try out what you've learned!

Attend the keynote address (usually presented by a notable historian, author, educator, or other figure with experience and knowledge relevant to the theme). Engage in sessions presented by educators, organizations, and experts sharing content, tools, and strategies. Stroll through the exhibit halls, learning about websites, books, and other resources that might help you in your teaching. Meet educators who share your passion for growing as a professional in informal lunches and mixers. Come home inspired and ready to try out what you've learned!

Remember to register as early as you can. Most conferences offer discounts for early registration, as well as discounts if you're a member of the organization hosting the event. Plan ahead, and you may also be able to book a hotel room for a reduced rate—many conferences take place in hotel conference centers, and set aside a block of reduced-rate rooms just for attendees. These can fill up fast!

Planning ahead may also let you sign up for extra, ticketed events. Maybe the conference offers half-day workshops on the day before the conference officially opens. Maybe you can pay to attend special-interest breakfasts, lunches, or dinners. Maybe you can buy tickets for guided tours of local historic districts or group excursions to museums. Conferences often take place in large cities, and this could be your chance to take in some of the sites while you're in town.

Finding Conferences

Conferences take place across the country at the local, state, national (and international!) levels. Here are some to consider:

  • National social studies and history education organizations host annual conferences, drawing hundreds of attendees. The National Council for the Social Studies's annual conference takes place in Washington, DC, in December of 2011, and the National Council of History Education's annual conference will explore "The Causes and Consequences of Civil Wars" in Charleston, SC, from Mar. 31–Apr. 2, 2011.
  • Historical organizations organize conferences annually and on special topics. Check their programs ahead of time, but many of these include sessions and workshops designed for teachers as well as content that can be helpful in the classroom. The American Historical Association and the Organization of American Historians both host conferences with teacher-focused sessions.
  • Other organizations for K–12 educators organize conferences that can help you keep abreast of new tools and techniques that aren't content-specific. The International Society for Technology in Education's annual conference draws crowds of more than 10,000 and promotes thoughtful, innovative use of the many new technological tools constantly becoming available to schools and teachers.
  • State social studies and history education organizations often organize at least an annual conference—some organizations may host two per year, one in the spring and one in the fall. Usually on a smaller scale and less expensive than national conferences, these may be easier to attend if you're tight on time or budget. Multi-state regions may also organize conferences.

And conferences wouldn't go very far without presenters. If you have a strategy or resource to share, look for calls for proposals on conference websites. These deadlines cut off months before the dates of the conferences, so plan ahead. Follow the guidelines and submit a proposal that is clear, succinct, attention-grabbing, and matches the stated theme of the conference.

Jennifer Orr on Making Technology Work for Primary Students: Part One

Date Published
Image
Photo, Computer Lab 1st Grade, Oct. 12, 2009, lewiselementary, Flickr
Article Body

History and technology are both challenges with primary students. Let's tackle history first. Young children struggle to understand anything that they can't see, so comprehending people and life in the past is difficult. Also, they've only been alive for a few years so time spans of centuries are beyond their understanding. As a result, you often hear children ask, "Is George Washington still alive?" or "Were Abraham Lincoln and Martin Luther King, Jr. friends?" Deeper comprehension of conflicts or realities is even more difficult.

Securing the Benefits of Technology for Young Students
Children, no matter their age, should be able to continue and direct their own learning and exploration.

The challenges faced with the use of technology stem from young children's pre-literacy. Many of the tools we use with students, such as blogs and wikis, require an ability to read and write, and to do so reasonably well. When I moved from teaching 4th and 5th grades to teaching 1st, this was a significant concern of mine. The ongoing conversations students were having on blogs and the recording of their learning, to which they could return throughout the year, on wikis seemed impossible with children who were still learning to read and write.

But I wanted those benefits. Children, no matter their age, should be able to continue and direct their own learning and exploration. They should not be limited to the time and ideas I set forth for them during class. So many things for young children are limited by the adults in their lives; I wanted to find ways to open up their learning as much as possible.

Feeding a Passion for History

In spite of the challenges inherent in using technology in the primary grades, I clearly believe it is important.

Finally, young children feel righteous indignation at the wrongs of the past.

That is also true for history. All children should have the opportunity to learn how people like them contributed to the world in which they live. They should also be exposed to things about which they could become passionate, even if for only a brief time. Many children love to have an area of expertise, something about which they know more than their peers or even some adults. I've watched little ones become obsessed about Greek myths, the Titanic, presidents of the United States, and Rosa Parks.

Finally, young children feel righteous indignation at the wrongs of the past. They are truly appalled by the idea of slavery, segregation, assassinations, and the need for the suffrage movement. I believe there is value in children coming to understand the past through a lens of righteous indignation. They are less likely to allow such treatment of others in their own lives when they have confronted their feelings about it through history.

Based on a firm belief in the importance of history and technology, I was determined to find a way to integrate the two with primary students. I will write more about ways to do so in an upcoming post, so keep reading. . . .

For more information

Jennifer Orr looks at other tricky topics in primary-level teaching in her entries on teaching Thanksgiving and Columbus Day.

For an introduction to Web 2.0 tools like those Orr mentions, browse our Tech for Teachers section. Articles introduce general tools, like Wikis and blogs, and more specific ones like Skype and Facebook.

Elizabeth Schaefer on Mental Maps in American History

Date Published
Image
Photo, Mental map, American Indian History, Elizabeth Schaefer, 2010
Article Body

In a world where kids are extremely familiar with a robotic "Turn left," and may have never actually seen a road atlas, geography has never been so important in the history classroom. Until mental maps, geography lessons did not often win the battle against history standards for precious time in my classroom. Now instead of being a sideshow, I consider maps a necessary step in teaching and checking for comprehension. Learning history content needs to be partnered with visualizing the environmental influences. After all, in order to understand how America was shaped, knowledge of the land is crucial.

Mental maps add another dimension to the history classroom. If you are not utilizing them to teach American history concepts, I recommend that you read below to discover how they help to build connections, incorporate different learning styles, and check for depth of understanding.

What is a Mental Map?

A mental map is a rough sketch of the world simplified enough that the outline can be remembered and repeated. The outline of the map can then be labeled with physical, political, or historic details.

How Do I Teach Mental Maps?

(The map described draws USA and its immediate neighbors.)

The Set-Up:

The teacher simply needs an overhead projector and some wet erase markers to begin (colors help!). The students need a piece of lined or computer paper and a writing utensil.

Before starting to draw, it is important to emphasize that no two mental maps will look identical.

First, I recommend figuring out a folding system that works for you. Folding the paper before beginning keeps the maps more proportionate. I like my students to divide the paper into six parts. Draw imaginary fold lines across the overhead to help orient the students.

Before starting to draw, it is important to emphasize that no two mental maps will look identical. Students can have trouble accepting that, and for the perfectionists this can be a particular challenge.

The Story:

The most important step to teaching mental maps is creating a story that will aid in memory. Tell the story using the overhead projector as a visual guide. After telling each part of the story, draw the corresponding piece of the map on the overhead, have the students repeat the steps, and periodically check their papers. Once they learn the outline, we use it throughout the year again and again so they have a very good understanding of our basic geography.

Many different stories could work and I have experimented with a few. This year, I told the story of "Norbert Americus, Zookeeper Extraordinaire." The story goes: Mr. Americus wanted to make the best zoo possible so he started collecting the biggest animals that he could. (If you prompt the students, you may find that they are very good at guessing the animals.) First he collected an elephant and a giraffe. Then he decided to get the very biggest animal even though he lives in the sea. Add a whale's tale to the top.

A little prairie dog wandered over from the deserts of America to see these big animals. He saw them and panicked. He took one look back and scurried all the way to the edge of the paper.

When the prairie dog arrived in Alaska, another nervous animal was there—a turtle. The turtle popped his head out when he saw the prairie dog.

The prairie dog and the turtle had each other now. They realized they had reached the West Coast so they decided it was time to chiiiiiiill out. Actually they chilled out so much that they were all the way down the Baja Peninsula before they knew it!

Just about then, the turtle and the prairie dog started talking. The animals in Mr. Americus's zoo seemed nice enough. In fact, none of those animals even eat turtles or prairie dogs. They turned back around and asked if they could be part of the zoo. The big animals liked the small animals and they of course said- "Y not?"

And that is the story of the Mr. Americus's Zoo!

In the first map that I teach, we draw the 2001 USA so we add an animal from way down low and way up high to the zoo—a snake and a bird—to outline the three major countries.

For American history, I do not include all of North America for simplicity's sake and I also exaggerate the size of America compared to Canada in order to fit features throughout the year. These two factors should be pointed out to the students, and you should show them a real map and discuss the purpose of a mental map versus a real map.

How Does This Apply to American History Specifically?

In world history, mental maps had been a great way to teach all of the different continents, so when I began U.S. history, I was concerned about the efficacy of repeating the USA map. I have discovered that not only can the single outline work, it is also beneficial to establish that one outline early on and recycle it so the focus can move to the details. Also, this helps to connect the historic pieces. For example, adding the Treaty of Paris land, then the Louisiana Purchase, and then the Treaty of Guadalupe Hidalgo, the students can really visualize the growth of our nation.

As you view the maps, please note that they also help orient the students to their country. Many of my DC students have never made it to see the White House, let alone making it past Maryland or Virginia. So they can establish the basic size and geography of our country in relation to places that they have heard of or seen on television.

Some of the maps I have used include:

Top 5 Reasons I Recommend Mental Maps
  1. Mental maps are accessible. The students have fun as if they have learned a neat new trick, and yet pretty soon they can easily locate the land America gained in the Treaty of Paris or describe the length of the Trail of Tears.
  2. Mental maps provide an avenue for students with different talents to shine on an actual test. Often times these talents show up in projects or classwork, but this aids that talent to come out in more rigid assessments as well.
  3. Mental maps force some traditionally excellent students to stretch their brains and skills outside of their comfort zone.
  4. Mental maps are simple to modify. I provide a few special education students the basic map outline and allow them to fill in the details important to the unit.
  5. Mental maps allow the teacher to check the difference between test memorization and actually comprehending the material. If they are able to answer that the Louisiana Purchase doubled the size of the United States on a multiple-choice question but then make that land a mere sliver on the map, the teacher knows that they have reached a level of regurgitation rather than of actual learning.
For more information

Students having difficulty visualizing the geographic concepts they're mapping? What does a butte look like? How about a mountain pass? In their TAH project, educators Terri Ruyter and Michele Yokell brought geography to students in three dimensions. Watch the video here.

Interested in another sort of mapping? The Tech for Teachers entry Mind Mapping explores concept maps as an aid for memory and understanding.

For more by Elizabeth Schaefer, check out her blog entries on the Interactive Declaration of Independence and the impact of 9/11 in the classroom.