Four Reads: Learning to Read Primary Documents

Image
Article Body
What is it?

A guided four-step reading process for primary documents that trains students to read a primary document like a historian. Use this guided process several times until students acquire the habit of reading and thinking like a historian.

Rationale

When historians read primary documents, they read at many different levels. They simultaneously pay attention to argument, purpose, context, content and credibility. Too often students will read a primary document as if it is a textbook. Students need to learn that reading a primary document is a different reading process and involves understanding the main point, but also contextualizing and asking skeptical questions about that point. Breaking the “reading” process into different steps helps students learn this.

Description

This is a teacher-led process that depends on transparency and discussion. In each step, the teacher clearly explains the purpose of that step, and uses questions to model how historians read primary documents. By doing so, the teacher shows students how to engage in the complex reading and thinking process that historians employ.

Teacher Preparation
  1. Choose a primary document that relates to the content you are teaching. If    students already know some of the historical context when they read the    primary document, they will be better able to think and read historically.    (See Handout: Jackson Reading.)
  2. Read the primary document like a historian yourself. Make note of    contextual clues (author, date, place, audience) and how those impact your    understanding of the document. Underline the author’s main argument    and supporting evidence. Make notes in the margins about the author’s    purpose and the argument’s credibility. Write questions that you have    about the document. With each of these steps, make a mental note of your    reading and thinking processes so you can model these for students later.    (See Example: Jackson Reading 4.) Be aware that you may need to conduct    additional research to better understand the document’s historical context.
  3. Note characteristics of the document that will make it difficult for    students to understand—for example, difficult vocabulary, obscure    references, or confusing syntax. Consider using a vocabulary box at the    bottom of the document or cutting sections of the document. (See this    guide for help.) If there is a difficult section that is pivotal to the    document’s meaning, mark it and review it with students in class as part    of the discussion of the document.
In the Classroom

Introduce the activity

Give a copy of the primary document to each student. Explain that the class will learn how to read a primary document like a historian. Consider projecting the document on a screen so that you can model the kinds of observations that a historian makes and the kinds of questions she asks. The purpose is to show how historians consistently read at multiple levels.

First Reading: Reading for Origins and Context

In this reading, ask students only to read the top of the document (where usually title, author, place, and date are provided) and the bottom of the document (where there may be additional information, in bibliographic notes, about the title, author, place, and date). For this read, students are not reading the main text of the document. The point here is to note and make some sense of the information about the document’s origins. Ask students to take note of each of the key sourcing elements. For each, they should ask themselves: Why does this matter? Why is the person significant? Why is the date or period significant? Why is the place significant? Why is the context significant? What background information do I know about any of these? (See Example: Jackson Reading 1.) Then ask students to identify what this context information suggests about the document. How does each part of the sourcing (person, place, date, context) impact how we read and understand this document? For more in-depth questioning on source materials, see here.

Second Reading: Reading for Meaning

In this reading, ask students to read the body of the text. They should read though the text to understand the author’s main idea and to get a sense of the document as whole. Ask students to underline only the sentence or phrase that best captures the author’s main idea. In this reading, students should skip over difficult vocabulary or sections. Too often students get stuck on a difficult or confusing section and stop reading or miss the big idea. The point here is to get the big idea of the document in order to make sense of more difficult or subtle parts later on. Once students have completed this reading, discuss students’ understanding of the big idea or meaning before moving ahead. If students have differing views about the big idea (and they usually do), ask different students to read aloud the sentence or section of the document they underlined. Discuss the merits and problems with each selection. Try to come to consensus about the big idea. Discerning the main argument is often difficult, but the process of wrestling with different claims is well worth it. (See Example: Jackson Reading 2.) Next, ask students what they notice about the document as a whole. In terms of genre, is it a persuasive speech, a private letter, or a newspaper article? In terms of content, is it clear or confusing? Were there many vocabulary words or historical references that students found difficult or skipped over? Who is the intended audience for the document? Discuss difficult passages or references. Often, when students get the main idea of a primary document, more difficult sections become easier to interpret. You might want to ask a student to read aloud a section that is particularly difficult and have the class work on interpreting it together in light of the main argument.

Third Reading: Reading for Argument

In this third reading, ask students to read through the body of the text again. This time students are reading to examine how the argument is constructed. What assertions, evidence, or examples are used to support or give credibility to the author’s argument? Students should underline any support (assertions, evidence, or examples) for the argument. Students should also write in the margins next to the underlined support. They should note whether they consider the support to be strong. Is it logical and believable? Does it contradict other evidence that the students have read? The point here is for students to see that most primary documents present arguments, and that arguments need to be understood and then interrogated for logic and credibility. Again, have a discussion with students. What are the supporting statements, and which supporting statements are strong? (See Example: Jackson Reading 3.)

Fourth Reading: Reading like a Historian

In this reading, ask students to go into the text one last time. This time students are bringing the earlier three readings together into a more complex final reading. Ask students to use the sourcing material (from their first read) to interrogate the argument and evidence (from the second and third reads). Students should write in the margins as they read to answer key questions. Given the author of the document, what bias or perspective might be expressed? How does that shape our understanding of the argument? Given the date of the document, what is the document responding to or in dialogue with? Given the place and audience of the document, how is the argument shaped to be effective? Like detectives, historians are suspicious. Their job is not to take the document at face value, but rather to dig deeper and use sourcing information to ask tough questions about the meaning of the document. Would the argument in the document have convinced its audience? Who might have disagreed or had a different perspective? What facts did the author leave out and why? What questions are unanswered by the document? Finally, historians evaluate primary documents. Is this primary document significant? Did it have an impact within its historical context? Did it express the view of an important group? How does it fit within debates taking place within that historical period? (See Example: Jackson Reading 4.)

Conclusion

Explain to students that they have now “read” a primary document like a historian. When historians read a primary document, they are constantly thinking about how their understanding of the argument or content is deepened by the sourcing information and historical context. Explain that as students become more experienced with primary documents, they too will become good historical detectives and be able to read at multiple levels. When a historian reads a primary document, a document becomes alive. The historian sees a primary document as part of a conversation or debate that took place within a specific historical context. The task for the sophisticated reader is to transform old, dead text into a live voice. Finally, ask students to list in their notebooks how a historian reads a primary document. Historians pay attention to sourcing information, select the main argument and support, look for credibility and bias, connect the text to the context, and ask questions like detectives. Note: Please see Four Reads handout for a short list of the four different reads.

Common Pitfalls

For teachers, this process takes time. You will need to dedicate a sustained block of time to teaching this approach. By dedicating time early in the year, students should be able to read primary documents more deeply over the rest of the year. For students, this process takes time. Too often students want to stop at the surface level of a document. With proper guidance, students should discover that there is a subversive pleasure in interrogating a document that is similar to interrogating an argument made by their parent or friend. Students should learn to use their natural skepticism to become historical detectives.

For more information

Gerwin, David and Jack Zevin. Teaching U.S. History as Mystery. Portsmouth, NH: Heinemann, 2003.

Kashatus, William. Past, Present and Personal: Teaching Writing in U.S. History. Portsmouth, NH: Heinemann, 2002.

Wineburg, Sam, Daisy Martin, and Chauncey Monte-Sano. Reading Like a Historian: Teaching Literacy in Middle and High School History. New York City: Teachers College Press, 2011.

See here for worksheets with questions for analyzing primary sources. These can be quite helpful after students have learned the four-reads approach.

Labor Unions in the Cotton Mills

Teaser

Introduce students to the importance of oral history while simultaneously teaching them about 20th-century labor unions.

lesson_image
Description

Students listen to excerpts of oral histories from former cotton mill workers, who discuss their reasons for joining (or not joining) the labor union. Students discuss these sources, and take a stand for or against joining the labor union in early 20th century cotton mills.

Article Body

In this lesson, students use oral histories to consider workers’ motivations (and reluctances) about joining labor unions in the cotton mills of North and South Carolina in the early 20th century. The website provides both audio recordings and transcripts of the oral history excerpts, allowing students multiple access points to the content.

The lesson introduces oral history as primary source and can be used to help structure class activities where students will gather oral histories. The website provides additional ideas for using these primary sources in an online guide to oral histories in the classroom. The brief excerpts (and accompanying background information) included here present challenges faced by cotton mill laborers, as well as concerns over the possible consequences of unionization. Peoples’ reasons both for and against union involvement are included. In this way the lesson illustrates contrasting perceptions on unionization and the necessity to look for varied perspectives when conducting historical research.

Students, in groups, write a speech about the merits of joining (or not joining) the union. We suggest that teachers be explicit that this speech be composed as if addressing this early 20th-century audience, and ensure that students have sufficient background knowledge about the specific historical circumstances to construct a realistic speech. Asking students to consider how similar or different the stated concerns are to those of modern-day workers confronted with a similar choice may help with illuminating historical context, as will additional background information. Teachers could also add a “context checker” to group roles to ensure this is taken into account.

The short, contrasting oral history excerpts included make this lesson a good way to introduce oral history and show its usefulness to understanding the past as well as to learning more about the labor movement.

Topic
Labor Unions
Time Estimate
3-4 Class Sessions
flexibility_scale
4
Rubric_Content_Accurate_Scholarship

Yes

Rubric_Content_Historical_Background

Yes
In addition to background information on the subjects of the oral histories included on the right-hand column of the lesson page, the site also includes additional helpful resources (under “related topics”) on cotton mills and labor unions.

Rubric_Content_Read_Write

Yes
Written transcripts are provided for the oral histories, and students are asked to write speeches defending or opposing unionization in the cotton mills.

Rubric_Analytical_Construct_Interpretations

Yes

Rubric_Analytical_Close_Reading_Sourcing

Yes
Students will need to closely analyze each oral history to identify a worker’s reasons for or against joining the union.

Rubric_Scaffolding_Appropriate

Yes

Rubric_Scaffolding_Supports_Historical_Thinking

Yes
While discussion questions are included for each document, teachers may want to provide additional support for struggling readers and English Language Learners.

Rubric_Structure_Assessment

No
Although the lesson does not provide specific criteria, teachers can use the persuasive speech at the end of the lesson (Activity 4) as an assessment. Constructing criteria that include attention to historical context is likely necessary.

Rubric_Structure_Realistic

Yes

Rubric_Structure_Learning_Goals

Yes

Social Pinboards

Image
What is it?

Online social pinboard services let you "pin" images, videos, text, and more (depending on the service) onto virtual bulletin boards. You can create new boards for different topics, rearrange pinned items on a board, share your pins, and follow other users' boards that interest you.

Getting Started

To use a social pinboard service, you'll need to register. Registration is free, but may require you to have a Facebook or Twitter account. (If you're considering having students create accounts, make sure to read the Terms of Service first. Children must be 13 or up to register on Pinterest.) Once registered, sign in to begin making boards and pinning content.

If you find pins that you like, you can "repin" them on any of your own boards.

Depending on the service you choose, what you can do with your pinboards and pins will vary. First, you will need to create a board or boards. A board is a blank space on which you can pin related content. For instance, you could create boards titled "Civil War Primary Sources" or "Ideas for Constitution Day." You can create new boards at any time, and can invite other users to contribute to a board. Once you've created a board, you can start pinning content to it. On Pinterest, you can pin images and videos that you find online or upload from your computer by using the "Add a Pin" or "Upload a Pin" options; to "Add a Pin" from online, you will need the URL of the image or video's original location. You can add a brief caption to each pinned image. Clicking on a pinned image will take you to the image's original location. Drag the Pinterest button to your brower's toolbar, and you can pin content as you surf the Web. Use the service's search engine to search for other people's pins and boards that might interest you. If you find a board or user you like, you can choose to follow them. If you find pins that you like, you can "repin" them on any of your own boards. Similarly, other users can follow you or any of your individual boards and repin your content on their boards. These social features let you share your own online finds and benefit from others'.

Examples

You can use social pinboard services to share and communicate with both students and other teachers. Many users use pinboard services to connect with their peers, locating users who teach similar subjects or have similar interests and following them for inspiration and resources. Pinboards also let you collect and organize content you find while surfing the Web. If you're searching for materials to put together a lesson plan, you can pin everything you find that might be useful on one board; if you're surfing casually and happen across a photo or article you'd like to remember, you can pin it to a board full of similar content, to look at later. Pinboards can help you save content, organize what you find, and share it with others.

Create a board of primary sources and use it to start off a lesson.

You can also create boards and share them with students. For instance, you could direct student research for a project or paper by pinning content from reputable websites to a board. Share the URL with the students, and they now have access to an online "reference shelf." Create a board of primary sources-—maybe engaging photographs or artwork—and use it to start off a lesson, or send the link to students before the lesson and ask them to look over the images and come in the next day with questions ready. If your students are old enough, they can also use Pinterest for themselves. Introduce them to the tool, and they can use boards to keep track of their own research, collaborate to create shared boards populated with materials they find on webquests or other scavenger-hunt-style projects, or curate mini exhibits with visuals and captions.

For more ideas, check out Online Universities's infographic "16 Ways Teachers are Using Pinterest" or Best College Online's "37 Ways Teachers Should Use Pinterest." Educational consultant Angela Watson also offers a quick rundown of tips for using Pinterest. Education World suggests four "power pinners" to follow or use as models. If Pinterest doesn't suit you, take a look around the web.

For more information

Visit Teachinghistory.org on Pinterest here!

The Short-Handled Hoe

Teaser

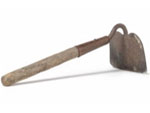
History is imbedded in the smallest objects. In this lesson, students examine how a simple farming tool connects to the work done by United Farm Workers.

lesson_image
Description

Students view a variety of documents and artifacts related to the short-handled hoe, migrant labor, and the United Farm Workers. They then draw on these sources to develop an online museum exhibit for the hoe.

Article Body

This lesson uses a simple farming tool, the short-handled hoe, to introduce students to migrant labor in California and the farm worker labor movement.

After a brief introduction to the hoe and the bracero program that brought workers to California from Mexico, students explore a variety of artifacts to understand the context of the hoe’s use, as well as the United Farm Workers’ role in the 20th-century labor and civil rights movement. Students then draw from these varied sources to create an online museum exhibit centered on the hoe.

One of the great strengths of this lesson is that it starts with what seems a simple artifact, the short-handled hoe, but leads students towards more complex thinking, including grappling with the artifact’s larger symbolic and political meanings and its historical significance. The lesson also provides an excellent opportunity for teaching about historical context because placing the short-handled hoe in the context of the other artifacts and documents clarifies the meaning of this particular artifact (labeled a “barbaric instrument” by one doctor).

While the lesson provides only minimal structure, teachers will appreciate the wealth of companion resources, including historians’ commentary, images of other farming tools, and primary sources related to California farm labor, and the work of César Chavez and the United Farm Workers.

Topic
20th Century Labor
Time Estimate
1-2 Class Sessions
flexibility_scale
2
Rubric_Content_Accurate_Scholarship

Yes

Rubric_Content_Historical_Background

Yes
In addition to a brief introduction, teachers can find additional resources listed here.

Rubric_Content_Read_Write

Yes
While many of the primary sources are artifacts, others are written documents. In addition, in the final activity, students must give a written justification for items included in their exhibit.

Rubric_Analytical_Construct_Interpretations

Yes
Students create a thesis statement for their exhibit and have to explain why they chose each of the items in their exhibit. Ideally, this explanation should connect to the thesis.

Rubric_Analytical_Close_Reading_Sourcing

Yes

Rubric_Scaffolding_Appropriate

Yes

Rubric_Scaffolding_Supports_Historical_Thinking

No
Teachers may want to provide additional support for struggling readers and English Language Learners in understanding some of the historical documents.

Rubric_Structure_Assessment

No
While no specific assessment is provided, teachers may use the culminating activity as an assessment. Criteria for assessment would need to be established.

Rubric_Structure_Realistic

Yes

Rubric_Structure_Learning_Goals

Yes

IWitness

Image
What is it?

IWitness is a free resource developed by the USC Shoah Foundation Institute to help students develop a deeper understanding of 20th-century history alongside digital and media literacies. It houses approximately 1,000 Holocaust survivor and witness testimonies and allows students to construct multimedia projects using the testimonies. Users need only an Internet connection; all of the tools—including an online video editor—are self-contained on the server and are compatible with both Macs and PCs.

Getting Started

In order to start using IWitness, click here and select “register.” Once registered, you will be able to create classes and generate access codes students can use to register.

Teachers are using IWitness as a way to integrate 21st-century literacies into a range of subjects.

Even prior to registering, the IWitness home page features a rotating group of curated clips. These short clips run less than five minutes and draw learners into compelling stories. Linked from the home page, the Browse All Topics page provides more clips from a breadth of topics to anyone visiting the site. Registered users are able to search among more than 1,000 full-length testimonies, then save clips from the testimonies for use in projects. Testimonies have been indexed to the minute with keywords. If, for example, students search for “music,” they will get a list of clips where the interviewee discusses music, and they can go right to the exact minute in which music is discussed in a testimony. Users also can narrow search results in various ways.

Once signed in, you should go to your “Dashboard” to get started exploring IWitness. From here you will notice videos located on the left side under “Connections.” The Connections videos will help you address important topics with your students: ethical editing of video clips, effective searching, and defining terms like “archive” and “testimony.” There is an Educators page designed to orient teachers to the site and highlight available resources. There is also a resource tab on the top of the screen with links to reliable information. For students and teachers alike, IWitness offers a Tool Kit, which can fly out from the right side of the screen. The Tool Kit provides users with quick access to their assigned activities, as well as to an encyclopedia, glossary, and note-taking tool.

IWitness has numerous activities you can assign to your students. More than 200 activities are available in several languages and cover an array of subjects from the Holocaust and genocide to cinema and media & digital literacy. Different types of activities present information in diverse formats and can be filtered for different age or subject levels. “Information Quest”, for example, focuses on a single survivor or witness of the Holocaust. Students listen carefully for information in testimony clips and then reflect on their learning by using, among other things, a world cloud tool. As an educator, you are also able to build your own activities for your students in IWitness with the “Activity Builder”. The additional resources offered on the “Resources” page provide bibliographies, glossaries, and timelines that may be useful when assigning activities for students to build or complete.

Examples
IWitness allows students to learn about . . . the 20th century while creating meaningful projects and making connections with their own lives.

Teachers are using IWitness as a way to integrate 21st-century literacies into a range of subjects, including social studies, language arts, media studies, psychology, and more. One history teacher built an IWitness activity so his students could compare and contrast the Hollywood portrayal of the Sobibor Uprising in film with how survivors of the event remember and describe it. Through his IWitness activity “Escape From Sobibor: Hollywood and Memory,” his students were able to use critical thinking as they watched testimony and compared it to the film, then select clips of that testimony to construct a more historical depiction of daily life in the concentration camp.

You can also use IWitness to help teach online etiquette and respectful dialogue skills. Within IWitness, students finish their activities by viewing and commenting on their classmates’ projects. This is a great way to spark conversation that can continue in IWitness through social-media-style commenting tools. Teachers are able to mediate conversations and communicate with students within the application. IWitness also provides reminders to students about good digital citizenship when communicating with their peers within the site. IWitness allows students to learn about important events in the 20th century while creating meaningful projects and making connections with their own lives.

For more information

Want to learn more about IWitness? See Teachinghistory.org's Website Review for more information.

Looking for more resources on the Holocaust? Teachinghistory.org has gathered website reviews, lesson plans, teaching strategies, and more on the Days of Remembrance of the Victims of the Holocaust spotlight page.

Learning Menus: Textbooks a la Carte

field_image
Article Body
Why do it?

Elementary and middle school classrooms often require students to read history textbooks. Historical accounts in textbooks, however, can often be dry or difficult to grasp. Learning Menus offer students a variety of active methods to access the textbook, remember pertinent information, and learn to regulate their own learning. This strategy can be adapted for multiple grade levels.

What is it?

Learning Menus are forms of differentiated learning that give students a choice in how they learn. Each choice on the Menu encourages students to engage in an activity that requires actively reading, re-reading, and then summarizing important textbook content. After a student has completed an activity on the Menu, the teacher immediately assesses his or her work before she or he can move on. Learning Menus come in various forms and can include tic-tac-toe boards, restaurant-like menus, matrices, and multiple-choice grids. For example, students can be given a Learning Menu structured like that of a dinner menu with the headings “Appetizer,” “Entrée,” and “Dessert” and be instructed to follow the order of the menu just as they would in a restaurant. Within each “course” students choose from a list of activities. The assignment sheet includes a Well-defined Description for how to complete a chosen activity, the Possible Points one can earn for it, and the textbook Section it covers. At least one task must be completed for each book section, although students are always free to choose their own tasks from the menu choices. After the completion of each “course,” the teacher assesses the result in Points Earned before the student moves to the next one. In the dinner menu example, “Appetizer” activities focus on summarizing the overall content in each section of the textbook reading with activity choices like “Flash Cards,” “Outline,” and “Summary.” “Entrée” activities center on a closer reading of details and give students an opportunity to be creative with options like make a website or travel brochure. For “Dessert” students must choose a short activity that provides an overall summary of the most important themes found in the entire textbook reading.

Example

For an example of a Learning Menu in action, see the video Differentiating with Learning Menus on the Teaching Channel website. In this video, Mary Vagenas uses a “dinner menu” strategy with her 7th-grade social studies students at the Queens School of Inquiry in Flushing, NY. Below the video and in the right-hand column under “Supporting Materials” one can find a sample Learning Menu and a full transcript of the video in Word (DOC) format.

Why is this a best practice?

Learning Menus are a method of differentiating instruction that provides flexible ways to engage students, and that can be adapted to various classroom environments. Students become familiar with different types of study methods that they can use to self-regulate learning in the future. Tasks can include simpler activities for struggling students and more complex activities to challenge advanced students. Continual assessment and feedback can help ensure that each student makes progress towards the learning goals. Learning Menus also liven up textbook reading activities by giving students choices about how to extract essential information. These choices can help motivate reluctant readers. However, no matter what a student chooses from the menu, he or she engages in actively reading and making sense of textbook content, helping build historical knowledge.

For more information

See more on this topic elsewhere on Teachinghistory.org.

Graphic organizers are another strategy for scaffolding and breaking down challenging texts. Learn more about them, and consider including them in Learning Menus.

Also see the Institutes on Academic Diversity (IAD) at the University of Virginia's Curry School of Education.

Tenement Life

Teaser

Students examine primary sources related to the life of an immigrant girl and her family to discover what life might have been like at the turn of the century.

lesson_image
Description

Students examine a set of primary source documents related to the life of an immigrant girl in order to investigate what life might have been like at the turn of the century.

Article Body

The Tenement Museum website provides engaging and entertaining ways to introduce young students to primary sources. The “Elementary School Lesson” found under “Primary Source Activities” uses a family photo, a postcard, a report card, and a passport to examine the life of Victoria Confino, an immigrant girl at the turn of the 20th century. Because these sources are mostly visual, they allow easier access for young students and English language learners than text-dense sources. The lesson provides useful guiding questions for the teacher when helping students examine the documents. After students have discussed the sources, they are asked to write a paragraph about Victoria’s life.

The Tenement Museum website also includes a variety of other fun and educational activities for students. Students can play the immigration game in which they figure out how to get to America, or complete a virtual tour of a tenement building. They could also mix a folk song or, for older students, explore the webcomics of a modern immigrant.

Topic
Immigration
Time Estimate
1 Class Session
flexibility_scale
4
Rubric_Content_Accurate_Scholarship

Yes

Rubric_Content_Historical_Background

No

Rubric_Content_Read_Write

Yes
Students “read” visual sources that contain minimal text. They write about the life of an immigrant girl using evidence from these sources.

Rubric_Analytical_Construct_Interpretations

Yes

Rubric_Analytical_Close_Reading_Sourcing

Yes
The lesson includes questions to prompt students to look at specific details in the documents, but teachers need to add questions about the origins of the documents.

Rubric_Scaffolding_Appropriate

Yes

Rubric_Scaffolding_Supports_Historical_Thinking

Yes
Suggested questions are provided for each source. The teacher could use the questions to develop a graphic organizer.

Rubric_Structure_Assessment

Yes
Students are asked to write about Victoria’s life using the historical evidence. There are no assessment criteria included and teachers will need to develop their own.

Rubric_Structure_Realistic

Yes

Rubric_Structure_Learning_Goals

Yes

Organizing History Through Images

Teaser

In this lesson, students will organize photographs both chronologically and conceptually in order to construct a narrative of the Holocaust.

lesson_image
Description

Students organize photographs from the U.S. Holocaust Museum both chronologically and conceptually in order to construct a narrative of the Holocaust.

Article Body

In this lesson, students organize photographs in order to tell the story of the Holocaust and construct an evidentiary narrative that makes sense to them. The lesson does not include any “correct” ordering or organization of the photographs and instead encourages students to experiment with organizing them both chronologically and thematically.

This lesson also guides students through the process of revising conclusions based on the discovery of additional historical evidence. Students are given a definition of the Holocaust and asked to consider or revise the definition with each new photograph in order to illustrate how historical narratives change depending on the available evidence.

Reading and analyzing primary texts can often be a daunting task for students who struggle with basic literacy skills. However, because this lesson presents historical data in the form of photographs, it is an excellent way to provide all students with access to the historical process, and to support historical thinking with struggling readers or English language learners.

For more advanced or older students, the supplementary activity asks students to read and incorporate brief testimonies of survivors into their definition of the Holocaust.

Topic
The Holocaust
Time Estimate
2 Class Sessions
flexibility_scale
4
Rubric_Content_Accurate_Scholarship

Yes

Rubric_Content_Historical_Background

Yes
The lesson requires students to “read” photographs and write a detailed “definition” of the Holocaust.

Rubric_Content_Read_Write

Yes
Captions and dates for each photograph are included in the lesson. There are additional background materials available.

Rubric_Analytical_Construct_Interpretations

Yes
Students construct an interpretation of the Holocaust using photographs.

Rubric_Analytical_Close_Reading_Sourcing

Yes
Students closely “read” photographs and accompanying source information.

Rubric_Scaffolding_Appropriate

Yes
Some of the photographs are disturbing (as is to be expected given the lesson’s topic).

Rubric_Scaffolding_Supports_Historical_Thinking

Yes
A student worksheet guides students through the process of analyzing each photograph and helps them focus on relevant details.

Rubric_Structure_Assessment

Yes
Some general strategies for assessment are provided. Teachers will want to determine and communicate their criteria for assessment.

Rubric_Structure_Realistic

Yes

Rubric_Structure_Learning_Goals

Yes

Prequel to Independence

Teaser

Teach your students about causality with this useful activity.

lesson_image
Description

Students view primary and secondary sources that represent events leading up to the publication of the Declaration of Independence and place them in chronological order.

Article Body

Teaching the events leading up to the Declaration of Independence is routine in many American history classrooms. This lesson consists of a brief sequencing activity followed by a written assessment and is a good activity to use in conjunction with other activities on this topic. Students view a collection of 10 historical documents representing events leading up to the Declaration of Independence. Each document includes an image of the original document and brief explanatory details. After putting the documents in their proper sequence, students are prompted to write one to three paragraphs describing the sequence of events leading to the publication of the Declaration of Independence, using the documents they have just sequenced as specific examples.

While the activity is simple and short, it can help to lay the foundation for a lesson on contextualization, as students place documents in chronological order and see them in the context of surrounding events. Additionally, this lesson provides an excellent opportunity to analyze the nature of cause and effect and teachers could augment the lesson by having students explain how specific events are related to one another as well as to the Declaration of Independence.

This lesson is one of a large collection of similar activities in which students engage with historical documents. Teachers can register with the website for free and create their own activities using a large searchable database of primary and secondary sources.

Topic
Pre-American Revolution, Cause and Effect
Time Estimate
1 Class Session (or less)
flexibility_scale
3
Rubric_Content_Accurate_Scholarship

Yes

Rubric_Content_Historical_Background

Yes
Limited, but a brief explanation and some background information are included with each document.

Rubric_Content_Read_Write

Yes
In addition to reading the documents, students are required to write a brief essay explaining how the documents fit together at the end of the lesson.

Rubric_Analytical_Construct_Interpretations

No
Students put events in chronological order using provided materials.

Rubric_Analytical_Close_Reading_Sourcing

No

Rubric_Scaffolding_Appropriate

Yes

Rubric_Scaffolding_Supports_Historical_Thinking

No
While background information is provided for each document, handwriting in some of the documents may be difficult for students to decipher. Teachers probably want to let students know ahead of time what sort of information they should look for in each document.

Rubric_Structure_Assessment

Yes
If the activity is completed on the website, the teacher may opt to receive an email for each student with the student’s written response, and a report of the student’s accuracy in placing the events in order.

Rubric_Structure_Realistic

Yes

Rubric_Structure_Learning_Goals

Yes

Using Non-Linguistic Representations to Strengthen Historical Thinking

Image

The classes at the urban San Diego charter school where I teach are not tracked. As a result, 100% of the juniors on campus are enrolled in AP U.S. History. With a relatively large number of English Language Learners, the challenge is to design a rigorous college-level course that helps students master historical thinking and specific content. I have found that encouraging students to use and produce non-linguistic representations results in deeper thinking and better understanding.