Jennifer Orr Wins ISTE Kay L. Bitter Vision Award

Date Published
Image
Photo, Jennifer Orr, May 3, 2012, Teachinghistory.org
Article Body

Congratulations to Jennifer Orr, 1st-grade teacher at Annandale Terrace Elementary, Annandale, VA, and writer and Teacher Representative for Teachinghistory.org! On Sunday, June 24, she received the International Society for Technology in Education (ISTE)'s Kay L. Bitter Vision Award for Excellence in Technology-Based PreK–2 Education. The award recognizes a PreK–2 educator whose work has had "a significant positive impact on technology use in education."

Orr, a National Board Certified Teacher, came to teaching early elementary after teaching fourth and fifth grades. Passionate about using technology in the classroom, Orr met the challenge of finding innovative ways to use digital tools with her new, younger, often preliterate students. While upper elementary students could jump into blogging, creating Wikis, and using other tools that require strong reading and writing skills, first-graders needed a different approach.

Orr met the challenge of finding innovative ways to use digital tools with her new, younger, often preliterate students.

". . . the most critical thing for me as a teacher is connections," says Orr. "Technology offers my students connections that I could never provide them. They can connect with learners around the world, with content about anything, and with experts in any field." Orr finds ways for her first-graders to make these connections using tools like VoiceThread, Wallwisher and PrimaryWall, pocket camcorders, digital cameras, an interactive whiteboard, and video creation programs. She blogs about her experiences at her blog, Elementary, My Dear, or Far From It, and here at Teachinghistory.org. You can watch her in the classroom and in DC with her students in Beyond the Chalkboard.

Orr appreciates that ISTE offers an award recognizing the challenges of bringing technology into the early elementary classroom. "Previous winners are women I immensely respect, many of whom have served as mentors to me as I transitioned to teaching primary," says Orr. "I feel so honored to join them in this."

An Ear for the Past: The National Jukebox

Date Published
Image
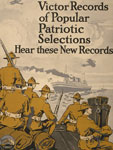
Poster, New Victor records of popular patriotic selections, 1917, LoC
Article Body

You don't have to look far to see how important music is to modern American life. Young people (as well as adults) talk about music, listen to music, download music, remix music, share music, and define themselves by music. In classrooms across the country, MP3 players and pop-tune ringtones give students' musical tastes away (and get them in trouble). But has music always been this personal, portable, and repeatable?

Ask your students to think back. Do they remember a time when music wasn't something you could own? When they, someone in their family, or someone they knew didn't have an MP3 player—or a CD, tape, or record player?

Before the birth of the recording industry, you could buy sheet music and learn how to perform musical pieces for yourself—but that was it. An individual performance was ephemeral, literally once in a lifetime.

When the recording industry took off, music became an object. Now you could buy and trade moments in musical time, preserved forever. You could listen to artists who lived far away from you, whom you might never see live. You could listen to your favorite performances again and again. You could even sell music, without having to worry about arranging performances. One song sung once by one artist could earn money for months or years to come. Sound become solid, something that could be passed from hand to hand—and preserved.

Exploring the Jukebox
Sound become solid, something that could be passed from hand to hand—and preserved.

On May 10, 2011, the Library of Congress launched its National Jukebox, an online archive of more than 10,000 recordings from 1901–1925. According to the website, Library of Congress staff worked throughout 2010 to digitize this massive collection of Victor Talking Machine Company recordings (Victor, now RCA, is one of the oldest record companies in existence, according to the Library of Congress's blog entry announcing the launch of the Jukebox).

You can browse the recordings by vocal artist, composer, lyricist, language, place or date of recording, target audience, label, category, or genre. And if you find some music you'd like to remember? Add it to your playlist in the site's pop-up player. Now you can listen to it while you browse other sites, email it to yourself to listen to later, or share it with others on social media sites or by embedding it in a blog or website.

Students and the Jukebox

While exploring the Jukebox is entertaining in its own right—I just spent two minutes listening to humorous singer Burt Shepard trying to lure a lost cat home—it also makes invaluable primary sources easily accessible.

Teaching about the rise of ragtime and jazz? Make a playlist of famous (and less famous) songs and artists and share it with your students.

How about the invention of the airplane? The Haydn Quartet's "Up in My Aeroplane" can give students an idea of the romance and novelty of flight six years after the Wright Brothers' first successful test run.

World War I? "Hooray, the war is over!" sings Harry Lauder in 1918; months earlier, baritone Reinald Werrenrath remembered the U.S.'s debt to Lafayette and to embattled France.

Pick a time period, a genre, an artist, a word—and go looking! There's something in this storehouse to accompany almost any topic from 1901–1925, if you look hard enough. Use the recordings to grab your students' attention—or ask them to analyze or compare music and lyrics. What do the words (if you choose a vocal piece) say? What emotions does the piece seem to seek to evoke? When was it recorded? Where? Who audience did the composer, artist, or publisher have in mind?

Finding music by topic can be difficult, as none of the pieces have transcriptions, but a little creative searching should leave you with at least a handful of catchy new sources to play with. Watch for more to come—the Library of Congress adds new content monthly, and it hopes to provide content from other Sony labels, such as Columbia and Okeh, in the future.

For more information

Looking for guidelines for music analysis? Professors Ronald J. Walters and John Spitzer introduce you to using popular song as a source in Using Primary Sources, and scholar Lawrence Levine demonstrates historical analysis of two blues songs.

Professor of social studies/history education Anthony Pellegrino's blog entries have ideas for exploring music in the classroom, too.

Constitution Day 2010

Date Published
Image
Photo, recommended reading, March 18, 2008, neon.mamacita, Flickr
Article Body

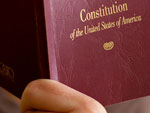
Every September 17, Constitution Day calls on teachers to memorialize—and critically engage with—Constitutional history in the classroom. But what approach to the Constitution should you take? What quality teaching resources are available? How can you interest your students in a document that is more than 200 years old?

In 2008, Teachinghistory.org published a roundup of Constitution Day resources. Many of those resources remain available, but online Constitution Day content continues to grow. Check out the sites below for materials that recount the Constitutional Convention of 1787, compare the Articles of Confederation with the Constitution, explore U.S. Supreme Court cases that have interpreted the Constitution, and apply the Constitution to contemporary debates.

Online Resources

The Library of Congress's Constitution Day page collects the full text of the Constitution, Bill of Rights, and Amendments, as well as the Federalist Papers and the Articles of Confederation. Lesson plans for grades 6–12 accompany the documents. The page also includes short suggested reading lists for elementary, middle, and high school, and links to relevant Library of Congress American Memory collections, such as Documents from the Continental Congress and the Constitutional Convention and the papers of James Madison, George Washington, and Thomas Jefferson. Also check out the Library's collection of primary sources "Creating the United States."

You can find an elegant, simple presentation of the Constitution on the National Archives' Constitution Day page. Check out their high-resolution PDF of the original document, part of NARA's 100 Milestone Documents exhibit.

If the Constitution is proving a difficult read for your students, try the National Constitution Center's Interactive Constitution. Search the text by keyword or topic, and click on passages that are unclear to find explanatory notes from Linda R. Monk's The Words We Live By: Your Annotated Guide to the Constitution. The Constitution Center also offers its own Constitution Day page, with a short video on the creation of the Constitution, interactive activities, and quizzes.

If you're not already familiar with EDSITEment, created by the National Endowment for the Humanities, take a look through their extensive collection of lesson plans. A quick search reveals more than 90 lessons related to the Constitution.

Interested in bringing home to students the Constitution's importance today? The New York Times' Constitution Day page links current events to the Constitution in more than 40 lesson plans. The Times also invites students to submit answers to questions such as "Should School Newspapers Be Subject to Prior Review?" and "What Cause Would You Rally Others to Support?"

Can't find anything here that sparks your interest or suits your classroom? Many more organizations and websites offer Constitution Day resources, including the Bill of Rights Institute, the American Historical Association, Annenberg Media, and Consource. (Check out our Lesson Plan Reviews for a review of a lesson plan from Consource on the Preamble to the Constitution.)

Joe Jelen on Digital Timelines

Date Published
Image
Homepage, Timeline, detail
Article Body
Beyond Butcher Paper

History teachers have long asked students to create timelines to help conceptualize and understand historical events. Student-created timelines were often limited by the space they occupied. Often teachers would have students focus on a few events and ask them to write very small on their notebook paper to squeeze in events. Clever teachers invested in rolls of butcher paper or banner paper to have students create long timelines. But thanks to today's web designers, timelines are no longer limited in space. Using free timeline builders online allows students to see concepts over time without the constraints of paper and a straightedge.

I have always liked using timelines in my classroom to help students see change over time and help students remember chronology (an oft-heard complaint for students of history).

I have always liked using timelines in my classroom to help students see change over time and help students remember chronology.

My students have made standard social, political, and economic timelines of eras of U.S. history in preparation for exams. My students have also created the popular timeline of events leading up the Civil War. I thought myself a clever teacher using large rolls of butcher paper for these timelines to maximize the number of events included and student participation. It was not until I sat down to read the new National Curriculum Standards for Social Studies put out by the National Council for the Social Studies that I saw another way for students to create timelines. "Learners demonstrate understanding by using graphic software to create a timeline depicting a scientific idea of the evolution of a technological innovation, and predicting how that idea or technology might develop in the next 10–20 years." (NCSS 57) With this, I began my search for digital timeline-building websites.

Finding and Using Timeline Tools

A quick search revealed lots of possibilities for creating timelines online for free. I had to spend a little time playing with each one to find the site that would best work for my needs and students. There are sites that are better tailored to elementary students. There are also those that are more powerful, but less user-friendly. This site provides a nice review of the various digital timeline sites available for free. My project required students to create events with years BCE and CE, which limited the sites I could use and may be a consideration in your site choice. You may also wish to consider what types of multimedia features you would like students to be able to embed in their timelines. Some sites offer the ability to embed pictures and videos. Most timeline-building sites allow users to embed their timelines in blogs or other websites, making sharing timelines easy.

Digital timelines allow teachers greater flexibility and creativity in assigning timeline activities to students over the old paper timelines.

Adapting the product recommended by NCSS, I asked students to create a timeline showing the impact of the Scientific Revolution on a specific field of modern science. To go one step further, students were to make some predictions about future developments in that field (i.e. chemistry, geology, meteorology, etc.). My students quickly caught on to the user interface for the timeline builder and in three 45-minute class periods had researched and created a timeline specific to their field of modern science. You can see an example of one student's timeline here. With more time and practice, I believe that my students will become better at creating richer timelines. After they had created their timelines, students were able to view each others' and comment on them. Ultimately, we created a class timeline merging events from each student's timeline to see the broader impact of the Scientific Revolution.

Digital timelines allow teachers greater flexibility and creativity in assigning timeline activities to students over the old paper timelines. They also allow students to collaborate in a way that fosters chronological thinking and in-depth analysis of eras in history. I hope that you will experiment with digital timelines and share the creative ways you use them in your classroom.

Bibliography

National Council for the Social Studies. "National Curriculum Standards for Social Studies." Silver Spring, MD: NCSS, 2010: 57.

For more information

Looking for more ideas for teaching with tech? Try Joe Jelen's earlier entry on teaching with document cameras, or check out our Digital Classroom section for articles and videos demonstrating more tools and techniques for using technology in your classroom.

Conventional timeline techniques can be used with digital timelines—the Teaching Guide Teaching with Timelines makes suggestions you can easily adapt to digital tools. EdTechTeacher also overviews digital and conventional timeline tools and strategies.

Mark Smith on Using Constructivist Video Production

Date Published
Image
Photography, Mini Coffee's Sidekick, Feb. 26, 2010, davitydave, Flickr
Article Body

The best way to use video in teaching history is short student-created segments for direct instruction. This post discusses what a group of teachers at the Education Study Group found works best for at-risk populations.

At my school, the figures are dismal: On the first day of school, you look at 23 students. Seventeen didn't eat breakfast at home, 16 struggle with English, five are designated Special Needs. On the last day of school, you still have 23, but nine of the faces changed without warning at some time during the year, due to high student mobility.

In this environment, the correct use of video can be a lifesaver. In general, a large percentage of at-risk kids learn visually, in short bursts which can be repeated, at will.

I'm not making excuses. To not acknowledge these hard facts would be educational malfeasance. It's where you start—with the student. Untangling these elementary students and teaching them to be lifelong learners of history is the goal, all the while striving to ensure they get what they need to pass NCLB requirements. In this environment, the correct use of video can be a lifesaver. In general, a large percentage of at-risk kids learn visually, in short bursts which can be repeated, at will. The Internet and digital video have made this a wonderful option.

Use of Video for Direct Instruction

When a short (two- to five-minute) video is played in class, we (the Education Study Group) recorded the highest student attention. Use a clip six to eight times in one lesson, and one gets the same attention numbers. This works with video clips from “expert” sources such as Discovery Education and some YouTube and TeacherTube videos, but the attention is heightened if the videos are created by students.

Our research found this is the best time to provide direct instruction. After the facts have been downloaded into your students' brains in this manner, then the discussion, examples, and inferences can be accomplished more easily.

Knowing the critical information is in the videos and online allows students to watch and interact in class, rather than take notes. . .

If the same videos are put online where they can be accessed by the students, those who need to review can repeat the videos over and over. When the direct instruction video is played it triggers the ancillary information provided in class. Conversely, if the videos are of ancillary information and the direct instruction was provided via lecture, less is recalled by review of the videos.

Knowing the critical information is in the videos and online allows students to watch and interact in class, rather than take notes—an important element for success in at-risk populations.

The Value of Constructivist Direct Instruction

Having students construct their own learning of history by building a video is great stuff, but many teachers do it backwards. They teach their regular lesson (lots of words, worksheets, and note taking) and then do something with technology as a "synthesizing" activity. That's not where technology goes. The research of Sugata Mitra and his "Hole in the Wall" experiment showed us that students should work in teams when using technology. In his experiment he placed computers throughout different remote regions of India and children were able to teach themselves to use the equipment, in small groups, without any external instruction. It is the research on which the global “one laptop per child” initiative is based.

There is a palpable difference in a student’s incentives when what they publish can be seen by a massive audience outside their classroom.

In our research, we’ve taken that model and applied it using authentic publishing. We define "authentic publishing" simply by the fact that, once content is published, it can be Googled. There is a palpable difference in a student’s incentives when what they publish can be seen by a massive audience outside their classroom. When publishing information about U.S. history, for a project on the American Revolution for example, students (even very young students) get the added responsibility that people in the United Kingdom will actually be able to read what they write. They take care not to offend their audience. They understand they will be judged against everything out on the Internet, not just against their classmates' or teacher’s expectations. It energizes their writing, and spurs broader research.

Most important, it is completely self-initiated. Students review one another’s work without being directed to do so. They comment on one another’s work using the available tools (almost all online technologies have a comments feature). They learn from one another, and in the process of creation of the project, take those lessons and adapt and apply them to their own work. This collaborative learning is done, for the most part, without it being assigned, or even encouraged (though we do suggest teachers encourage this behavior).

We've done research over the past three years on how students use media at home. We find if they make it and publish it authentically, they review it repeatedly in production, and then at home with friends and family. We've found students watch their own media 25 or 50 times. And they repeatedly watch the media produced by other students in the class.

Wiki Example

In one example, students were given a page to complete in a subject-specific wiki. They were shown the tools and allowed to use whichever media they wished. They worked in teams to accomplish their goals, even though they each had a separate page. The assignment was classical, with a standard rubric that could be used for any writing assignment. Teachers didn’t need to change the assignment parameters from what they would have assigned for a paper and pencil version. It was the medium which changed the paradigm.

What was most telling was students' activity at home. To a student, they would go home and review their page.

What was most telling was students' activity at home. To a student, they would go home and review their page. They would show it to their brothers, their sisters, their friends, and parents. They would then look at the pages of each of the other students in their class. Then they would come in the next day and say something to the effect of, "I've got some new ideas on how to make my page better. Are we going to work on the wiki today?"

This example was a second-grade class with predominately special needs. Imagine the same activity, with worksheets. "A student goes home and reviews their worksheet, shows it to their siblings, friends, and parents. Then reviews the worksheet for everyone else in their class." It would never happen.

On the first day of spring break, it rained. Two students published videos on their pages that day. It's the power of publishing—authentic (Google-able) publishing—which provides the incentive, the power to this learning engine.

Conclusion

Our research illustrates students should construct their own visual media, developing parts of the direct instruction for the lesson. If they publish it authentically, they are motivated to excel due to a larger audience of peers and through competition with classmates. And they voluntarily review the material repeatedly.
Bibliography

Driscoll, Marcy. "How People Learn (and What Technology Might Have to Do With It." Educational Resources Information Center Digest (2002). Accessed September 29, 2011.

Manfra, Meghan McGlinn and Robert M. Coven. "A Digital View of History: Drawing and Discussing Models of Historical Concepts." Social Education 75:2 (2011): 102–106.

Zahn, Carmen, Roy Pea, and Friedrich W. Hesse. "Comparing Simple and Advanced Video Tools as Supports for Complex Collaborative Design Processes." Journal of the Learning Sciences 19:3 (2010): 403–440.

For more information

Ready to start your students filming? To learn more about tools for making and editing digital videos, browse Tech for Teachers and learn about iMovie and Movie Maker, Little Bird Tales, Animoto, and other digital storytelling tools.

This Teaching in Action entry spotlights a video on learning through creating documentaries.

First-grade teacher Jennifer Orr, in her blog entry on using technology, says even early elementary students can create digital videos.

Stop and Source!

Image
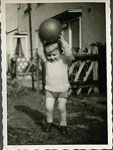
photography, Jonathan with a ball, c. 1957 digitized 23 May 2010, Flickr CC
Question

I am teaching first grade. As part of the lesson I am going to put photographs of families from the 1900s into an album and ask the students how these families are the same or different than their own families. Any suggestions on how to spice this up?

Answer

Before you place photos in an album and make comparisons, use your pictures to introduce an activity called Stop and Source. Sourcing refers to taking inventory of the creator, date, place, and type of a piece of evidence in order to “read” it more accurately. Sourcing is an essential skill for critical analysis and information literacy. As soon as children have books read aloud to them or look at pictures, they can be introduced to the concept that all texts, written or visual, have a creator and a time when they were made.

  1. Choose pictures for which you have some source information such as the date taken, the photographers’ names or where they were taken, etc. You may wish to use pictures from the late 1800s to make a bigger contrast with today.
  2. Project a long ago picture with an overhead or interactive board and ask your students to describe what they see.
  3. Next, project a picture from today and again ask your students to describe what they see.
  4. Ask your students what is different about the pictures.
  5. Ask your students why these things are different.
  6. Next, share the available source information for the pictures with your class, such as:
    • WHO took the picture?
    • WHEN was the picture taken?
    • WHERE was the picture taken?
  7. After you share the source information for each picture, ask your students if the dates are the same or different, if the places and photographers are the same or different, etc. Could differences in time and place that we find in the source information begin to explain some of the differences in the pictures?
  8. To help your students remember to always look for sourcing information when they read a book or look at a picture, teach them to Stop and Source with a kinetic activity. Ask them to stand up, raise a hand to their shoulder, palm out, then push it forward as they say “Stop and Source!” Do this a few times, then return to your activity.
  9. Project another photo and ask your class what to do first. Hopefully they will say “Stop and Source!”
  10. Repeat the comparison of a pair of pictures from long ago and today.

This activity will help your students begin to develop a sourcing habit, and understand that source information helps us “read” pictures accurately.

Bibliography

Wineburg, S. and D. Martin. "Seeing Thinking on the Web." The History Teacher 41(3) (2008).

For more information

The Bringing History Home project's Source, Observe, Contextualize, Corroborate Visual Image Analysis Guide can help guide your students' sourcing.

Or check out this Ask a Master Teacher by Teachinghistory.org on using scrapbooking in the history classroom.

Teaching with Timelines

Image
Image, Timeline, 21 Sept 2009, George Boyce, Flickr CC
Article Body
What Is It?

Throughout a school year or history course, students collectively construct an illustrated timeline of historic events and people they have studied.

Rationale

Researchers have found that students too often encounter little bits and pieces of history out of context and unconnected to larger historic themes (1). Consequently, students don’t develop a sense of historic era and they don’t connect individual events to larger movements and themes (2). These limitations not only affect students’ grasp of history topics; they may also restrict students’ engagement in critical analysis. As a recent middle school study found, "Without proper background knowledge, students have difficulty developing the contexts for historical thinking" (3).

Use [timelines] to categorize similar or related events into themes, eras, and topics, and to help students compare elements in different time periods.

Timelines help students understand the chronology of historic events, and help students situate newly encountered events and figures in relation to those they’ve already studied (4). They provide a visual aid for identifying cause and effect relationships between events, and a visual prompt to activate student prior knowledge. They allow students to recognize how historic events, eras and topics overlap in time. Use them to categorize similar or related events into themes, eras, and topics, and to help students compare elements in different time periods.

All of these purposes are important singly, and collectively they help students develop a long-range understanding of historic chronology.

Description

In this ongoing activity, a timeline is collectively constructed by students. It may be made of butcher paper and covered in student drawings, primary sources, and recipe-sized cards noting laws and events. Or, if fire codes allow, it may be made of rope, with images, dates, and documents hung from paper clips and clothespins. The main classroom timeline may be supplemented by smaller posterboard-sized lines that include only a few elements, such as changes in farming or in environmental regulation over time, or a chronology of legislation related to voting rights and disenfranchisement. But timelines should always be constructed by students so they reflect the students’ own learning.

Teacher Preparations
  1. Cut a long strip of butcher paper. Your class timeline should be displayed     as prominently as possible in your room, and should be easily reached for     adding new elements. If it’s hard to reach, you’ll be less likely to add     elements daily. But if you don’t have space in your classroom for your     timeline, try hanging it in the hallway near your class.
  2. In bold colored marker, place marker dates on the paper. These will be     determined by the course content. If you are teaching 19th- and 20th-    century U.S. history, you may wish to label the timelines with 10 or 20     year increments, or you may wish to only list century markers. Be sure to     leave space for dates before and after the time period your class will     explore, however, as your class will almost certainly encounter events that     precede and follow the designated beginning and conclusion of your unit     explorations.
  3. Decide how the class will display elements on the timeline. Will you ask     for volunteers to illustrate events that go on the line? Will you ask the     class to vote on how they wish to illustrate various elements—with a     student illustration, a copy of a primary source, a historic image or...? Will     you decide each time how an element that goes on the line will be     represented?
In the Classroom
  1. Start your classroom timeline at the beginning of the school year. Add to     it throughout the year.
  2. At the conclusion of an exploration of a significant event or person, ask     the class if they would like to include that person or event on the class     timeline. Tape the representation of the new element to the timeline, with     a date and title prominently visible. When posting a person’s life rather     than a single action by a person, you may wish to list dates of birth and     death.
  3. Every day or two, begin your history study with a review of the timeline.     Settle your students on the floor in front of the line and invite them to do     a silent “walk and talk” of the events on the line. Allow a minute or two     for this activity, and then invite a student to stand and do a walk-and-    talk aloud (see video). The students don’t need to account for every     element on the line; they should just use the elements as prompts to     tell a story about a particular era or theme, or inventory various things     that were happening during the same time period. Let students finish     before correcting any mistakes they may make in their storytelling.
  4. When deciding which elements to put on your timeline, it’s better to err on     the side of generosity than stinginess. The more elements on your line, the     better it reflects your class's learning, at least if you are engaged in rich     history explorations. But don't limit your dates to events you explore in     formal history lessons; include elements from other disciplines as well.     Language arts, science, music, math; if you encounter a historic topic in     one of those areas, add it to the class line. If a student finds something at     home that relates to history, invite them to add it to the line. A dynamic,     full-to-the-brim timeline is a sign of a class that’s engaged in history full-    tilt.
  5. As your class explores history, allow and encourage your students to view     and reference the timeline spontaneously to situate new evidence in     relation to what they’ve already studied, or to infer the timing of a new     historic element for which they have no date.

Watch this video and listen to a student walk and talk her way through her class timeline.

For more information

Lesson plans and units that incorporate timeline activities are available on the Bringing History Home project website. Additional information about using timelines in elementary and college history classrooms is also available on the site.

See this entry about Docs Teach from the National Archives to explore their “Finding a Sequence” timeline tool that allows teachers to create their own document-based timeline activities.

EdTechTeacher overviews online timeline creation tools and techniques.

Bibliography

1 Barton, K. (2002) “Oh, that’s a tricky piece!”: Children, mediated action, and the tools of historical time. The Elementary School Journal, v.103, n.2.

2 Shemilt, D. (2000) The Caliph’s Coin: The currency of narrative frameworks in history teaching. Knowing, Teaching & Learning History, eds. Stearns, P. et. al., New York: New York University Press.

3 Twyman, T., et.al. (2006) Using concepts to frame history content. The Journal of Experimental Education, 74 (4), 331-349.

4 Fillpot, E. (2007, 2008) These findings are from unpublished studies conducted with children in the Bringing History Home K-5 curriculum and professional development project.

Storytelling with Scrapbooks

Image
Scrapbook, time and eternity, mary bailey, 7 Nov 2010, Flickr CC
Question

I like to scrapbook. How can I incorporate this craft into an elementary classroom (Grades 2-5)?

Answer
Using Scrapbooks

Making scrapbook pages can be a fun activity for students in the elementary grades. You will want to help students understand that, in this case, a scrapbook—like all history—uses pieces of the past to tell a story. Students can make their own scrapbook pages that tell a story and these pages, when bound together, can tell a larger story or multiple stories about the same theme, historical event, or era.

Students could construct pages that tell family history or pages that focus on an historical figure like George Washington, Elizabeth Cady Stanton or César Chávez. Such scrapbooks might integrate photos, portraits, maps, timelines, and age-appropriate primary documents. Another option for scrapbooking is to examine a topic related to local history. Students might construct pages about historic sites in their own community, including important buildings, parks, and graveyards, pages about people from the past who made a difference in their local areas, or pages about daily life in the past. These pages could be bound together and used as a resource for future activities like writing a town history. Naturally, you will want to tailor the assignment’s topic and requirements to the particular age-group that you’re working with, asking older students to use more materials and craft more complete and clear narratives.

Assignment’s Requirements

You’ll want to guide students in terms of what their scrapbooks should include. First, you’ll want to help students understand the kinds of sources they should use. Have a conversation with them about where they might gather the ingredients for a scrapbook page, and consider working with your school librarian to ensure that students have the necessary materials they will need to tell their story—photos and pictures from the internet, old newspapers and magazines, etc. You will also want to help students understand that a scrapbook, like all history, uses pieces of the past to tell a story. Selecting and ordering their materials chronologically, by theme, or in some other manner, will affect the nature of their narrative—and they’ll want to consider this when choosing sources to paste on their page. Consider if you will require specific sources, for example, will they need to include a map? Two photographs?

Students will need coaching in creating titles for their pages and captions for the “scraps” they include on that page. Remind them to use details in those captions and include information about names, dates, and places. Again, consider your students’ abilities in deciding what prose will be required in the assignment, and the choices (e.g., page title) you will leave to them and the choices you will make for them. Your experience with creating scrapbook pages will likely make it easy for you to model how you plan your page and what finished pages look like. This kind of modeling is always helpful for students. We also recommend using the creation of scrapbook pages as a prewriting or presentation assignment, where they put into words the story they have created on their page.

Scrapbooking, in short, can be a useful tool in the history classroom, as long as you take the time to create assignments that focus on understanding the past. Teaching opportunities in the activity include students learning more about the use and selection of evidence to tell a story, and cultivating a deeper understanding of primary sources and the specific historical stories they illustrate. Be sure to define your learning objectives thoughtfully so it is an activity with significant purpose. Try this backwards design model for planning, where those objectives determine the specific shape and nature of the activity that you design.

Jennifer Orr on Integrating History into 1st-grade Instruction

Date Published
Image
Photography, Old Telephones and assorted equipment, Chester Paul Sgroi, 23 Dec 2
Article Body

As a primary school teacher my focus is on building basic academic skills in ways that are developmentally appropriate for my students. That means we focus most of our time on reading, writing, and math while ensuring that we have chances to play and explore our world.

As one can imagine, this leaves little time for social studies and science. I have standards and objectives to teach in these areas, but they are prioritized below the others. As a result, I look for ways to integrate them into other parts of our day.

Some ways to do so are obvious. When we are working on nonfiction reading skills I carefully choose books about Benjamin Franklin, George Washington, or life in the past. As we explore writing reports I will gently nudge my students towards something about the past that has caught their interest. I stock my classroom library with biographies, history trade books, and historical fiction at appropriate reading levels. I choose read alouds that offer a window into the past, such as Potato: A Tale from the Great Depression by Kate Lied, Train to Somewhere by Eve Bunting, or books from the American Girl or Magic Tree House series.

In addition to those options, I also try to integrate our exploration of history into other areas. One way I do so is to have my students talk to family members and adults in the school about their own histories. Homework might be to ask someone in the family how their experience in school was different from that of my students or what going to the movies was like when they were young. During our morning meeting the next day we’ll talk about what their family members shared with them.

I want to correct misperceptions, expose them to surprising ideas, and generally encourage an interest in understanding how our world has changed over time.

We study data and graphing in math in first grade and I use this as a chance to learn about the past. My students will fan out around the school and interview teachers, administrators, secretaries, lunch room helpers, and custodians about their lives in first grade. They might ask how many channels they had on TV then, did they wear seat belts or ride in car seats, how many telephones were in their house, etc. (I do try to send my students off to interview only those staff members old enough to make a difference here. Our just-out-of-college teachers won’t offer answers different enough to be noticeable.) Then we graph the answers they got from staff members and my students’ answers and look at the differences.

History is fascinating to young children, but it is also very nebulous. They struggle to understand something they can’t see. I try to build it into our days throughout the year to ensure that we are talking about and exploring history as much as possible. I want to correct misperceptions, expose them to surprising ideas, and generally encourage an interest in understanding how our world has changed over time.

For more information

Watch Orr demonstrate integrating history into a lesson that also teaches skills such as reading, ordering, and technology use, in Beyond the Chalkboard.