What Do You Mean?: How Language Changes Over Time

Teaser

This creative lesson transforms language into a historic artifact and enables students to analyze how language changes over time.

lesson_image
Description

Students create sentences using words whose meanings have changed since the 17th century. They then discover how their sentences change meaning when the words’ 17th century meanings are used.

Article Body

This lesson provides students with a simple introduction to a fundamental and often elusive component of historical thinking—placing the prose of an historical document in its appropriate context. Students begin with a list of words from 17th-century English that are still in use in the 21st century. Students create sentences using these words based on their modern meanings, then note how their sentences change in meaning with the 17th-century usage of the words. The short follow-up discussion focuses on how such changes in the meanings of words make the historian’s task of analyzing primary sources challenging.

Contextualization, or placing a historical text in its appropriate social, political, cultural, and even linguistic context, is a challenging task even for collegiate students of history. Because contextual influences are often subtle and linked to extensive background knowledge, younger students can have difficulty noticing them, and teaching younger students to recognize the historical context of a document can be a daunting task when students are already dealing with challenging texts. This lesson introduces the idea of context through the changing meaning of words. Rather than dealing with the meanings of entire texts, students are focusing on the meanings of individual words. Thus, this lesson provides a useful starting point in laying the foundation for historical thinking skills like contextualization and the close reading of documents, while clearly showing that language changes over time.

Topic
Daily Life, Southern States
Time Estimate
1 class session
flexibility_scale
4
Rubric_Content_Accurate_Scholarship

Yes

Rubric_Content_Historical_Background

Yes
In addition to information on the historical usage of words featured in the lesson, the site also includes a brief article on the history of the Jamestown settlement, and a variety of other resources for teachers and students.

Rubric_Content_Read_Write

No
The amount of writing required is minimal, but teachers may easily adapt and extend that part of the lesson.

Rubric_Analytical_Construct_Interpretations

No

Rubric_Analytical_Close_Reading_Sourcing

No
Although the lesson itself does not require close reading, it focuses on skills that will help students closely read and question other texts.

Rubric_Scaffolding_Appropriate

Yes
This lesson is easily adapted to the needs of a variety of students; while designed for elementary school, it could be adapted easily for a middle or high school classroom.

Rubric_Scaffolding_Supports_Historical_Thinking

No
Teachers may want to scaffold the lesson for younger students by providing 21st century definitions of the words.

Rubric_Structure_Assessment

No

Rubric_Structure_Realistic

Yes

Rubric_Structure_Learning_Goals

Yes
A simple, but elegant, plan.

Google Maps

Image
What is it?

Google Maps allows users to place markers, upload pictures of specific locales, draw lines and shapes, and provide descriptions—helpful for constructing historical maps or geography-based lessons.

Getting Started

Working with Google Maps is simple enough, but users will (of course) need to establish a Google account in order to create a map. After signing in, the first step is to provide the map with a title and description, as well as establish privacy and share settings; the map is already in edit mode. Text can be entered in plain or rich text—great for inserting links. Users will see three icons in the left corner of the map: a hand (navigation tool), a marker pin (with over 90 icons), and a jagged line (to draw lines and shapes). To create a marker, select the corresponding icon and select style and click on the desired location on the map. After entering a title, users can select the rich text format to not only insert hyperlinks but also add images to the marker by selecting the image's URL address. In addition, you can embed a Google Video or YouTube clip by copying the embed code and pasting it into the description field. To create a line, users can simply click at the beginning point, click at subsequent locales, and double click to finalize the desired route. Creating lines using existing roads may be a useful for tracing travel and trade routes.

Google Maps facilitates collaborative learning and helps teachers extend and refine their lessons through an interactive medium that promotes critical decision making.

Two more tool options are found at the top of the left bar, above the title of the map: "collaborate" and "import." The collaborate function—which allows users to invite others to help create and edit a map—is ideal for group projects. Teachers can also use this function to collaborate with colleagues teaching a similar course. Either way, Google Maps facilitates collaborative learning and helps teachers extend and refine their lessons through an interactive medium that promotes critical decision making. The import option allows users to add map data from a KML, KMZ, or GeoRSS file. This is a very useful tool if teachers are able to find good historical "overlays" for their maps. A brief search for historical KMZ files yielded several good imports, such as battles of the Civil War, significant cities of the Civil Rights Movement, and U.S. presidential elections (using search terms like "historical maps KMZ" or "KMZ historical places" is a good way to start . . . but the development of these types of files is still growing so it may take some searching). Google Maps does have some glitches. Creating routes using the "line drawing" tool is tricky. Starting points do not always appear where you click to select, and editing an existing route is difficult; the pointer on the screen does not always match the marker boxes designed to click and drag to a new point on the map. In creating our own map, we also ran across an interesting problem. We created a map with markers and descriptions, but when we accessed it at a later date, the information appeared but all the markers on the map disappeared. Furthermore, the links in the information panel were no longer active. We would recommend creating a database on an Excel spreadsheet first, using columns such as "latitude, "longitude," "name,", and "icon." Then you can convert the Excel document into a KML file by using an online site such as Earth Point, which does an excellent job of providing a step-by-step process on how to create a "KML-friendly" Excel spreadsheet, lists the various ways to enter longitude and latitude coordinates, provides the numbers for hundeds of different marker icons, and also has a feature where you can make the conversion on the Earth Point site. A new KML file will be downloaded onto your computer, which can then be imported in Google Maps. Voila! All the markers appear, with descriptions in place.

[Note: it is highly recommended to use the decimal format for coordinates. Excel spreadsheets only accept negative values in the decimal-coordinate format. Any location in the Western and Southern hemisphere is a negative coordinate.] Although such a process sounds tedious, we found that this extra step is useful if you want to continue editing a map, or, more importantly, if a glitch causes the information on Google Maps to disappear. You can import the KML file into your Google Map at any time and replace the old one. Consider the KML file a Google Maps "backup" file.

Examples

One good site to examine the potential of map overlays is Dave Rumsey's site. In an 1861 historical overlay, we see an old map of Washington, DC over a Google Map in Satellite View. By clicking on "Washington DC 1861" on the right, users can make the map come and go as they please. Likewise, by clicking on "transparent map", users can add and remove modern street names and locales.

Historypin is another good site to see what users can do with pin markers, photographs, and other information that can make history come alive.

Another good site to examine student-produced Google Maps projects is Google Historical Voyages and Events. By clicking on "historical events" on the left sidebar menu, several student-created projects are available for browsing. One useful starting point is to select "Major Events of the Civil War" and browse various class projects in Google Maps. "Major Events of the Civil War," a 5th-grade class project, also includes detailed for educators to gain ideas of how to use Google Maps in the classroom across grades 5-12.

For more information

Helpful tips and tutorial for users new to Google Maps.
A useful primer on KMZ and KML files.
10 minute video of how Google Apps work for the K-12 classroom.

Voki

Image
What is it?

Voki allows users to create personalized speaking avatars and use them to re-create historical actors, unique characters, or other figures. By controlling their voices, students can use their avatars for role play or to reenact famous speeches.

Getting Started

Luckily Voki allows users to practice creating an avatar without enrolling or creating a new account. You can choose characters from various categories and several obvious historical personas are available like George Washington, Abraham Lincoln, and modern-day political figures. Each avatar can be customized by head, clothing, accessories, and various voice options. Users can also select background images and resize the avatar in relation to the player window. After selecting the voice option, users can enter text and listen to the voice that is created. Likewise, if users want to record their own voice they can also playback their recording until satisfied.

Once the Voki avatar is created, users can publish their creation. By registering an account with Voki, all Avatar creations are saved under the user's account for continual access. If users forego the registrations, the finalized avatar does contain a unique URL link (which should be copied down for later access.) Users can also use the embed code to immediately post or bookmark the avatar in whichever social network site they prefer.

Whether users want to embed their avatar on their own site, in an email, or a course blog, these creations can liven up any history class.

Examples
By speaking through an avatar, students will not only maintain retain online privacy but will appreciate an innovative and safe platform for classroom presentations.

In a simple avatar that imagines a modern-day George Washington, students could apply Washington's guiding philosophies to modern issues such as health care, immigration, or foreign interventions. By speaking through an avatar, students will not only retain online privacy (great for teachers and parents!) but will appreciate an innovative and safe platform for classroom presentations.

Students can use their avatars to engage in debates and topic discussions—such as Abraham Lincoln and Ronald Reagan engaging in issues of states rights and federalism. Likewise, students could use their avatar creations to address a homework question on a course blog or wiki page. Another good use of Voki avatars is to re-enact famous speeches such as the Gettysburg Address, or to summarize the President's State of the Union Speech in under two minutes by examining word clouds released after the speech.

Finally, a wonderful use for these avatars is to apply gained knowledge of philosophical views of historical figures into fictional scenarios. For example, students can create a fictional character that meets a certain demographic (i.e. middle-aged Hispanic female nurse). Then the entire class, made up of various American citizens, can conduct a town hall debate on the key issues of the past and present. A variation of this format is to conduct a town hall of famous American politicians and personalities—such as Barack Obama, Reagan, Washington, Lincoln, John Kerry, Hillary Clinton, Sarah Palin, and John Stewart.

For more information

Voki for Education has plenty of materials and suggestions that can help teachers gain inspiration for how to make the best use of the available technology. One helpful feature is the Teacher's Corner Message Forum—a quick browse through the posted messages is worth the time spent.

Voki also has a Lesson Plan site that can be searched through grade level and/or subject area. A useful FAQ section can also help users to orient themselves to the tool.

Padlet

Image
What is it?

In a nutshell, Padlet is an online bulletin board. History teachers, however, can use this tool in myriad ways. For example, Padlet users can pose open-ended questions and elicit multiple student responses—ideal for posing document-based questions using primary sources. Users can also create their own "post-it" notes in response to a directed question. Teachers can also use Padlet as an online posterboard—a natural fit for group projects. Padlet can also function as a "bell-ringer" or "ticket-out-the-door" activity, as well as a homework assignment.

Getting Started

Although registering is not required, it is free and easy to do via Padlet's own registration portal, or using a Google (or Open ID) account. Once users are registered, they can create their first bulletin board and (in the top left corner) edit the title and description of the "wall." Teachers can create a topic, or simply post a question for students to answer. Users can also edit the image associated with the wall, which functions as an identifying logo. (Students looking to create a World War II wall could use, for example, a propaganda poster like Rosie the Riveter as the logo.) Lastly, users can select the design template and set access privileges (which includes a custom URL ID).

After the wall is established, users can add a "post-it" note by double-clicking anywhere on the wall. Text, audio, video, and images can be posted to the wall (videos and images automatically display a Zoom picture when clicked on—a temporary pop-up window for viewing.)

[Note: Do not place any "sticky notes" too close to the wall title and description. If the top of the sticky note is hidden underneath the wall title and description, it can be hard to move the note.]

Examples

An easy way to experiment with Padlet is to give it a try with a simple question. Once users become more accustomed to how Padlet functions, they can construct walls that employ more Web tools. We posted a sample question on a 1960s U.S. advertisement for a non-coffee product so that readers of this Tech for Teachers entry can add their own thoughts. Try it out! Leave a "sticky" note and tell us how you would respond to the coffee question, ad, and TV commercials.

The use of various multimedia sources makes historical questions more complex, engages students, and goes beyond what is possible in a traditional worksheet/whiteboard approach.

Embedding an image for viewing and providing a directed question allow the coffee example to work like a document-based question (DBQ). Additionally, the coffee question can be expanded into other discussions. In this case, a YouTube clip on coffee advertisements opens up questions about gender relationships in 1950s-1960s America. The use of various multimedia sources makes historical questions more complex, engages students, and goes beyond what is possible in a traditional worksheet/whiteboard approach. By modeling specific uses for Padlet, teachers can also empower students to create their own effective walls for classroom use and history-based discussions.

A few technical issues are worth considering. Each sticky note is limited to 150 characters. Also, images heavy on text might not be legible, even in their zoom pop-windows. If this is the case, viewers can find larger images by either right-clicking the image and saving it to their desktop, or enlarging the zoom view on the computer screen. Lastly, and most problematically, the site tends to become tied up and non-responsive. We have encountered many instances when Padlet fails to load properly. However, the value of the tool should encourage users to be patient and hope for a more consistent service in the future. Padlet is a simple tool, but one that can accentuate the best teaching practices teachers employ on a day-to-day basis. For students, carefully posed questions will allow them to respond in many ways—which only helps classroom discussion.

For more information

Check out the Padlet Blog to see some other ideas for using Padlet.

Little Bird Tales

Image
What is it?

Finding digital tools for social studies in the elementary classroom, especially in the early grades, can be a bit difficult. Little Bird Tales is a helpful tool in making social studies come alive for young students through its simplicity and marriage of visuals and sounds.

Getting Started

Registering with Little Bird Tales (LBT) is quick and easy; the focus on small learners means that privacy concerns are respected: the site contains no ads, merchandising, or external links, and only requires a valid email to sign-up. LBT also offers a teacher account, which is accessible via an email request (teachers should provide the same email used to sign-up). Before working with students, teachers should be aware of the technical specifications, such as supporting browsers, image file size, and storage capacity—the FAQ page addresses these points fairly well.

Once an account is activated, creating a digital tale is fairly simple. Click on "create a new tale" to construct the tale cover. Users can either draw an image—using the built-in art pad—or upload a saved image (note: minimum image size is 600x420 px). Add a title, submit author information, and a record an audio introduction to finalize the tale cover. Users should also test microphone quality for volume and clarity before proceeding with new pages.

Each subsequent page follows the same procedure, and the size of the final project is only limited by the tale box capacity in your account. The main difference from the cover page is that students can enter text for their product—an ideal feature that reinforces reading and writing, while providing students a "script" for their sound recording. Page order can be easily rearranged at any time by dragging each page into the desired order in the sidebar found on the right.

Users can resume editing their tales by logging back in, selecting "My Tales," and clicking on the notepad icon. Other icons on the "My Tales" screen include a play option (to see the video in progress), an email icon to share the video, and a trash icon to delete the tale project.

Once the video tale is completed, users proceed to step three in order to share the tale via email—regardless of whether users choose to keep the video private or make it public. Users who choose to make the video public can do so by clicking on the account homepage (house icon) and selecting "public" under the cover page image (note: Little Bird Tales moderates all videos before they become public).

Examples

It is highly recommended that teachers create a "test-run" project ahead of time before working with students. In addition, it might serve well to have students prepare all images and script beforehand. Users can create their own artwork using the built-in drawing pad, but teachers may need access to a scanner to create image files of original student artwork on paper (note: images and scans should be saved in .jpg, .png or .gif).

Little Bird Tales works well because it captures the imagination, creativity, and voice of the child in a free and easy to use platform.

The strength of Little Bird Tales is the ability for children to tell stories that can be autobiographical (my life, my community, my school, my family), biographical (U.S. presidents, world history figures), or related to other aspects of the early grades social studies curriculum such as the environment, economics, civic ideals, or global communities. Little Bird Tales works well because it captures the imagination, creativity, and voice of the child in a free and easy to use platform. Public Tales on the LBT site include a civics project on American symbols, a story on "daddies", a tale on regional history, a silent tale on global cultures and clothing using beautiful imagery, and an inspirational video by a young runner. Middle school and high school students can also benefit from LBT, as evidenced on a video dealing with homelessness in America. In our experience in working with a 1st-grader, the initial day of trying out LBT was a learning curve for her but she caught on quickly. With simple guidance, she was able to do all the work (although uploading images needed more hands-on assistance.) By the half-way point, she was typing, recording her voice, saving her work, and moving on to the next slide. Fatigue did settle in after a while, so preparing all materials and images beforehand helped her. She also discovered LBT's ability to rearrange pictures in any order—a useful benefit whenever she changed her mind after previewing the video. The student found the playback of the recording useful and empowering; immediately recording a passage again helped her get the video "just right." It took her about 2-3 hours in total to finish the project. Keeping this one experience in mind, it might be best for teachers to first try LBT by having each student create one or two slides for a class video. For example, in a 50-states project, each student could easily adopt one or two states and create a few slides which would allow the entire U.S. to be included in a video project. This model could likewise work for U.S. presidents, famous American citizens, local communities, or other topics with a large number of elements. Such an introductory approach serves teachers and students alike. Children can become familiar with technology in a limited way by creating only a few slides. For their part, educators can invest limited curriculum time for a collective project, before expanding a video project to a more extensive one for individual students.

For more information

Teachers, review the specific features provided by the "Teacher Account," including class and school management.

For more on the tool, read Discovery Education Blog on Little Bird Tales

The Object of History

Image
Annotation

The Center for History and New Media and the Smithsonian National Museum of American History created this website to model both historical thinking about artifacts as primary sources and possible best practices for sharing museum collections online. With the site, students can curate their own virtual history exhibits, using documents and expert interviews related to six core artifacts from different time periods. The "Guide" section introduces users to how and why artifacts are important to historians. Seven 300- to 600-word essays argue that artifacts tell stories, create connections between people, hold many different meanings, capture moments, and reflect changes. After learning how historians relate to artifacts, users can tour model exhibits in "Objects," focusing on six Smithsonian-held artifacts: Thomas Jefferson's lapdesk, the gold nugget that started the California Gold Rush, a dress that belonged to Mary Todd Lincoln, an 1898 voting machine, the Woolworth counter where a sit-in took place in 1960, and a short-handled hoe used by farmworkers in the 1960s and 1970s.

Using the more than 220 expert interviews and primary sources from the "Object" model exhibits, students can create their own six-item exhibit.

An "Introduction" for each artifact includes a short introductory video placing it in its historical context and a virtual version of the artifact. Users can zoom in and out on the virtual artifact, rotate it, or click to discover interactive hot spots. Clicking "Explore" in each exhibit provides further information on the object, its place in history, and its history as a museum artifact. Interviews with Smithsonian experts and related primary sources enrich "Explore" sections. "Tour" demonstrates how the interviews and sources in "Explore" can be pulled together into exhibits: either a short 4- to 5-piece "Brief Tour" or a 5- to 13-piece "Extended Tour." "Resources" rounds up annotated links to websites with more information on topics related to each artifact. "Activity" is the heart of the site. Using the more than 220 expert interviews and primary sources from the "Object" model exhibits, students can create their own six-item exhibit. After selecting the objects that reveal the perspective or tell the story they wish to convey and labeling the objects with interpretative text, students can email their finished exhibits to their teacher (or to themselves). For even more information on the six core artifacts, users can listen to experts' recorded answers to questions about the artifacts in "Forums." The 16 recordings run from 13 minutes to an hour. The site may take time to learn to navigate and use, and sorting through the many interviews and primary sources to curate an exhibit can be frustrating (interviews and sources can be displayed by collection, but not searched). However, the site can still provide an introduction to what makes artifacts unique as primary sources, and the skills historians use to interpret artifacts and create museum exhibits.

Laura Jernegan: Girl on a Whaleship

Image
Annotation

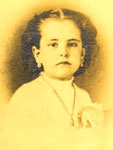
In 1868, Laura Jernegan, six-year-old daughter of a whaling captain, put to sea with her parents and younger brother. This website, created by the Martha's Vineyard Museum, explores her family's four-year whaling expedition, focusing on Laura's own diary.

Two narratives ground the exhibit: "The Story of Whaling" and "Laura's Story." Each narrative is divided up into three sections—"Before the Voyage," "The Voyage" and "After the Voyage"—and consists of 14—15 individual "chapters," each a short essay of approximately 300—1600 words. "The Story of Whaling" describes the rise and fall of the whaling industry and the nature of a whaling voyage, including preparation and hiring crew.

"Laura's Story" narrates the voyage of the Roman, the ship on which Laura and her family set sail. The voyage included a stay in Hawaii, mutiny, and the Roman's sinking in the Arctic (everyone survived). "Laura's Story" also looks at the lives of Laura and her family before and after the voyage, as young children and as adults. Each essay include links to images, descriptions, and other sections of the website that clarify and enrich the text.

For Laura's own description of her time at sea, "Explore Laura's Journal" lets visitors browse her 43-page journal. Written in a child's bold handwriting, the journal is short and easy to read, and can be viewed in the original scans, as a text transcript, or with a magic lens feature that translates the writing into print as the mouse runs over a page.

Further background information supports the two narratives and Laura's journal, including:

  • "About Whales," a mini-exhibit answering basic questions about six whale species;
  • an interactive timeline reaching from 1774 to 1955, including both general world history events and whaling events;
  • "Explore the Ship," a diagram of a whaling ship that visitors can click for information on crew positions and parts of the ship; and
  • a "Map of Whaling."

This interactive world map lets visitors display features from six sets of information, turning each set on or off and overlaying them. The sets include the four routes of the Roman's journey, three typical whaling routes, posts and sites important to whaling, 1878 whaling grounds for four species, major ocean currents, and whale migration patterns for three species.

Finally, visitors can view zoomable photographs of 175 different whaling-related objects in "Artifacts," read the descriptions of 15 crew positions in "Meet the Crew," and browse 16 pieces of logbook art, 36 photos, and 53 whaling-related images in the "Picture Gallery." An A-to-Z glossary offers definitions for 180 historical and whaling terms. Visitors can also explore the biographies of five people, including all of the members of the Jernegan family and, in "More About," can read 10 more 1,000-3,000-word essays on subjects like race and whaling, women and whaling, and 19th-century children's literature.

In the "For Teachers" section, educators can download two units on whaling: a four-lesson unit for grades 1–3, or a six-lesson unit for 4–5. "For Further Study" features a bibliography of 75 books for children and adults and eight annotated links.

A thorough website centered around a very unique primary source—use it to invite young children into history through the voice of a peer!

Animoto

Image
What is it?

Animoto takes photographs and allows users to add sound and text, as well as control some editing of the video project, in order to share stories through a short video presentation. Students will find the ability to express themselves through new media tools an attractive aspect of Animoto, and teachers can utilize this tool as a way to bridge curriculum and student engagement or develop digital storytelling projects. For students and teachers tired of PowerPoint presentations, Animoto is just as easy to use and provides a wider multimedia experience.

Getting Started

Pre-planning is a helpful first step in creating your video project. Gather all images and video clips and save them in a desktop folder. If a particular soundtrack serves the needs of the project, make sure the sound clip or song is in .mp3 format. Finally, on a piece of paper, sketch out the storyboard for the video—in particular the placement of text in the video. Animoto offers a handful of different account types that vary in price from personal to business.  The "Professional" account priced at $22/month ($264/year) is the most common and offers HD quality videos, more than 25 professional fonts, and pre-built storyboards.

Once images and videos are uploaded, users can click and drag images at will in order to construct a desired sequence. Other features allow users to spotlight certain images or videos for a more focused display during the final presentation...

After users open an account, the first step is to upload photos and videos via three options: from files on the computer, from Animoto's own collection of photographs, or from another website. Uploading images and videos from the computer allows users to select multiple files and conduct a batch upload. Once images and videos are uploaded, users can click and drag images at will in order to construct a desired sequence. Other features allow users to spotlight certain images or videos for a more focused display during the final presentation, add text slides, rotate and/or duplicate images, and delete any unwanted selections. It is worthwhile to note that one of Animoto’s biggest drawbacks is the limit placed on text entries. Text restrictions may prove to be frustrating for users, but one simple way to bypass these limits is to create a PowerPoint slide with the desired text, save that PowerPoint slide as a .jpg image, and then import the file as a picture into Animoto. Step two directs users to add a music file, or soundtrack, to the video either through Animoto’s own selection of songs or your own .mp3 files. Users can also select at which point the music begins. The final step is the editing process and finalization, where users can establish the speed of transitions, the design template, and select whether the video is short (30 seconds) or full length. After all selections are made, users go to the final section where the credit information is provided for the title of the video and the creator(s). Here is where Animoto users will find a second frustration: once everything is ready to go, users select “create video” and the process of finalizing the video can often take quite a while. Nevertheless, Animoto emails video creators once the video is finalized . . . so you don’t have to wait around. (Update: Animoto’s site updates may have fixed the speed delay in finalizing videos.)

Examples

Teachinghistory.org used a quick mock-up video at the 2011 AHA conference to show attendees how five simple images can tell a story. Other video examples include The American History of Chocolate, The Great Exchange, and Civil Rights.

For more information

Animoto’s website, as well as their education page.

USA Today’s blog TechnologyLive looks at the updates and improvements of Animoto.

Review an abstract on "Animoto and language acquisition in the classroom." İrgin, Pelin and Yildiz Turgut "Using Animoto for Language Education" The International Journal of Learning 16 (2009): 1-8.