Padlet
In a nutshell, Padlet is an online bulletin board. History teachers, however, can use this tool in myriad ways. For example, Padlet users can pose open-ended questions and elicit multiple student responses—ideal for posing document-based questions using primary sources. Users can also create their own "post-it" notes in response to a directed question. Teachers can also use Padlet as an online posterboard—a natural fit for group projects. Padlet can also function as a "bell-ringer" or "ticket-out-the-door" activity, as well as a homework assignment.
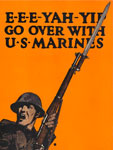
Although registering is not required, it is free and easy to do via Padlet's own registration portal, or using a Google (or Open ID) account. Once users are registered, they can create their first bulletin board and (in the top left corner) edit the title and description of the "wall." Teachers can create a topic, or simply post a question for students to answer. Users can also edit the image associated with the wall, which functions as an identifying logo. (Students looking to create a World War II wall could use, for example, a propaganda poster like Rosie the Riveter as the logo.) Lastly, users can select the design template and set access privileges (which includes a custom URL ID).
After the wall is established, users can add a "post-it" note by double-clicking anywhere on the wall. Text, audio, video, and images can be posted to the wall (videos and images automatically display a Zoom picture when clicked on—a temporary pop-up window for viewing.)
[Note: Do not place any "sticky notes" too close to the wall title and description. If the top of the sticky note is hidden underneath the wall title and description, it can be hard to move the note.]
An easy way to experiment with Padlet is to give it a try with a simple question. Once users become more accustomed to how Padlet functions, they can construct walls that employ more Web tools. We posted a sample question on a 1960s U.S. advertisement for a non-coffee product so that readers of this Tech for Teachers entry can add their own thoughts. Try it out! Leave a "sticky" note and tell us how you would respond to the coffee question, ad, and TV commercials.
Embedding an image for viewing and providing a directed question allow the coffee example to work like a document-based question (DBQ). Additionally, the coffee question can be expanded into other discussions. In this case, a YouTube clip on coffee advertisements opens up questions about gender relationships in 1950s-1960s America. The use of various multimedia sources makes historical questions more complex, engages students, and goes beyond what is possible in a traditional worksheet/whiteboard approach. By modeling specific uses for Padlet, teachers can also empower students to create their own effective walls for classroom use and history-based discussions.
A few technical issues are worth considering. Each sticky note is limited to 150 characters. Also, images heavy on text might not be legible, even in their zoom pop-windows. If this is the case, viewers can find larger images by either right-clicking the image and saving it to their desktop, or enlarging the zoom view on the computer screen. Lastly, and most problematically, the site tends to become tied up and non-responsive. We have encountered many instances when Padlet fails to load properly. However, the value of the tool should encourage users to be patient and hope for a more consistent service in the future. Padlet is a simple tool, but one that can accentuate the best teaching practices teachers employ on a day-to-day basis. For students, carefully posed questions will allow them to respond in many ways—which only helps classroom discussion.
Check out the Padlet Blog to see some other ideas for using Padlet.


 Quite traditionally, my American Government classes work through the three branches of government in their investigation of the American political scene. For the study of the Executive Branch, we look intently at the complex bureaucratic structures developed over time at various levels of government. I find that students often think that the Executive Branch is just the president or governor or mayor, but fail to consider the elaborate web of bureaucracy that the Executive Branch oversees. The end-of-unit project is based on the understanding of a selected bureaucratic “task.” The goal of the project is for the students to actually pursue the task by assembling and filling out paperwork, making phone calls, reading . . . reading . . . reading, and asking questions. At the end of all of it, the partnerships present the body of evidence with the paperwork, but also with a flowchart that details the process by which the average citizen would complete the task. They are to add in links, tips, tricks, hints, and such. At the completion of the project the students had to not only analyze the complex structures of government bureaucracy, but also produce a “deliverable.”