Mind Mapping: Visualizing Historical Thought

Image
What is it?

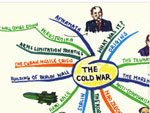
Mind Mapping applications are tools that allow students to develop a physical representation, a blueprint of their thinking that goes from the concrete to the more abstract. Mind Maps provide a clear and organized visual snapshot of how the ideas and information are outlined in one’s head. This way one can see where ideas need to be further developed and how all the information is linked. This snapshot is developed and analyzed by the student. He or she identifies the logical flow of ideas connecting one to the next and building on each in a web-like form. Mind Mapping is truly a revolutionary way of thinking and learning!

One Teacher's Experience:

As an educator I have found the electronic tool of Mind Maps to be pivotal in the success of some of my students, particularly when looking at students who are visual learners and mathematical/logical learners. I have also found that students in the special education classroom benefit from Mind Mapping. The tool allows them to demonstrate their understanding without the rigor of extensive writing. It also allows them to monitor their own understanding, and thus helps them continue to build toward metacognition . . . every educator’s dream.

Getting Started

Below are just a few of the many Mind Mapping sites available. I happen to be partial to Mindjet, but click on the links and check them out for yourself.

Examples

Furthermore Mind Mapping can be used in the following ways. Please note: this list details just a few ways to use this tool. There are countless ways to incorporate it into your classroom.

  • Vocabulary development—detailing what the word is, what it’s not, and examples
  • Outlining an essay or other form of writing
  • Viewing and analyzing differing points of view of two historical figures/events in history
  • Developing a timeline of a historic event
  • Comparing and contrasting events and people in history or present day issues
  • Identifying the main event and detailing the cause/s

My History at School

Teaser

To make something real, make it personal. Abstract concepts can best be understood when applied to individual experience.

lesson_image
Description

Access 7 activities which introduce the evidentiary and narrative aspects of history to young students. Students familiarize themselves with these topics by exploring their own past school experiences.

Article Body

This collection of activities found on the Bringing History Home website introduces first graders to important historical concepts. Through exploring the history of their time at school, students learn about topics such as chronology and historical context as well as how to identify and question different types of primary sources. While these concepts may seem fairly sophisticated for first or second graders, the activities introduce them in accessible and engaging ways. There are seven activities that make up this instructional unit. Each activity can stand alone as a single class lesson or can be combined with others for a multi-day lesson or unit. The first activity asks the question, "What is history," and distinguishes between fictional stories and stories about things that actually happened. Understanding history as a story is a central theme throughout the plan, and the subsequent activities focus on the centrality of evidence in creating historical stories.

Understanding history as a story is a central theme throughout the plan. . .

Activities three, four, and five introduce students to various types of evidence historians use to make sense of the past, through examining school artifacts such as a newsletter and cafeteria menu. In the final activity, students work as a class to construct a mind map about the history of their year at school. Students are then asked to draw a picture that illustrates one of the concepts from the mind map. Finally, students can be assessed by asking them to identify types of evidence that can provide particular types of information about the school. With a focus on making connections to students' experiences and teaching them that history is a story based on evidence, these clear and kid-friendly activities are an elegant way to introduce key aspects of history to young elementary students. Designed for first graders, these activities can be useful for both younger and older students.

Topic
Chronology, Historical context
Time Estimate
1-7 days
flexibility_scale
2
Rubric_Content_Accurate_Scholarship

Yes
Introduces students to core characteristics of the historical discipline.

Rubric_Content_Historical_Background

Yes

Rubric_Content_Read_Write

Yes
However, teachers must find text-based artifacts about their school (e.g. a newsletter) to use in the lesson.

Rubric_Analytical_Construct_Interpretations

Yes
Students are asked to analyze multiple pieces of evidence in order to construct a history of their time at school.

Rubric_Analytical_Close_Reading_Sourcing

Yes
Students are introduced to sourcing and are asked to consider source information in several activities. See this example. Questions are used to demonstrate the close reading of multiple kinds of sources.

Rubric_Scaffolding_Appropriate

Yes
A very accessible introduction to the idea that history is more than just a set of facts.

Rubric_Scaffolding_Supports_Historical_Thinking

Yes

Rubric_Structure_Assessment

Yes
Includes an assessment activity and rubric.

Rubric_Structure_Realistic

Yes, but no estimated times are provided for instruction.
A few activities rely on specific texts but substitute texts can be used.

Rubric_Structure_Learning_Goals

Yes

Using Old Maps as Tools to Explore Our World

Image
Article Body
What Is It?

In this bulletin board activity, students work collaboratively to explore sections of old maps. By closely examining these unique historical documents, students learn to see maps as more than just tools for locating places. And, whatever the grade level, this activity prompts students to grapple with the basic elements of the social studies: people, space, time, meaning, and purpose.

Rationale

Maps are essential tools in modern life but they also are primary source documents reflecting the people, time, and culture that produced them. They can be read at different levels and used for various purposes. In every case, however, some fundamentals of social learning can come into focus when a class looks carefully at a single map. Visual literacy, critical analysis, synthetic learning, and interdisciplinary thinking all come into play. But, maps are often too large to use at student desks. So a bulletin board activity based on cutting the map into manageable section—a "divide and conquer" strategy—provides a way out. If the map is not too big, enlarging it on a copy machine to clarify its details will often increase its pedagogical value.

Description

After selecting a map, the teacher should photocopy it with two concerns in mind:

  1. It should be a suitable size for an available bulletin board or display area. AND
  2. It should be divisible into a number of equal parts.

In the classroom, groups of students will work with single sections of the map, using a specific procedure (see Handout 1) that will help them uncover meaning in the map. When the separate pieces are reassembled at the end of the activity, the class will have a unique final product: a historical map with accompanying narrative captions that explain its significance. The bulletin board display can then be read by others in the school’s community, including other classes, teachers, parents and the general public.

Teacher Preparation
Maps, after all, can be compelling visual resources offering various ways to turn a class into a learning community.
  1. Scheduling: Place this lesson into your school’s curriculum and your course calendar. Decide if you want to do it once or several times with a series of maps distributed throughout the academic year.
  2. Determining goals: Choose the type of map that would be most appropriate for your learning objectives. For example, if your goal is to use maps at several different scales, you could feature four activities in the    course of the year using maps of the world, nation, state, and local community.
  3. Finding a map: Although current maps might be readily available, old maps are preferred because students will be able to see how they are "dated." By "datedness" we mean how they reflect not only past geographies and technologies, but also a former cultural and historical context. Help in finding suitable maps is available both on web pages and at your local library, historical society, community college, or state university’s map library.
  4. Exploring meaning: Once you have selected a map, find out as much about it as possible for    your own benefit. Why did you select it? What intrigues you about it? Make a list of    questions it raises, and keep a record of how you went about gathering information to help    you understand the map. Remember that the essence of your preparation is to provide a model for your students.
  5. Enlarging and dividing it: Enlarge the map using a photocopy machine. At the same time, divide it into manageable sections. If you have 36 students in class and want them to work in groups of six, you will need six sections to the map. Make at least two copies of these board-size segments so you can proceed without interruption if one of them is damaged.
  6. Making copies: If you have enough resources, make a small 8½ x 11 inch version of the whole map for each group or student.
  7. Gathering supplies: Make sure you have enough supplies for coloring the map (if necessary); stiff paper for making panels for call outs; ribbons for connecting points on the map with these commentaries; and tacks, pins, or tape to attach everything.
  8. Practice makes perfect: A "trial" mounting of the bulletin board at least a day before the lesson will point out potential problems.
  9. Planning evaluation: Along with your lesson plan, develop some type of evaluation procedure so that you will be prepared to share this lesson with colleagues and interested parties (a curriculum director, parents, or even a local newspaper). Photographs of the end result as well as the lesson's stages of development might prove to be of great value. Maps, after all, can be compelling visual resources offering various ways to turn a class into a learning community. You will know you are on your way to success as students begin to see maps as more than devices to locate places.
In the Classroom

NOTE: The below steps are outlined in Handout 1 which students can use to guide their work.

A draft is seldom good enough for a presentation copy, both in the classroom and in real life.
  1. Preparing students: First take a few minutes to set up the lesson, show students the focus map, explain how it fits into the curriculum, outline the six stages of the lesson using Handout 1, and then describe the end result. Then the class as a whole should develop a context for the map    by addressing the four questions in part one of the handout.
  2. Student groups: During Part Two divide the class into small groups, each of which will focus on one part of the map, developing questions and searching for answers as directed on Handout 1.
  3. Calling out details: Part Three centers on students developing "call outs" to point to some detail of interest on the map. If this device is new to the class, start by providing an example of a call out ("look how small that state is" or "what is the strange symbol?"). Also help students realize the importance of questions in reaching for understanding. Pairing students is one possible way to encourage them to exchange ideas.
  4. Monitoring presentations: Part Four offers several opportunities for you to step back into a leadership role as needed, perhaps rephrasing a group's tentative statements or emphasizing that a map is constructed by selecting some details and omitting others (e.g., a map's "silences").
  5. Writing commentaries: At this stage each student should "read" the map in his or her own way and make a statement about the map's meaning or purpose. Extend the lesson by editing these commentaries. All of them could be made available (on a rotating basis) at the side or bottom of the display.
  6. Polishing the apple: A draft is seldom good enough for a presentation copy, both in the classroom and in real life. You will need to decide how much time to spend here. In any event, "Polishing the Apple" offers opportunities for evaluation, assessment, and involving students with special needs or talents.
Common Pitfalls
  • The map selected may prove too challenging for some classes. This might be a good time to walk the students through the lesson and then use the map bulletin board approach again later in the term with a different map.
  • Mounting an attractive bulletin board that collects input from every student can be a daunting task. Seek help and guidance from art and English teachers. A media specialist might also be very helpful.
  • This lesson has the potential to grow like Topsy, so careful advance planning and time management are essential.
Example Maps
  • Community Map: Youngstown, OH, 1905-1906 This example is from an old "Quadrangle," map—a series produced by the U.S. Geological Survey since the 1890's. Every part of the nation is covered at once in this series of large-scale topographic maps. Other maps with this type of detailed local coverage can be found in county atlases, local history books, insurance atlases, and governmental records. Check with your community library to find a suitable map, especially one which includes the site of your school. This example is a detail from the Youngstown Quadrangle, edition of April 1908. It shows the Ohio city as it was in 1905-1906, the date of the survey. The small squares indicate residences.
  • State Map: Highway Map of Southern California, 1924 Secure an old highway map of your state. (These are often available at flea markets, second-hand shops, libraries, historical societies, on the internet, or from antique automobile enthusiasts.) This example is a detail from the "Highway Map of Southern California" given away by the Security Trust & Savings Bank of Los Angeles. The Automobile Club of Southern California produced the map in 1924 through the Clason Map Company of Los Angeles.
  • A Map of the United States, 1864 This map of the United States, entitled "Map of the Rebellion, As It Was in 1861 and As It Is in 1864" appeared in Harper’s Weekly, the leading news magazine of the time. The issue was dated March 19, 1864.
  • A World Map, 1792 The Abbe Gaultier developed this map in England. The author was a French educational reformer who believed that schools should be fun. It was produced in England because the author had fled from the French Revolution. Students can use this display copy to answer a series of questions asked by the teacher, receiving points according to the quality of their answers. Note that the map presents the geographical situation and knowledge of the time.
For more information

Cartography Associates. David Rumsey Map Collection. 2009. http//www.davidrumsey.com/. 20,000 antique maps.

Greenhood, David. Mapping. Chicago: University of Chicago Press, 1964. Originally published in 1944, this revised edition is still the best general introduction to maps.

Teachinghistory.org. "Featuring Maps!" History Education News 5, (2010). http://teachinghistory.org/files/HEN/HEN-05.pdf (accessed June 1, 2010).

Wood, Denis. The Power of Maps. New York: Guilford, 1992. An artist and designer looks at maps through modern eyes. In 2010 he will sharpen his perspective in Rethinking the Power of Maps.

And listen to Danzer explain map analysis at the Roy Rosenzweig Center for History and New Media's History Matters.

Truth in Transit: Crafting Meaningful Field Trips

Image
Article Body

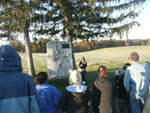
Dawn. The Blue Ridge Mountains, of Pennsylvania, in the western distance, down Chambersburg Pike have an ethereal purple hue as the sun captures their crest. Closer to the ground where we are standing the mist is beginning to lift this mid-October morning. Students and chaperones huddle close together to ward off the autumn chill. All is quiet for this moment I have planned. Reaching into my satchel I pull out my set of Tibetan bells. Asking for perfect stillness from my students and chaperones I bring the bells together. As their ring echoes and trails off, I invoke the Spirit of History to be with us this day as we explore the site of the largest battle of the Civil War. Seven hours later we will head back to West Springfield High School, and my students will never look at a historic site in the same way again.

. . . my students will never look at a historic site in the same way again.

This article will help you to craft deeply rich learning experiences for your students. The lens through which we will use to explore this topic is my annual pilgrimage to Gettysburg National Military Park. Any of the strategies modeled here can be easily adapted by you to use at any historic site you choose.

Prep Work

For any field trip, preparation is a necessity and that includes planning

  • the logistics of getting there,
  • making sure your students are fed, and
  • figuring out how, what, and where you want your students to learn.

Planning is essential, and yes it will take hours, but in the end everyone is rewarded for your hard work. Before you take students, visit the site yourself, several times if necessary. Speak with site staff about your visit and keep a sharp eye and ear attuned to the narrative told at the site. Pick up tidbits along the way that you can use to transform the total experience. If the site has audio-visual programs look at them and determine if you want your students to see them. Doing so will help you to determine your time frame for visiting the site. Your use of time is crucial, particularly if you are visiting a large site such as a battlefield.

Using Student Historians

Early on I learned that what makes a field trip more meaningful for students is getting them involved. I don’t want to simply be a tour guide. For our trip to Gettysburg I ask for student volunteers to teach all of us about what happened to certain individuals at site specific locations, what I term "battlefield vignettes." Working with the National Park Service staff at Gettysburg I assembled file folders of information about seven or eight people who were part of the Gettysburg story. Student historians are then given these folders about a week before the trip to help them to prepare for their presentations. At different stops along the way, we disembark from our motor coach, and the student historians share what they have learned about these characters and what happened to that person at the specific site from which they are speaking. This provides an optimum experience on a variety of levels; it sharpens students speaking skills, it allows peers to see others in action, and it forces the student historians to "get into" the story of their character and be a historian.

. . . student historians share what they have learned about these characters and what happened to that person at the specific site from which they are speaking.


The Teacher's Role on Site

My role on the trip is to provide necessary background information about the battle as we drive along in our bus. At different places we stop I will read dramatic primary source accounts of key moments in the battle. Before I read I ask everyone to take their minds' eye back to that time and place and settle in with the moment of the past. On the crest of Cemetery Ridge, at the Angle, where Pickett's Charge was repulsed, I read several eyewitness accounts of the actual combat that took place where we are standing as well as reflections on the site that were written the day after the battle was over. These prove to be powerful and moving as history becomes transcended.

Assessment

It is important to have students reflect on their experience and the best way to do that is to have them write reflective journal entries about their visit. (See here for example of prompt.) Entries are crafted to plumb not only the intellectual components of their visit but also their feelings, affirming what Ralph Waldo Emerson famously wrote, "There is no truth but in transit." Field trips can be the ultimate learning and teaching experience and provide you and your students not only a slice of history but a lifetime of memories as well.


Geo-Literacy Project: Students Explore Their World

Image
Article Body

Edutopia's Geo-Literacy Project is an interdisciplinary, project-based, approach to teaching local history that can be adapted for different locations. The goal of the project was to develop students' literacies. Throughout the project, students were guided by the essential question, why is the preservation of a local historical site—in this case, Rush Ranch—important? They explored the site from a number of perspectives, working with local experts and community partners to understand the local environment. They then built websites using primary sources, images, videos, and student-created reports. Older students helped them prepare the content for this website and use the technologies. Specifically, this project demonstrates two promising practices:

  • Using local history resources and issues to engage and challenge students.
  • Using technologies in the history/social studies classroom to further learning
Throughout the extensive project, students were investigating, using primary sources of information, problem solving, and finally, communicating their findings.
What's Notable?

This project-based approach teaches students to think about how the past relates to their own lives and how geography, geology, and history interact. Further, because the project asks students to present their findings through multimedia, web-based accounts, the project presents an opportunity to meaningfully use technology in the history/social studies classroom and share what they have learned with a larger audience.

Viewing Instructions

To view this example, either play it directly on the website or download it for free in iTunes.

Adapting Documents for the Classroom: Equity and Access

Image
Article Body
What Is It?

Preparing and modifying primary source documents so that all students can read and analyze them in their history classrooms.

Rationale

Although they are useful for engaging students in the past, and teaching them to think historically, primary source documents often use antiquated or complex language. This can pose a challenge even for able readers, let alone those who read below grade level. Adapting a variety of historical documents for use in the classroom will allow students greater access to important reading and thinking opportunities.

Description

Adapting documents for the classroom includes the use of excerpts, helpful head notes, and clear source information. It means adjusting documents for non-expert readers and making them shorter, clearer, and more focused. Adaptations can also include simplifying syntax and vocabulary, conventionalizing punctuation and spelling, cutting nonessential passages, and directing attention to a document's key components.

Teacher Preparation
  • Choose a document that is relevant to the historical question or topic that    your class is studying. Consider what you want students to get out of the    document. Will they try to unravel a historical puzzle? Corroborate    another document? Dive deeper into a particular topic? Write a focus    question for the lesson and the document.
  • Make sure that the source of the document is clear. State whether you    found it online or in a book, clearly identify when, where, by whom, and    for whom the source was originally created.
  • Create a head note that includes background information and even a brief    reading guide. This helps students to focus on what they're reading while    using background knowledge to make sense of it.
  • Focus the document. Although some documents may seem too important    to edit, remember that students may be overwhelmed by passages that    look too long. Judicious excerpting with a liberal use of ellipses makes any    document more approachable and accessible. If students are confused by    ellipses, shorten documents without them.

Consider simplifying the document. This can include the following modifications, but use them sparingly and carefully:

  • Cut confusing or nonessential phrases to make it shorter and easier to    follow
  • Replace difficult words with easier synonyms
  • Modify irregular punctuation, capitalization, or spelling

Every adaptation is a tradeoff, so when in doubt, consider whether a particular adaptation is necessary for your students to access, understand, and analyze the document. Work on presentation. Brevity is important, especially in making a document student-friendly. Other techniques to render a document approachable include:

  • Use of large type (up to 16 point font)
  • Ample white space on the page
  • Use of italics to signal key words
  • Bolding challenging words
  • Providing a vocabulary legend
In the Classroom
  • Devise a focus question to use with prepared documents. Introduce the    question to your class and explain that reading each document will help    them to answer it. (The focus question used in the example is "Why is the    Homestead Act historically significant?")
  • Explain that the document has been adapted to make it clearer and more    useful for today’s lesson. You can provide students with the original and    the adapted documents; or give them the adapted document, while    projecting the original on a screen.
  • Direct students’ attention to parts that have been added to the document.    Show them the document’s source information—its author, and the    circumstances of its publication—while discussing how such information    can help them understand the contents of a document. Show them the    head note.
  • Identify words that have definitions provided, reminding students to    underline or highlight other difficult words in the document in order to    build vocabulary skills.
  • Encourage students to notice any italicized words which indicate    emphasis and to make notes in the margins as they read.
  • Have students answer the focus question, using information and quotes as    evidence from the document to support their answers.
Have students answer the focus question, using information and quotes as evidence from the document to support their answers.

Extension: As students become more adept with using documents, discontinue some of the reading supports. A useful companion lesson is to let students compare the original document with the edited version, to make explicit the modifications and consider whether they changed the document’s meaning or not.

Common Pitfalls
  • Candidly explain that students are working with documents that have    been specially prepared for the classroom. A phrase such as "Some of the    language and phrasing in this document have been modified from the    original" posted at the bottom of the page may be useful. Make sure the    original document is available to students and allow anyone interested to    compare it with the adapted version.
  • Do be careful, however, that the adapted document doesn't seem less    valuable than the original. Emphasize to students that all historians    struggle with using documents from the past. Adapting documents is    simply a tool to help novice historians develop their skills and access    rich content.
  • Use this method also when students are using multiple documents. In this    case, instructional steps may be added to assist students in considering    how documents work together and to help them answer the focus    question.
  • The focus question should require that students read and understand the    document, and use it as evidence in supporting their answers.
An Example for High School Education

See here for original document, here for a transcribed version, and here for an adapted version of the Homestead Act of 1862.

An Example for Middle School Education

See here for a transcribed version of "What to the Slave is the Fourth of July?" by Fredrick Douglass, and here for an adapted version of the document for use in a middle school classroom. To view the original document, see Foner, Philip. The Life and Writings of Frederick Douglass, Volume II Pre-Civil War Decade 1850-1860 (New York: International Publishers, 1950).

An Example for Elementary Education

See here for an original version of John Smith’s "A True Relation." See here for an adapted version appropriate for an elementary school classroom.

Further Resources

For more examples of modified document sets, see Historical Thinking Matters. Select "Teacher materials and strategies," select one of the four topics, and then select "materials" and "worksheets." For original and transcribed versions of milestone documents in US history, see 100 Milestone Documents from the National Archives and Records Administration.

Bibliography

Biancarosa, Gina and Catherine E. Snow, Reading Next—A Vision for Action and Research in Middle and High School Literacy: A Report to Carnegie Corporation of New York, 2nd ed.Washington, DC: Alliance for Excellent Education, 2006.

Wineburg, S. and D. Martin. "Tampering with History: Adapting Primary Sources for Struggling Readers." Social Education (ex. 58, no 4) (2009).

Writing to Learn History: Annotations and Mini-Writes

Image
Article Body
What Is It?

Pre-writing strategies that help students understand content, think historically, and prepare for culminating writing assignments.

Rationale

Typically, essays are written at the end of a history or social studies unit, if they are written at all. This structure misses opportunities to help students engage with the material and learn how to read and write about primary and secondary sources. Integrating writing throughout the curricular unit allows students to grasp the content, learn how to think historically, and practice writing.

Integrating writing throughout the curricular unit allows students to grasp the content, learn how to think historically, and practice writing.

In annotating a text, students become active readers, asking and answering historical questions, making connections both to prior knowledge and other texts, and summarizing—all widely endorsed reading comprehension strategies. Mini-writes give students the chance to think through a topic. Since writing is thinking, a series of mini-writes lets students build their understanding in achievable stages, one document at a time. During this process they become familiar with available evidence and deepen their historical understanding.

Description

Annotating involves highlighting, underlining, and making marginal notes while reading a document. Some students have little experience annotating, or focus solely on reading comprehension. In such cases, explicit prompts to consider the source's author, perspective, and historical context can lead to better historical understanding. This may be done through teacher modeling followed by guided and independent practice. Ideally, informal writing exercises allow students to think through a historical document on their own, on paper. Mini-writes can be assigned at the beginning of class or as homework, and are used throughout the unit to develop student thinking and background knowledge.

Preparation
  • Choose a historical question to investigate over the course of a unit. It    should be open to interpretation, go beyond summarizing, and be an    appropriate focus for a final essay.
  • Select documents to help students respond to the unit question.
  • Identify aspects of each document that help students understand the    document and the larger unit question.
  • Create annotation guidelines and mini-write prompts that highlight the    aspects of the document that help students understand the document’s    time period, and key historical actors, events, and issues central to the    unit question.
  • Arrange students in pairs or groups to work on annotations and    exchange mini-writes.
In the Classroom
  • Model the best ways to annotate documents.
  • Have students annotate individually, in pairs, or in groups.
  • Ask students to complete mini-writes independently and then share    conclusions with a partner or the entire class.
  • Invite students to explain why they reached certain conclusions, using    excerpts from the documents.
  • Ask students to write a final essay in response to the unit question; if    annotations, mini-writes, and final essay are properly aligned, they will    serve as scaffolds for the final essay.
Common Pitfalls
  • Students may have little experience annotating, i.e., actively thinking with    pen in hand. Using an overhead, model how to annotate a document for    the purposes of increased historical understanding. Examples of useful    annotation include: asking questions and answering them while reading;    summarizing passages; considering an author’s point of view; analyzing    word choices; and making connections between a document and when it    was written. Good modeling can display a degree of expertise, while    demonstrating that even teachers learn by asking questions and    pondering a text.
  • In their annotations or mini-writes, students may focus too much on    reading comprehension, by defining words or summarizing a document's    main idea. However, the point of writing about a document is to    understand the author and his or her times. To push students beyond    summary, prompt them to consider an author's purpose, the context of    the author's life, and their perspective.
  • Students who are unsure of how to respond to a document can be helped    by highlighting phrases or asking questions like, "What does the author    mean when he says this?" or "Why would the author say this?" Breaking a    document into components is a more concrete and manageable approach    than trying to respond to an entire document. As students become more    comfortable with document analysis, increase the challenge by assigning a    full page of text or an entire document.
  • If students make only vague references to a document in their mini-writes,    ask them to cite a particular passage and to explain their interpretation.    Teachers can get students into the habit of making specific references to    the text by prompting them during a discussion or in written feedback.
Good modeling can display a degree of expertise, while demonstrating that even teachers learn by asking questions and pondering a text.
Example:

The Spanish-American War unit from Historical Thinking Matters investigates the question:

Why did the United States invade Cuba in 1898?

To answer this question thoughtfully, students need to consider a range of evidence, multiple causes, and perspectives from the time period. As they analyze documents in writing, students become familiar with the causes of U.S. imperialism in 1898. Handouts help students to use annotations and mini-writes in responding to three documents that relate to the central inquiry question and lead to an evidence-based essay. Handout 1 models how to annotate a document and offers sample guidelines. Handout 2 provides guidelines for annotating a second document. Handout 3 gives a mini-write prompt in response to an additional document.

Acknowledgments

I thank teacher Vince Lyle for helping me see the value of annotations and mini-writes in the history classroom. I thank Historical Thinking Matters for offering rich document sets, one of which I use here.

Bibliography

Lehning, James R. "Writing About History and Writing in 'History.'" The History Teacher 26, no 3 (1993): 339-349.

Monte-Sano, Chauncey. "The Intersection of Reading, Writing and Thinking in a High School History Classroom: A Case of Wise Practice." Presentation, Annual Meeting of the American Educational Research Association, New York, NY, day-day 2008.

A Brush With History: Paintings from the National Portrait Gallery

Image
Annotation

Visitors to this site can view 76 portraits of prominent Americans, drawn from the Gallery's collections. The paintings are arranged in chronological order, from the 1720s to the 1990s. Featured artists include famous 18th and 19th century portraitists Gilbert Stuart and John Singer Sargent, as well as more abstract 20th century artists like Marguerite Zorath and Alex Katz. The wide variety of subjects includes Benjamin Franklin, popular music icon Michael Jackson, 20th century dancer and choreographer Martha Graham, and Cherokee statesman Sequoyah. A brief (200-250 word) biography of the subject accompanies each portrait, along with the artist's name (if known), the year painted, the medium, and accession information. For those interested in American portraiture from colonial times to the present, this site provides a sampler of changing styles and subjects.

American Presidents

Teaser

Analyze letters written by America's presidents to learn more about these men.

lesson_image
Description

Critically analyze letters written by America's presidents to learn more about these men.

Article Body

With a nice set of analytic questions to use with each president’s letter, this lesson is sleek, yet its content coverage is broad. Questions ask students to think about a letter’s audience, purpose and tone and are phrased in student-friendly language. Using several letters across instructional units or in several class periods will provide students with multiple opportunities to develop their ability to critically examine letters as historical documents. The letters for each president vary in both content and difficulty level, some may be more appropriate for your class than others. Students may also need help with considering the President’s words in his own time and contextualizing the letter.

The lesson provides several writing assignments for a closing activity. Assignments 1 and 2 ask students to write about the letter’s purpose and content. These tasks only require students to summarize the information from the earlier part of the lesson so we recommend assignments 3, 4 and 5. Assignment 3 asks students to assess the historical value of the letter and assignment 5 asks students to respond to the letter from the point of view of the letter’s original recipient. Teachers may want to remind students to use quotes and information from the examined letter to support their claims in these writing assignments.

Topic
The American Presidents
Time Estimate
1 class session per letter; 41 letters available.
flexibility_scale
2
Rubric_Content_Accurate_Scholarship
Yes.
Lesson focuses on primary sources.
Rubric_Content_Historical_Background

Yes Limited background information about each president's public and private life is available on the the website.
Some of the writing assignments, #4 in particular, will require teachers to provide additional information.

Rubric_Content_Read_Write

Yes Students read a primary source and write in response to that source.

Rubric_Analytical_Construct_Interpretations

Yes Questions require students to use evidence to support claims.

Rubric_Analytical_Close_Reading_Sourcing

Yes Great set of questions guides students through this analysis.

Rubric_Scaffolding_Appropriate

Yes Several of the letters will be difficult to comprehend for some middle and high school students.

Rubric_Scaffolding_Supports_Historical_Thinking

Yes Questions in the lesson are designed to help students think about the perspective, intent, and audience of the letter.

Rubric_Structure_Assessment

No Students write answers to questions and use those answers to complete a final writing assignment. Options 3, 4, and 5 require that students use their analysis and evidence from the letter to make a case. Assessment criteria absent.

Rubric_Structure_Realistic

Yes Materials are web-based but can be printed for classroom use.

Rubric_Structure_Learning_Goals

No There are clear skill objectives. Teachers will need to establish objectives regarding specific content.

Samuel J. May Anti-Slavery Collection

Image
Annotation

This is one of the richest collections of anti-slavery and Civil War materials in the world. Reverend Samuel J. May, an American abolitionist, donated his collection of anti-slavery materials to the Cornell Library in 1870. Following May's lead, other abolitionists in the U.S. and Great Britain contributed materials. The collection now consists of more than 10,000 pamphlets, leaflets, broadsides, local anti-slavery society newsletters, sermons, essays, and arguments for and against slavery. Materials date from 1704 to 1942 and cover slavery in the United States and the West Indies, the slave trade, and emancipation. More than 300,000 pages are available for full-text searching. Accompanying the documents are eight links to other collections.