The Disaster of Innovation

field_image
Question

What was the effect of the cotton gin on slaves?

Answer

Eli Whitney patented his cotton engine, or “gin,” in 1794. A mechanical device to separate cotton fibers from cotton seed, it dramatically lowered the cost of producing cotton fiber. Formerly, workers (usually slaves) had separated the seeds from the lint by hand, painstaking work that required hours of work to produce a pound of lint. By mechanizing the process, the gin could produce more than 50 pounds of lint per day. Cotton fabric, formerly quite expensive due to the high cost of production, became dramatically cheaper, and cotton clothing became commonplace. In the early decades of the 19th century, Southern farmers shifted more and more of their acreage into highly profitable cotton production, and large-scale plantation agriculture became common in the Deep South states of Georgia, Mississippi, Alabama, and Louisiana. The gin’s effect on the economy and on the lives of the slaves who made up a significant part of that economy was complex. The cotton gin freed slaves from the arthritic labor of separating seeds from the lint by hand. At the same time, the dramatically lowered cost of producing cotton fiber, the corresponding increase in the amount of cotton fabric demanded by textile mills, and the increasing prevalence of large-scale plantation agriculture resulted in a dramatic increase in the demand for more slaves to work those plantations. Overall, the slave population in the South grew from 700,000 before Whitney’s patent to more than three million in 1850—striking evidence of the changing Southern economy and its growing dependence on the slave system to keep the economy running. Cotton cultivation proved especially well-suited to slave labor. A relatively delicate plant, growing and harvesting cotton was a labor-intensive process. On large Southern plantations, much of that labor was provided by slaves working in gangs. Gang labor fit the slave system particularly well: dozens of slaves collected into a work crew could be supervised by a single white overseer, which made for more efficient work. Unlike solitary jobs like shepherding, which made constant supervision of individual slave workers extremely difficult from a practical standpoint, gang labor in the cotton fields allowed one overseer to supervise (and, when necessary, to discipline and punish) large numbers of slaves simultaneously.

Any invention that encouraged the growth and expansion of the institution increased the misery of slaves in the aggregate acutely

On large cotton plantations both the work and the punishments were unremitting and unforgiving. During the height of harvesting season, slaves worked from sunup to sundown; when the moon was full, they worked into the night as well. Slaveowners varied in their reputations for physical violence, but none eschewed punishment completely in the quest to extract more labor from their charges. Beatings and whippings were frequently used to coerce recalcitrant slaves; slaves who resisted labor or attempted to escape were punished with mutilation, sale away from their families, and occasionally death. There is no simple calculus to determine whether and how the cotton gin affected the lives of individual slaves. It is possible that the adoption of the gin made the working hours of a few individual slaves somewhat less difficult. However, given the barbarity of slavery generally—rampant physical and sexual abuse, the separation of families, lives of forced labor in acute deprivation, and the overarching dehumanization that the system enforced—it seems clear that any invention that encouraged the growth and expansion of the institution increased the misery of slaves in the aggregate acutely. Given the cotton gin’s effects on the spread of large-scale cotton agriculture and the resultant growth in the institution of slavery in the first half of the 19th century, it is difficult to portray its introduction as anything other than a disaster from the perspective of enslaved African-Americans.

For more information

Economic History Association. EH.net Hounshell, David. From the American System to Mass Production, 1800-1932: The Development of Manufacturing Technology in the United States. Baltimore: Johns Hopkins University Press, 1984. Patents as Primary Sources Plantation Agriculture Museum The University Library at the University of North Carolina at Chapel Hill. Documenting the American South, 2004.

Bibliography

Gray, Lewis Cecil. History of Agriculture in the Southern United States to 1860, vol. 2. Gloucester, MA: Peter Smith, 1958. Reidy, Joseph P. From Slavery to Agrarian Capitalism in the Cotton Plantation South, Central Georgia, 1800–1880. Chapel Hill: University of North Carolina Press, 1992.
TeacherServe

Image
Annotation

These three collections of essays, commissioned from distinguished scholars are designed to deepen content knowledge in American history and offer fresh ideas for teaching. Essays include many links to primary source texts in the National Humanities Center’s Toolbox Library. Divining America: Religion in American History features 36 essays, divided into three subcategories: "The 17th and 18th Centuries," "The 19th Century," and "The 20th Century." Topics range from "Native American Religion in Early America" to "The Christian Right," and include Puritanism, the First and Second Great Awakenings, abolitionism, Islam in the U.S., African American Christianity, American Jewish experience, U.S. Roman Catholicism, and Mormonism. Nature Transformed: The Environment in American History features 17 essays, divided into "Native Americans and the Land," "Wilderness and the American Identity," and "The Use of the Land." These focus on the changing ways in which North Americans have related to the natural world and its resources. Topics include, “The Columbian Exchange,” “The Effects of Removal on American Indian Tribes,” “Cities and Suburbs,” and “Environmental Justice for All.” Freedom's Story: Teaching African American Literature and History addresses topics ranging from the early 1600s through to contemporary times. These 20 essays include, “How to Read a Slave Narrative,” “Segregation,” “The Trickster in African American Literature,” “Jazz in African American Literature,” and “The Civil Rights Movement: 1968-2008.” Essays provide an overview of the topic. “Guiding Discussion” offers suggestions on introducing the subject to students, and “Historians Debate” notes secondary sources with varied views on the topic. Notes and additional resources complete each essay.

Mystery Strategy for Elementary Students

Image
Article Body
What Is It?

Using the premise of a mystery to solve, elementary students act as history detectives as they explore a historical question and analyze carefully chosen clues to formulate and test hypotheses.

Rationale

This strategy depends on our need to solve mysteries. Students are given an opportunity to be active learners as they solve a historical mystery. This strategy relates to what historians do and the process of historical inquiry. Students must work with evidence, form hypotheses, test those hypotheses, and report their findings.

Goals

The goals of the mystery strategy are to learn to: 1. gather, organize, and process information; 2. formulate and test hypotheses; 3. think creatively and analytically to solve problems; and 4. develop, defend, and present solutions to problems.

Teacher Preparation

1. Choose an topic that contains a mystery such as “Why did the American beaver almost become extinct in the 1840s?” Other examples of appropriate historical mysteries include: “How did flooding in Mississippi in 1931 hinder the Civil Rights Movement?”; “Who really invented the cotton gin?”; and “Was the Boston Massacre really a massacre?”

Data should tease the student without revealing too much.

2. Gather primary and secondary sources that will serve as clues for students such as letters, diary entries, maps, statistical tables, political cartoons, images, artifacts for students to touch (in this case beaver fur or felt), and web articles. These sources should pique students’ interest and provide them with clues that will help them generate theories. For example, if students are given a clue regarding the habitat and species characteristics of the beaver and then also told John Jacob Astor was the wealthiest man in America in 1848 it is hoped they conclude that Astor’s wealth had something to do with the beaver. Maps indicating trade routes should confirm this conclusion. Though they may be encountering names in the clues for the first time, making educated guesses is an essential ingredient to the mystery strategy. Students should not be afraid of making guesses or presenting ideas to the larger group. The learning goal is about what it takes to arrive at a hypothesis rather than ending up with a right answer. 3. Decide student grouping. If using small groups, keep individual needs in mind such as reading levels, ability to work with others, and Individual Education Plans (IEPs). 4. Decide how to present the clues to students (strips of paper within envelopes at stations, single sheets of paper for them to cut apart, etc.). See examples of clues for additional clues. Teachers should read through materials to pull clues that fit students’ needs and abilities.

In the Classroom

1. Students read through clues and sort them according to common elements. Once the clues are sorted, students begin to work on their hypothesis. 2. As students analyze the clues and arrive at a hypothesis, use guiding questions such as, “Tell me how the two things relate” and “What’s your reason for thinking that?” to keep students focused on solving the mystery. Avoid guiding them in a direction. The goal is for students to work with the clues and arrive at their own hypothesis. Students can use the Mystery Writing Guide Worksheet to record ideas. 3. In a whole group, have small groups share their hypotheses and evaluate them. Are they logical based on the clues? Do they make sense? Write group responses on the board so students can track their findings as they move through the evidence. The goal is to test each group hypothesis and arrive at the best conclusion. For example, if one group understands there is a connection between the mountain men and the beaver yet they also think the railroads had a role in the problem, do the clues support or refute these ideas? Remind students they are like historians looking at information to form a hypothesis, test it, and arrive at a conclusion.

Students are asked to think about the process of historical inquiry and how it relates to the steps they followed to arrive at a hypothesis

4. Assign each student a written reflection piece on the content learned and the process used to uncover the mystery. This is the most important part of the mystery strategy and should go beyond merely reporting content. Prompt students with questions such as: What happened in the activity? What things did you do well? Most importantly, ask, Which hypothesis best answers the mystery question? Why?

Common Pitfalls
  • Data should tease the student without revealing too much.
  • Data should hone inference skills.
  • Clues should provide information not an explanation (see Mystery Strategy Clues Worksheet).
Example

Students are presented with the following problem: Why did the American beaver almost become extinct in 1840? Write the question on the board so it is visible throughout the activity. Anticipatory Set: Begin by employing a student’s knowledge of science and ecosystems learned earlier. Give a short presentation about the American Beaver. This would include the fact that beavers maintain dams that create ponds. The water level in these ponds is constant, encouraging the growth of vegetation that supports many other types of animals. The dams also keep summer rains and resulting erosion in check. The presentation could end with figures about the number of beavers estimated to be in North America from European settlement to today (see links below). Students would see a significant decline in the population during exploration and settlement. This decline leads students to the essential question and they can begin working with the clues to make hypotheses. Clues: Clues can be obtained from….

  • images from fashion catalogs from the mid-1800s;
  • real beaver pelt and/or beaver trap, scraps of commercial felt, or images of    beaver fur and hats;
  • short biographical sketches of mountain men such as Kit Carson, John    Liver-Eating Johnston, and William Sublette;
  • Advertisements for beaver products such as top hats and ads from trading    companies seeking hunters. Scroll down through each page for the    aforementioned images.
  • newspaper accounts regarding skirmishes/battles between the Iroquois    Confederation/other tribes in the Great Lakes region in the Beaver Wars;
  • Quotes from all parties involved in the fur trade (Native American chiefs,    trading company owners such as Manuel Lisa, mountain men, etc.)
  • Pictures of people wearing beaver hats;
  • John Jacob Astor.

Be sure to use some visuals! Reflection: Students reflect on the original question by presenting their hypotheses in written form. Along with their response about the disappearance of the beaver, students are asked to think about the process of historical inquiry and how it relates to the steps they followed to arrive at a hypothesis.

Bibliography

American Beavers. Silver, Harvey.F., et. al. Teaching styles & strategies. Trenton, NJ: The Thoughtful Education Press, 1996.

Using Old Maps as Tools to Explore Our World

Image
Article Body
What Is It?

In this bulletin board activity, students work collaboratively to explore sections of old maps. By closely examining these unique historical documents, students learn to see maps as more than just tools for locating places. And, whatever the grade level, this activity prompts students to grapple with the basic elements of the social studies: people, space, time, meaning, and purpose.

Rationale

Maps are essential tools in modern life but they also are primary source documents reflecting the people, time, and culture that produced them. They can be read at different levels and used for various purposes. In every case, however, some fundamentals of social learning can come into focus when a class looks carefully at a single map. Visual literacy, critical analysis, synthetic learning, and interdisciplinary thinking all come into play. But, maps are often too large to use at student desks. So a bulletin board activity based on cutting the map into manageable section—a "divide and conquer" strategy—provides a way out. If the map is not too big, enlarging it on a copy machine to clarify its details will often increase its pedagogical value.

Description

After selecting a map, the teacher should photocopy it with two concerns in mind:

  1. It should be a suitable size for an available bulletin board or display area. AND
  2. It should be divisible into a number of equal parts.

In the classroom, groups of students will work with single sections of the map, using a specific procedure (see Handout 1) that will help them uncover meaning in the map. When the separate pieces are reassembled at the end of the activity, the class will have a unique final product: a historical map with accompanying narrative captions that explain its significance. The bulletin board display can then be read by others in the school’s community, including other classes, teachers, parents and the general public.

Teacher Preparation
Maps, after all, can be compelling visual resources offering various ways to turn a class into a learning community.
  1. Scheduling: Place this lesson into your school’s curriculum and your course calendar. Decide if you want to do it once or several times with a series of maps distributed throughout the academic year.
  2. Determining goals: Choose the type of map that would be most appropriate for your learning objectives. For example, if your goal is to use maps at several different scales, you could feature four activities in the    course of the year using maps of the world, nation, state, and local community.
  3. Finding a map: Although current maps might be readily available, old maps are preferred because students will be able to see how they are "dated." By "datedness" we mean how they reflect not only past geographies and technologies, but also a former cultural and historical context. Help in finding suitable maps is available both on web pages and at your local library, historical society, community college, or state university’s map library.
  4. Exploring meaning: Once you have selected a map, find out as much about it as possible for    your own benefit. Why did you select it? What intrigues you about it? Make a list of    questions it raises, and keep a record of how you went about gathering information to help    you understand the map. Remember that the essence of your preparation is to provide a model for your students.
  5. Enlarging and dividing it: Enlarge the map using a photocopy machine. At the same time, divide it into manageable sections. If you have 36 students in class and want them to work in groups of six, you will need six sections to the map. Make at least two copies of these board-size segments so you can proceed without interruption if one of them is damaged.
  6. Making copies: If you have enough resources, make a small 8½ x 11 inch version of the whole map for each group or student.
  7. Gathering supplies: Make sure you have enough supplies for coloring the map (if necessary); stiff paper for making panels for call outs; ribbons for connecting points on the map with these commentaries; and tacks, pins, or tape to attach everything.
  8. Practice makes perfect: A "trial" mounting of the bulletin board at least a day before the lesson will point out potential problems.
  9. Planning evaluation: Along with your lesson plan, develop some type of evaluation procedure so that you will be prepared to share this lesson with colleagues and interested parties (a curriculum director, parents, or even a local newspaper). Photographs of the end result as well as the lesson's stages of development might prove to be of great value. Maps, after all, can be compelling visual resources offering various ways to turn a class into a learning community. You will know you are on your way to success as students begin to see maps as more than devices to locate places.
In the Classroom

NOTE: The below steps are outlined in Handout 1 which students can use to guide their work.

A draft is seldom good enough for a presentation copy, both in the classroom and in real life.
  1. Preparing students: First take a few minutes to set up the lesson, show students the focus map, explain how it fits into the curriculum, outline the six stages of the lesson using Handout 1, and then describe the end result. Then the class as a whole should develop a context for the map    by addressing the four questions in part one of the handout.
  2. Student groups: During Part Two divide the class into small groups, each of which will focus on one part of the map, developing questions and searching for answers as directed on Handout 1.
  3. Calling out details: Part Three centers on students developing "call outs" to point to some detail of interest on the map. If this device is new to the class, start by providing an example of a call out ("look how small that state is" or "what is the strange symbol?"). Also help students realize the importance of questions in reaching for understanding. Pairing students is one possible way to encourage them to exchange ideas.
  4. Monitoring presentations: Part Four offers several opportunities for you to step back into a leadership role as needed, perhaps rephrasing a group's tentative statements or emphasizing that a map is constructed by selecting some details and omitting others (e.g., a map's "silences").
  5. Writing commentaries: At this stage each student should "read" the map in his or her own way and make a statement about the map's meaning or purpose. Extend the lesson by editing these commentaries. All of them could be made available (on a rotating basis) at the side or bottom of the display.
  6. Polishing the apple: A draft is seldom good enough for a presentation copy, both in the classroom and in real life. You will need to decide how much time to spend here. In any event, "Polishing the Apple" offers opportunities for evaluation, assessment, and involving students with special needs or talents.
Common Pitfalls
  • The map selected may prove too challenging for some classes. This might be a good time to walk the students through the lesson and then use the map bulletin board approach again later in the term with a different map.
  • Mounting an attractive bulletin board that collects input from every student can be a daunting task. Seek help and guidance from art and English teachers. A media specialist might also be very helpful.
  • This lesson has the potential to grow like Topsy, so careful advance planning and time management are essential.
Example Maps
  • Community Map: Youngstown, OH, 1905-1906 This example is from an old "Quadrangle," map—a series produced by the U.S. Geological Survey since the 1890's. Every part of the nation is covered at once in this series of large-scale topographic maps. Other maps with this type of detailed local coverage can be found in county atlases, local history books, insurance atlases, and governmental records. Check with your community library to find a suitable map, especially one which includes the site of your school. This example is a detail from the Youngstown Quadrangle, edition of April 1908. It shows the Ohio city as it was in 1905-1906, the date of the survey. The small squares indicate residences.
  • State Map: Highway Map of Southern California, 1924 Secure an old highway map of your state. (These are often available at flea markets, second-hand shops, libraries, historical societies, on the internet, or from antique automobile enthusiasts.) This example is a detail from the "Highway Map of Southern California" given away by the Security Trust & Savings Bank of Los Angeles. The Automobile Club of Southern California produced the map in 1924 through the Clason Map Company of Los Angeles.
  • A Map of the United States, 1864 This map of the United States, entitled "Map of the Rebellion, As It Was in 1861 and As It Is in 1864" appeared in Harper’s Weekly, the leading news magazine of the time. The issue was dated March 19, 1864.
  • A World Map, 1792 The Abbe Gaultier developed this map in England. The author was a French educational reformer who believed that schools should be fun. It was produced in England because the author had fled from the French Revolution. Students can use this display copy to answer a series of questions asked by the teacher, receiving points according to the quality of their answers. Note that the map presents the geographical situation and knowledge of the time.
For more information

Cartography Associates. David Rumsey Map Collection. 2009. http//www.davidrumsey.com/. 20,000 antique maps.

Greenhood, David. Mapping. Chicago: University of Chicago Press, 1964. Originally published in 1944, this revised edition is still the best general introduction to maps.

Teachinghistory.org. "Featuring Maps!" History Education News 5, (2010). http://teachinghistory.org/files/HEN/HEN-05.pdf (accessed June 1, 2010).

Wood, Denis. The Power of Maps. New York: Guilford, 1992. An artist and designer looks at maps through modern eyes. In 2010 he will sharpen his perspective in Rethinking the Power of Maps.

And listen to Danzer explain map analysis at the Roy Rosenzweig Center for History and New Media's History Matters.

Building the Erie Canal

Teaser

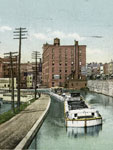
Cutting through New York from the ocean to the Great Lakes, the Erie Canal changed lives.

lesson_image
Description

How would the Erie Canal have changed your life and the lives of those around you? Politics, trade, and the land itself were all affected.

Article Body

This lesson from Teachers’ Domain examines how the construction of the Erie Canal affected the geographic, economic, and political landscape of the United States. In exploring these issues, students are presented with four computer-based activities.

The first two activities—viewing documentary video clips—are engaging, brief, and informative. These clips could be projected to the whole class if a teacher does not have access to multiple computers.

The third—an interactive graphic organizer—allows students to categorize different consequences of the construction of the Erie Canal in terms of geographic, political, and economic effects. The interactive graphic organizer allows students to draw connections between consequences in different categories and explain how they are interconnected in a pop-up comment box. After they are done, students can print out the graphic organizer.

The final activity in the lesson, which requires students to read and write, can be done either on a computer or not. It asks students to synthesize information from the video clip and a background reading (available in two different reading levels), and students can choose from three different writing assignments.

Topic
Erie Canal
Time Estimate
1 day
flexibility_scale
5
Rubric_Content_Accurate_Scholarship

Yes
Featured video contains interviews with reputable scholars.

Rubric_Content_Historical_Background

Yes
Historical background provided in videos and handouts.

Rubric_Content_Read_Write

Yes
Students take notes throughout the assignment and write a short essay evaluating the major changes resulting from the construction of the Erie Canal.

Rubric_Analytical_Construct_Interpretations

Yes
Using evidence from the documentary video and a background reading, students assess and examine the economic, political, and geographic effects of the Erie Canal on the nation.

Rubric_Analytical_Close_Reading_Sourcing

No

Rubric_Scaffolding_Appropriate

Yes
Two versions of background handout are included for different grade levels.

Rubric_Scaffolding_Supports_Historical_Thinking

Yes
A graphic organizer helps students organize their ideas and draw connections between the various effects resulting from the Erie Canal’s construction.

Rubric_Structure_Assessment

Yes
Students can write an essay on the canal’s effects on America or New York State. Students can write a journal from the perspective of someone who experienced the effects of the Erie Canal five years after its construction.

Rubric_Structure_Realistic

Yes

Rubric_Structure_Learning_Goals

No
Requires access to multiple computers, but can be adapted for classroom use in which only one computer and a projector are needed to stream the video.

U.S. Congressional Serial Set, 1817-1994

Image
Annotation

[SUBSCRIPTION REQUIRED] This vast archive includes many documents and reports produced by the U.S. Senate and House of Representatives and published between 1817 and 1980, for a total of more than 355,000 items. These items include 48,000 maps, 9,000 illustrations, thousands of reports, and numerous records of committee hearings and floor proceedings. All items are full-text searchable and can be browsed by subject, such as education, economics, food and agriculture, health, Indian affairs, armed forces and conflicts, environment and natural resources, and social issues. Within each of these broad categories, there are hundreds of subject headings, such as "animal welfare" (83 items), "alien labor" (306 items), and "ordnance testing" (353 items). The "Indian Affairs" category, for example, presents thousands of items on agencies and organizations relating to Indian affairs, Indian reservations, treaties, names of Indian tribes, as well as documents relating to hundreds of laws and supreme court cases. There is also a bill number search, an alphabetical list of names of all acts of Congress, and a listing of all documents by U.S. Congress session. All documents can be downloaded in PDF format. In addition, a separate browse feature entitled "Serial Set Maps" facilitates access to thousands of maps from counties and cities across the country. Many of these date to the Civil War-era or later and include images of forts and depictions of field operations. Readex plans to expand coverage through 1994.

Peace Corps

Article Body

The Peace Corps has a three-fold mission. First and foremost, the organization sends volunteers to communities around the world which have requested assistance in creating sustainable solutions to real world problems. Second (and third, really), is an interest in increasing international understanding and friendship—of non-Americans for Americans and vice versa.

One of the most exciting options the Peace Corps offers educators is the World Wise Schools Correspondence Match program. The program permits educators to request a pen pal relationship with a Peace Corps volunteer in a region of the world and area of interest (agriculture, business, education, health, or environment) of their choosing. Maybe your students could discuss the lasting impact of the Vietnam War with a volunteer in Southeast Asia or how U.S. business history has altered life in China or Central America. This could also be an excellent way to introduce social studies students to the connection between history and geography and fields more often taught at the collegiate level, such as anthropology and international relations.

Another feature offered is a collection of more than 120 lesson plans. These are not focused on history per se, but you may be able to find a lesson which will strengthen themes you are pursuing in the classroom. One such lesson involves planning a service learning project. Oral histories are a classic way to combine service learning and history.