Amy Trenkle on Experiencing the First Amendment

Date Published
Image
Photo, students learning linoleum-cut printing
Article Body
Welcome our blog's first guest writer!

In the future, look for more entries by practicing teachers we've selected to bring you their experiences connecting students with primary sources and/or using technology and digital resources to support and enrich their teaching. Teachers will come from elementary, middle, and high school; some have been teaching for years and some have just started out. Each will have their own unique insights on teaching U.S. history and social studies.

Amy Trenkle teaches 8th-grade U.S. history at Stuart-Hobson Middle School in Washington, DC. A National Board Certified Teacher in early adolescence social studies/history, she has taught in DC since 1999. Amy believes in experiential learning and using the museums in her city and across the country to make concrete connections for her students to their history curriculum. She has served on several advisory boards to local museums, including the Smithsonian Center for Education and Museum Studies, the National Museum of American History, the Newseum and the National Building Museum. An active participant in the DC Council for the Social Studies, National Council for the Social Studies, and DC Geographic Alliance, Amy the received the DC History Teacher of the Year Award in 2005 as sponsored by the Gilder Lehrman Institute of American History. Currently, Amy is serving as an adjunct professor of education at American University.

Picturing the First Amendment

This year, celebrating Constitution Day was a school-wide affair.

Thanks to a special grant opportunity offered through the Newseum and 1 for All, students at my school became aware of, or reviewed, their First Amendment rights.

Students took a field trip to the Newseum, where they had a class taught by a Newseum educator about the First Amendment, and then visited the First Amendment Gallery, both highlighting issues related to the First Amendment today.

Upon returning to school, students in each grade level shared what they learned in different forms. The 5th grade made sidewalk chalk drawings, the 6th graders made a mural about their First Amendment rights, 7th graders left their impressions of the First Amendment via window drawings with washable window paint, and 8th graders made a linoleum print about the First Amendment.

Finding Your Freedoms

As the 8th-grade U.S. History teacher, I really wanted to emphasize the importance of the First Amendment—we will be studying it more in-depth later this year, but what a great opportunity to bring it to life now! To prepare my students for this trip, we took a walk around several blocks near the school. Students listed as much evidence as they could for our five First Amendment rights in action. I directed them not to just look for signs, but to listen for them and to really observe.

Students came up with the following:

  • Assembly: We are all walking as one group on the sidewalk.
  • Religion: The Imani Temple Church, Tibetan worship flags, a cross (for Christianity)
  • Speech: the Redskins sign, bumper stickers on car, mayoral candidate signs
  • Press: Newspaper stands, Washington Post newspaper

Armed with our examples in our neighborhood, I felt we were ready for our field trip. We had a great time—the students LOVE going to the Newseum. As a teacher, I felt that they deepened their understand of the First Amendment and connected it to what we did in class.

What Do Freedoms Look Like?

Our final activity, upon our return, was to synthesize what we learned through a print. Students were first asked to choose one of the five parts of the First Amendment to focus on. They then were tasked with finding a quote, lyrics, or saying that they felt related to that part of the First Amendment, and to cite it. Then, they drew a sketch of how they would illustrate this on a print.

The next day a local artist, Alexandra Huttinger, came in and taught the students how to make linoleum-cut prints. Each student carved his/her own linoleum and then printed their print. They then wrote what their print was about. These will be displayed in our school's foyer.

Taylor chose to focus on the Freedom of Assembly because "the right to assemble is very important to me." She chose to illustrate her drawing as she did because "to protest you could have megaphones and signs." From this activity she learned "that our First Amendment rights are important to us as Americans."

Virgil chose to illustrate the Freedom of Petition "because it got my attention because I remembered the Tea Partiers." He used a quote from his father: "We have a right to protest against things that we feel are not right." He chose to illustrate his right as he did "because people signing a paper to get things or to relieve things is a form of petition." As for the activity? Virgil says, "It is a really fun experience!"

Ashley chose to highlight Freedom of Speech. "I chose to focus on this particular part of the First Amendment because I think that the Freedom of Speech is used the most," wrote Ashley. She used a quote from Benjamin Franklin that she found on thinkexist.com: "Without the freedom of thought, there can be no such thing as wisdom, and no such thing as public liberty, without freedom of speech." Ashley explains her choice: "I chose to illustrate the First Amendment as I did because I thought it really illustrates what my feelings are about Freedom of Speech. The mouth represents speech and the flag as the tongue in the mouth represents freedom." She "enjoyed learning how to print and about our First Amendment rights again."

Whether it was new or a review for students, I felt, as a teacher, that my students were thinking about the First Amendment and their rights on Constitution Day. I'm very proud of their work!

For more information

Visit the Newseum's website to explore the museum's resources for students and teachers yourself.

Also check out 1 for All, a nonpartisan educational campaign seeking to celebrate and publicize the rights granted by the First Amendment. The website offers lesson plans for all grade levels, and links to further resources.

Amy Trenkle on Glogging Class Greats

Date Published
Image
Student glog, Dorie Miller
Article Body

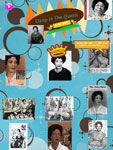
This school year, each of my classes chose a person to represent them and become their class name. Instead of having blocks 3 and 4 or periods 6 and 7, I've had my Alice Paul and Daisy Bates classes on A Day and Dorie Miller and Rosie the Riveter on B Day.

At the beginning of the year, I gave my students the task of reading a biography in small groups. Student glog, Daisy BatesI chose historical figures in U.S. history, some well known and others lesser known to them, and created biographies no longer than a page, by cutting and pasting from credible websites or by using biographies from History Makers (published by Rada Press). After each group read their biography, they summarized what their person did and why they are in the history books. They then presented their findings to the class, as well as what characteristics their person possessed that would make them a great name to adopt for the class. Students cited such qualities as perseverance, tenacity, and strength. After the class heard all of the biographies, they voted on which name they wanted to adopt.

During the course of the year, I made sure each class had an activity outside of the curriculum that connected with their class name. Alice Paul, named after one of the founders of the National Women's Party, had a museum educator from the Sewall-Belmont House come in and speak about Paul. We then walked to the house and saw just how close the National Women's Party headquarters are to our school! Student glog, Dorie MillerDorie Miller, who had taken the name of the first African American to receive the Navy Cross, had a museum educator from the National Portrait Gallery come to our class to share World War II posters, with an emphasis on the Dorie Miller poster. She created a lesson that had students then write their own historic labels, like you would find in a museum, for the poster. Rosie the Riveter visited the Smithsonian National Museum of American History’s "The Price of Freedom: Americans at War" exhibit and had a tour, emphasizing Rosie! The kids even practiced riveting! Daisy Bates, who had taken the name of the civil rights activist, traveled to the National Museum of American History in February and heard from veteran Freedom Riders. While there wasn't a direct connection to Daisy, they heard from civil rights leaders who fought alongside of Daisy Bates.

Memorializing History with Glogs

I've decided that I will definitely continue this for next year’s classes, but that I could never have another Dorie, Daisy, Alice, or Rosie class. So, my last assignment for each class this year was for them to create glogs memorializing their class names. Students worked individually or in pairs to create a glog.

The class then voted on which glog was the best. I will print the final, winning glog for each class in poster form and hang it in my room to teach future classes with and to remind me of the legacy of these classes.

What is a Glog?

Student glog, Dorie MillerBut what's a glog? This is a question that my students had.

At first, they thought I said they were creating a blog—like a blog entry—since they were used to doing that. I clarified and enunciated the word "glog" again. There were confused looks.

A glog, as I explained to my students, is a multimedia poster, created on the computer. On a glog you can add text, photos, videos, music, audio recordings, documents—you name it!

Student glog, Daisy BatesOne of the first things we did was find a Plan B. Glogster, a glog creation tool and community, is blocked by my school district. Having explored Glogster at home, I did know that they have a teacher's address. I directed my students to edu.glogster.com and had them create accounts as "Basic" members (it's free!). The students were soon underway!

Students were to create posters about their class name, and incorporate photos, a quote about or from their person, a brief summary of what their person did, and at least one multimedia clip (a video or music).

When the students were done with their posters, they published them and then emailed me their blog with the "email friends" feature. I did this activity over two days. The second day, I was much more clear about my expectations for inclusion of elements on the glog, and they turned out much better, content-wise, for more groups. I think it was helpful for students to have to think about the various elements to incorporate and served as a review of primary sources for them.

The Impact of Glogs

Student glog, Daisy BatesI can definitely say that this was a hit among the students. They really enjoyed learning about the new technology and many said they were going to go home and play with it. They became engrossed in looking for sources that others wouldn’t find so that their posters would be unique.

The technology was very intuitive for the students, and I learned a lot from watching them. While I had spent time learning how to glog myself, I watched my students just fly with it! Before I knew it, they were asking each other questions about how to add something or asking their friends to look at what they did on their screens. They clearly were enthusiastic for not only their class name, but for creatively sharing the history of their person through their glogs for future classes.

Evelyn MacPherson, one member of the two-person winning Alice Paul glog team, said the following about making her glog:

I enjoyed making the poster, it was a lot of fun to create something that could be used as a learning tool that required you to use creativity. We knew that you had to balance out the facts with things that would draw people to your poster, such as a theme, or pictures. It required some trial and error, but it was a lot of fun.

I really enjoyed this activity and hope to use glogs more in the future. Glogster was easy to use, and this activity required critical thinking skills from my students and integrated technology and history in an engaging way for them . . . and me!

For more information

Our bloggers have many ideas for using visuals in the classroom! Once you've learned how to glog, take a look at Jennifer Orr on using art in a 1st-grade classroom, Diana Laufenberg on tying visuals and visualizations in at the high school level, and Joe Jelen on Google's Art Project.

Tech for Teachers can introduce you to more online tools—including Glogster—and our articles on copyright can help you (and your students) understand the complexities of locating and using images online.

Gettysburg National Military Park: Camp Life

Image
Photo, Ring, Gettysburg National Military Park
Annotation

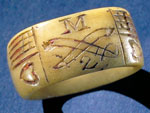
Created by the National Park Service and associated with Gettysburg National Military Park, this exhibit recreates Union and Confederate camp life. Short 200-300-word essays in two sections, "Living in Camp" and "Existing Day to Day," describe how camp life differed for officers and enlisted men, what daily routines were like, and what personal effects soldiers might carry. Seven subsections make up a third, larger section, "Battling Boredom," on ways soldiers passed time in camp, including "Playing Games," "Writing," "Drinking & Smoking," "Taking Pictures," "Whittling," "Making Music," and "Praying."

Sound sparse? The explanatory text isn't the strong point of this site—it's the 90 annotated photographs of artifacts from Civil War camp life, including board games, uniforms, musical instruments, prayerbooks, cooking tools, and more. Visitors can either explore the three main sections of the site and click on the artifacts as they read the related essays, or click on "All Image Gallery" to see all 90 primary sources gathered on one page.

An easy-to-navigate bare-bones introduction to the hurry-up-and-wait side of war, the exhibit could draw students in with its personal, everyday artifacts.

Elizabeth Schaefer on the Impact of 9/11 in the Classroom

Date Published
Image
Photo, September 11 memorial, September 28, 2005, FatBusinessman, Flickr
Article Body

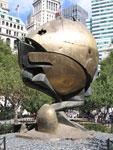
Early in the year, teachers scramble to put back on their 500 hats and begin the year on the right foot. For the past two years, I have used a September 11th interview project in my 8th-grade U.S. History class to meet many early-in-the-year needs. With a week of instruction and one project, I have been able to better understand the level and lives of the students, communicate with families early on, set the tone for thinking historically within my class, and most importantly, gotten the students engaged and excited about American history.

Project Design

The original idea began simply with concern that my 13- and 14-year-old students did not understand what actually happened on 9/11 or its relation to our presence in Afghanistan and Iraq. Simultaneously, I knew I needed to meet standards and could not linger too long on a timeframe outside of my content area. Based on this balance of social studies duties, I ended up using 9/11 as a lens to teach the beginning of the year’s "history tools and vocabulary" unit. The consequential project design ended up looking like this during the first full week of school (ideal for a pre-Labor Day start time):

Monday - Students are introduced to primary and secondary sources and basic vocabulary. They work in groups to perform a primary source analysis on four different pieces: New York Times Sept. 12 cover, a photograph of people crying, a photograph protesting the backlash against Muslims, and the transcripts from 911 conversations. I found the conversations through my local NPR website. The students record descriptions, inferences, and questions.

The original idea began simply with concern that my 13- and 14-year-old students did not understand what actually happened on 9/11...

Tuesday - The students take guided notes on what happened during the day of September 11th, a simplistic statement about "why,” and basic bullet-pointed effects. I include the people that died from a variety of countries and positions in life, the economy, changes in transportation, the related wars, and increased hate crimes against Muslims.

Wednesday - The interview project itself is introduced. Students brainstorm a possible person to interview about their September 11th experience. In class, the students create two sourcing questions (find out about your subject), four experience questions (find out about his or her experience) and two opinion questions (find out about his or her thoughts or life after). Questions are modeled to demonstrate open-ended and information-based questions.

Thursday - The students bring in a minimum of 10 questions which they should have developed for homework (including the eight from the day before) and the class conducts peer edits based on open-endedness and knowledge.

Friday - Check back in with all students to make sure they have an interview plan. Model how to ask an adult to interview and set them up to turn the project in successfully with a grading rubric. The grading rubric involves an outline including an introduction to the interview, a question/answer section, and finally a four-part conclusion including a connection they made with their subject, a surprise, an additional question, and finally a reflection on the experience.

Due Date - In my classes, the interview project has been due on or next to the anniversary of 9/11. The students take a mini-quiz on the topic and then the students each share-out about their interview. This has been a very special day both years that I have done this project.

Improvements

As this was my second year using this project, several major adjustments were made. First, I fully committed to the mini-unit and had no qualms about using a full week to make sure that it integrated practical history skills and provided time for clarity. My students have been very interested in this subject and have many questions. When you are approaching this, there needs to be an outlet and plenty of time for an excess of GOOD questions.

This year I mentally prepared to get political and stick to the historic facts.

Secondly, this year I mentally prepared to get political and stick to the historic facts. The knowledge students have on this subject largely comes from their families. They have surprised me with their in-depth knowledge of conspiracy theories as well as confusion about their parents' anti-Islamic statements. I recommend requesting a trusted person to observe you if this is a concern. I personally felt relieved after my mentor teacher viewed a session to ensure that I was teaching the students to be good, knowledgeable citizens of the world as well as inquisitive historians without veering off the facts.

Finally, I had come to accept that as a middle-school teacher I should be in the beginning of their education, not the end. Although the students and I both want to go deeper into the history and the causes of September 11th, I needed to give myself clear boundaries recognizing the pieces I could teach effectively in the time allowed.

Next year more changes will be needed. I plan to increase guidance on how to interview. In retrospect, a full model interview session would have been helpful. Although the student's questions improved year-to-year, I would also like to move my next group closer to thinking deeply about the unique perspective of their subject and formulating questions based on their location, job, or past. As of now, this is the only interview that my students conduct, but I am considering making it a gateway to a more advanced interview later in the year to make sure that the students are growing in inquiry skills instead of just information.

Results

Early in the year, the results of this one-week experience are powerful for the teacher. The excitement about history is tangible in the classroom and written in student reflections. The information gathered about families on the second week of school is invaluable in a way that a parent survey could never be. With a very structured project outline, the data gathered on student's writing, ability to reapply knowledge, and ability to follow directions is worth much more than the test averages from the year before.

The excitement about history is tangible in the classroom and written in student reflections.

As for the students, according to their quizzes, they no longer think that the Pentagon is in New York or that Iraq is directly responsible for 9/11. Their conclusions however tell of a much deeper impact:

"I can't believe something so big happened during my lifetime and I never really knew about it."

"I did not know that my mom knew stuff about history. I really liked talking to her about this. "

"My dad told me more about 9/11 than the questions but I didn't report it because it was too personal. He cried and that never happens."

For more information

Interested in teaching 9/11 yourself? Try the September 11 Digital Archive or September 11, 2001: Attack on America for primary sources.

Created for the Bracero Archive, "People as Primary Sources: Conducting Interviews" presents useful tips for conducting oral history interviews.

Top Tens, or "Best Sites for..."

Date Published
Image
blue ribbon sketch
Article Body

Lists of Top Ten Best Sites For... or 100 Best Whatevers or One Thousand Resources to Help You... abound on the internet.

But are lists of Bests valuable? They are one way to corral the quick fix, hyperlinked capability of internet research and to mediate enormous quantities of material of unknown quality. Then there's always the hope that other people's time spent compiling these lists might save us some of our own.

So, here's an eclectic selection of a few lists that have come to our attention. Since we don't want to marginalize other prime candidates, we won't call them the best of the bests, but they're definitely quite, quite good. And if all of them don't directly address history teaching, many do speak to pedagogical methods applicable to the history curriculum.

Lists that aren't content specific may still have ideas to adapt across the curriculum.

Educator Larry Ferlazzo is a prolific list creator (also featured in previous Clearinghouse blog posts). My Best Of Series is a table of contents to those lists that cover topics from A to W (Art to Web 2.0) with social studies, ESL and ELL, and a broad variety of content and methodological topics in between.

Making Teachers Nerdy is another teacher-based blog from a tech integration specialist who went back into the classroom when budget cuts affected technology teaching. This Kansas teacher blogged between January and September in 2009, annotating links and best of lists of tech tools appropriate to her curriculum. Attached comments from readers augment her blog entries.

Top Ten Sites for Brainstorming/Mind Mapping is from Technology Tidbits: Thoughts of a Cyber Hero the blog of technology education specialist Dav Kapuler. Kapular advocates mind mapping as "a tool that facilitates ideas and collaborative in nature," as an ideal tool for 21st century learners.

In October, 2009, the New York Times published The 10 best educational websites. Maybe yes. Maybe no. But these selections definitely link to some of the largest educational organizations that are crammed with information helpful to the American history curriculum and that serve as gateways to relevant microsites.

History News Network features Cliopatria's History Blogroll. This gateway places blogs within 30 categories such as American History, Primary Sources, Military History, Women's History—and each listing is well-populated with history content and commentary.

Kathy Schrock's Guide for Educators lists American History Sites, General History and Social Studies Sites, World and Ancient History Sites. These, too, are eclectic lists that may take you to historic sites, archives, lesson plans, and tech tools.

Technology enables teachers to develop personal learning networks for diverse learners.

Ten Tips for Personalized Learning via Technology from Edutopia talks about how to use digital technology tools for teaching and assessment to help meet the challenge of increased classroom diversity. "Income levels, ethnicities, family structures, first languages, interests, and abilities now vary so much, that a traditional teaching approach, with a uniform lesson targeted to the average-level student, just doesn't cut it" is the premise of the list.

One Alone

Resources specifically directed toward middle school teachers and students are often difficult to find, so here's a list of one.

Middle School Matrix: Exploring the changing world of middle school teaching and technology is a blog from a Philadelphia history, English, and technology educator . She talks about what she teaches, how she implements lesson plans, about how technology works (or doesn't work) with different units, and about the role and goals of the educator. The focus is the curriculum and the student; technology is a means to meet classroom goals.

Michael Yell on Using DVDs/Video Segments in the History Classroom

Date Published
Image
Graphic, Interactive Viewing Guide, Submitted by Michael Yell
Article Body

One may hear a thousand words or read a thousand volumes, and, at the end of the process, be very much where [he or she] was as regards knowledge. Something more than merely admitting it into the mind is necessary, if it is to remain there. It must not be passively received but actively and actually entered into, embraced, mastered. The mind must go to meet what comes to it from without.—John Henry Newman (1801-1890)

History instruction cries out for engaging thoughtful strategies to help our students embrace the content. And although it is understood by most teachers that information must not be passively received, it takes thought and a repertoire of effective strategies to maintain activity and engagement while imparting information. John Henry Newman discussed the ineffectiveness of imparting information through lectures and reading without engagement. DVDs, videos, and online streaming, via such online educational services as Discovery Education's United Streaming, were far off in the future when he wrote, but the same idea holds true. When showing students a video, DVD, or online streaming video to convey information on a unit, can we still actively engage our students? Can we still help them to embrace the content?

[. . . A]lthough it is understood by most teachers that information must not be passively received, it takes thought and a repertoire of effective strategies to maintain activity and engagement while imparting information.

As history teachers, we want our students to question and to inquire into historical events, ideas, and people, and we also want to impart historical information. One way to do both is through the use of DVDs, videos, and streaming, and we have many excellent video sources that we can choose from, but there are problems that teachers face in using them. How can we help our students get the information from that form of media while still keeping them involved? How do we help our students mine the media for information while still having them watch the program? How we utilize video resources determines much of what our students learn from them.

Some will give students worksheets to fill out while viewing, but that is hardly involving them. Having them take notes while viewing might get students active but while they are writing they are distracted from the viewing and invariably will miss some of the presentation. Some years back, I came across a reading strategy that utilized the old Cornell notetaking strategy and I adapted it for use with video presentations. My students know it simply as the Interactive Viewing Guide and it has become my go-to strategy in using nonfiction videos and DVDs.

The Interactive Viewing Guide

Experience told me long ago that simply turning on the video and running it from start to finish was definitely not the way to go, and so I began early in my career dividing the video viewing into segments. Using the viewing guide allows students to question, take brief notes, discuss, elaborate, and summarize what they have watched. The guide has several steps: 1) Preview the video or DVD, 2) Develop questions as a class, 3) Ask students to jot down one- or two-word impressions regarding each question while they view, 4) Divide students up for pair or group discussion, 5) Prompt students to summarize, 6) Convene whole-class discussion.

Key points for use of the guide include what the guide looks like, questioning, student notetaking while viewing the video, and discussion. I put the following guide on my Smartboard and students copy it into their notebooks:

Graphic, Interactive Viewing Guide, Submitted by Michael Yell

My preference is to begin the preview with discussion and developing questions. I might use an inquiry or simply pose questions to my students about the subject matter. I might use a primary source or artifact, but it is important to begin by appealing to the students' curiosity and establishing a purpose for what will be viewed. From this, we will begin to develop questions that they are to keep in mind during the video segment. As a teacher I guide the questioning and from their ideas develop a few brief questions for which they are to watch (of course, as a teacher I steer the questioning as I know what I want them to learn from the presentation).

Keeping the number of questions that students are to watch for during the segment to two or three, the questions are written in the Watch for. . . section. Students are told that when they hear or see something in the DVD that relates to the questions they are watching for, they are to jot down a one- or two-word impression or idea. This is the most difficult thing for many students as they want to write down everything, but they are told to keep it short; their purpose is not to write lengthy notes but to jot down short memory joggers for discussion.

[. . . T]heir purpose is not to write lengthy notes but to jot down short memory joggers for discussion.

Following the segment, we use a quick summarizing technique I call One-Minute Review for groups of four. Each student has jotted down some impressions and the brief review time allows them to discuss the ideas that they jotted down during the segment they just viewed. In this strategy, I set an interval timer on the Smartboard to run for four 15-second intervals. At the end of each interval an alarm sounds. Each student in each group reviews the impressions they wrote down for 15 seconds, the alarm sounds and the next student reviews hers or his, then the next, etc.

Following the brief discussion each students writes their own summary in the appropriate section of the guide. The summaries must be clear and complete and answer the questions posed for the DVD segment. We complete the interactive viewing guide with a whole-class discussion, following the reading of a number of summaries.

Turn the Suggested Process into Your Practice

The Interactive Viewing Guide has become my go-to strategy when using DVD segments in my 7th-grade history class. I find it excellent for use with nonfiction videos/DVDs/streaming (although I often use the one-minute review strategy from time to time with fictional programs, I do not use the writing component of this strategy until after the program). Although I continue to tweak it, I have found that through its use students become actively engaged in thinking about, discussing, and writing about information. Give it a try, adapt it, and help your students to embrace the informational content of the DVDs/videos that you use in class.

For more information

Our Teaching Guide "Teaching with Historical Film Clips" gives more guidance on leading students to analyze and question film sources.

A Yale professor models critique of a famous documentary in a review of Ken Burns's Jazz.

Planning their own documentaries can give students more insight into the interpretive process that goes into making any film.

Ron Gorr on Imagining the Great Depression: Mixing Primary Documents and Student Creativity

Date Published
Image
Print, Heidi writing, 1922, New York Public Library Digital Gallery
Article Body

Often, in my mission to include primary sources in my AP U.S. history curriculum, I find that my lessons become predictable and less awe-inspiring than I would like them to be. My students have analyzed, discussed, interpreted, and synthesized primary resources to such an extent that some of them lose sight of the fact that these items can be a lot of fun to manipulate. If your students sometimes feel the same way, why not try something a little different that still includes sound instructional techniques and content synthesis? Here is what my students and I did to fight primary-source boredom.

Finding New Ways to Engage Old Sources

After reading the chapters and completing some basic homework related to the Depression, I asked my student to find at least three separate primary sources pertaining to the Great Depression. The first needed to be an official document of some sort (government document, newspaper article, legislation, etc.); the second could be an image (cartoon, poster, photo, etc.); and the third item needed to be a personal account of some sort (diary, letter, editorial, etc.). Each of these items needed to be from the Depression period, between 1929-1938.

Once my students found their documents, I asked them to create a story that bound the three documents together. This could be total fiction or some version of historical fiction, but the story needed to not only mention each document, but explain or address its historical meaning and significance within the structure of the story. Other than these instructions, I allowed the students to apply their own creative instincts to the assignment. (Note: Previously, we had done a number of other primary source projects that required the kids to find sources on their own, so this was not the first time I'd asked them to locate content-specific primary sources. If this is your student's first exposure to primary source research, you may want to spend some extra time guiding them through Teachinghistory.org or another quality history resource venue).

[. . . S]ome of my logical-sequential students moaned at [the assignment's] right-brained nature, but a handful of kids saw it as a chance to set themselves apart from the traditional super-student who can read fast, ace every test, and answer every discussion question. . .

Upon receiving this newfangled assignment, some of my logical-sequential students moaned at its right-brained nature, but a handful of kids saw it as a chance to set themselves apart from the traditional super-student who can read fast, ace every test, and answer every discussion question first. In addition, a bunch of kids were simply relieved by the break in routine. With such a diverse reaction to the assignment, I was excited to see how this experiment would go.

The Product

The final products offered a fantastic diversity of effort, creativity, and depth of research. As always, there were a few students who just went through the motions and turned in three documents with a superficial, ill-formed story, but most of the students seemed to enjoy the departure from strict, conventional historical study. Passionate accounts of suffering, hardship, sadness, anger, hope, and overcoming obstacles arose from the images and documents they discovered. Fictional characters were created based upon contextual clues offered by the source material and plotlines evolved as my students made artistic and historical connections between each of the documents. It was fascinating to see how easy it was for my students to synthesize the information in their documents and carry it into their imagined realities.

Overall, I loved the results of the assignment. The stories were fun to read, and since we seldom have a chance to travel creative avenues in the A.P. curriculum, I think most of the kids viewed it as a welcomed break from the relentless push towards the exam in May. But what seemed like a break to them was simply another one of Mr. Gorr's hidden agendas—one of which was so hidden that I didn't even see it until I was grading their assignments. Here are my original objectives, plus the third I discovered:

The first objective of this assignment was to provide curricular diversity and a chance for my right-brainers to excel. I think we accomplished that successfully.

Evaluation and synthesis skills are essential to writing a good DBQ, and this assessment allowed us to look at these processes in a totally different way.

The second objective and my original reason for designing the lesson was to obscure the anxiety-invoking document analysis component of Document Based Question (DBQ) writing by allowing students to create their own story instead of basing everything upon documented history. This lesson still required them to evaluate and synthesize their sources, but they could do so without the restrictions they felt when confronted with DBQs. Evaluation and synthesis skills are essential to writing a good DBQ, and this assessment allowed us to look at these processes in a totally different way.

Once I related the correlations between the fictional DBQ and the actual DBQ, a number of my students seemed to have an epiphany. This assignment allowed them to see document analysis in a much more simplistic way.

Pulling Meaning from Sources v. Selecting Sources to Fit a Narrative
If historians conduct their research with a preconceived idea of what the documents will say, they can inadvertently ignore important information. . .

I discovered the third objective retroactively. After reading their stories, I noticed that some students chose documents with a story already in mind. In other words, they didn't write a story to connect their documents, they chose documents to fit their story. At first, I just saw this as a shortcut to finishing the project, but the more I thought about it, the more it emphasized the challenges that face historians when they try to relate the past to modern audiences. If historians conduct their research with a preconceived idea of what the documents will say, they can inadvertently ignore important information that could challenge the history they want to tell. In some cases, the omissions could dramatically skew the conclusions made and diminish the creditability of the author and his/her historiography.

In many ways, this objective overtook my original objectives. Since our understanding of the past is in the hands of historians (both good and bad), I think it is very important for my students to understand the interpretation that goes into writing history. We compared Christopher Browning's book Ordinary Men with Daniel Goldhagen's book Hitler's Willing Executioners. Each author wrote significantly different histories about a group of German soldiers, based upon the identical primary resources. My students were enthralled by the discussion of how important a historian's job is. For a few minutes, I was cool!

In Conclusion

In all, I was extremely pleased with all aspects of this assignment. It allowed us to verge from the beaten path and explore underused methodologies that allowed my students to expand their critical and creative thinking skills while still maintaining focus upon the core objectives of the AP curriculum.

If you have suggestions, comments, questions, etc., please let me know. More importantly, if something I have written motivates you to create something even better, please share it with me. We are all curricular thieves in teaching and in this case, my hope is that I can, as Huey Long put it, "Share the Wealth."

For more information

EDSITEment offers an example of using creative writing, historical fiction (including visual fictions), and primary sources together to engage students—in this case, in the story of Paul Revere's ride, as told by both art and poetry.

Linda Levstik, author of Doing History, cautions against allowing students to identify uncritically with the past, and with historical fiction, but still recommends fiction's use in class.

Connecting Art and History

Description

From the Corcoran website:

"Explore America's cultural history through paintings, sculpture, and other works of art in the Corcoran's collection. Look at Western expansion, the Gilded Age, the Great Depression and other major issues and movements in our country through the eyes of artists. Hands-on activities, educator resources, and refreshments are included."

Contact email
Sponsoring Organization
Corcoran Gallery of Art
Phone number
2026391774
Target Audience
K-12
Start Date
Cost
$12, $8 for members
Duration
Three and a half hours

The Iconography of Slavery

Description

From the National Humanities Center website:

Visual imagery played a major role in the anti-slavery movement. From the iconic image of a kneeling slave asking "Am I Not a Man and a Brother?" to images of family separations through sale at auction, images were an important weapon in the arsenal of abolitionist activity. This seminar will look at some of the imagery created in support of anti-slavery activities. How did the imagery evolve? What were the major themes? What were the iconic images of slavery? And how, then, did artists portray freedom? What was the relationship between anti-slavery imagery and slave narratives and abolitionist writing, including Uncle Tom's Cabin?

Registration Deadline
Sponsoring Organization
National Humanities Center
Target Audience
K-12
Start Date
Cost
$35
Course Credit
"The National Humanities Center programs are eligible for recertification credit. Each seminar will include ninety minutes of instruction plus approximately two hours of preparation. Because the seminars are conducted online, they may qualify for technology credit in districts that award it. The Center will supply documentation of participation."
Duration
One and a half hours

Children and Youth in History

Image
Detail, homepage
Annotation

This website presents historical sources and teaching materials that address notions of childhood and the experiences of children and youth throughout history and around the world. Primary sources can be found in a database of 200 annotated primary sources, including objects, photographs and paintings, quantitative evidence, and texts, as well as through 50 website reviews covering all regions of the world. More than 20 reviews and more than 70 primary sources relate to North American history.

The website also includes 20 teaching case studies written by experienced educators that model strategies for using primary sources to teach the history of childhood and youth, as well as 10 teaching modules that provide historical context, strategies for teaching with sets of roughly 10 primary sources, and a lesson plan and document-based question. These teaching resources cover topics ranging from the transatlantic slave trade, to girlhood as portrayed in the novel Little Women, to children and human rights. Eight case studies relate to North American history, as do two teaching modules.

The website also includes a useful introductory essay outlining major themes in the history of childhood and youth and addressing the use of primary sources for understanding this history.