Pictures of World War II

Image
Annotation

This National Archives and Records Administration online archive offers selected photographs depicting Americans' activities during World War II. The 202 photographs, drawn from the Still Picture Branch of the National Archives, primarily came from the records of the Army Signal Corps, Department of the Navy, Coast Guard, Marine Corps, and the Office of War Information. They represent all aspects of wartime preparation, from military training to combat and support services, as well as the homefront activities of civilians and war agencies. They are grouped into 22 subjects, including eight regions of Europe and the Pacific in which Americans fought, and other topical categories such as: the Homefront; Rest and Recreation; Prisoners; The Holocaust; Death and Destruction; and Victory and Peace.

Images include leaders like Franklin D. Roosevelt, General Dwight Eisenhower, and Adolph Hitler, as well as posters from homefront rationing and war bond campaigns, Rosie the Riveter posters, combat photographs of invasions and scouting missions, and images of entertainers like Danny Kaye and Bing Crosby visiting the troops. Each photograph is accompanied by a 15-25 word caption with the title, photographer, location, and date the photograph was taken. This site is ideal for those interested in illustrating reports or lectures on Americans' contributions to World War II.

The Star-Spangled Banner

Image
Annotation

This exhibit tells the story of "the flag that inspired the National Anthem" through more than 50 images and short texts (50–200 words) explaining their significance. Also presents images from Smithsonian collections to illustrate sections on expressing patriotism, fostering national memory, and how "common cultural symbols, such as the American flag, patriotic songs, presidential images, and monuments, serve to coalesce a common identity among Americans." Elucidates challenges the Smithsonian faces to preserve the flag that flew over Fort McHenry during the Battle of Baltimore in 1814 and inspired Francis Scott Key's poem.

Provides a teacher's manual in three sections for grades K–2, 3–5, and 6–8 and suggestions for using the site in the classroom. Includes a 10-title reading list, links to 14 related sites, and games designed to stimulate students to use primary sources to investigate "mysteries surrounding this famous flag." A well-conceived site, though modest in size, that will prove useful for K–8 classes.

Online U.S. History Textbooks

Image
Question

Do you know of any good online US history textbooks?

Answer

Online textbook options are convenient, inexpensive, and environmentally friendly. The key is finding one that is reliable, meets the needs of your students, and complies with district standards—so you will want to explore some to find one that fits your needs. We know of a few online textbooks that will help you get started in your search. Digital History, a project hosted by the University of Houston, offers an easy-to-use, high-quality textbook. Digital History is also a good resource for supplementary classroom materials including primary sources, e-lectures, and lesson plans. USHistory.org, created and hosted by the non-profit Independence Hall Association, also offers a complete illustrated U.S. history text that is clearly organized by topic and easy for students to use. A third option is the Outline of U.S. History, which is produced and maintained by the U.S. State Department. The Outline is a fairly comprehensive textbook, and is accompanied by useful supplementary resources, including historian essays and a briefer version of the textbook. Finally, Wikibooks offers a U.S. history textbook that is fairly comprehensive and easy to use. On a cautionary note, Wikibooks is an open source site (like Wikipedia), so teachers will want to carefully monitor the content of the site to be certain that the material is accurate and useful.

Well-behaved Women [and Men] Seldom Make History

Image
Article Body
Rationale

Picture book biographies can provide young readers with a great deal of information. Yet without a focus for reading, students often pay attention to interesting details and tidbits—what's been called the "terrific specifics"—rather than the big ideas in history. This guide focuses students' attention on two main ideas that promote historical thinking:

Understanding historical context Understanding individual efforts that promoted social change

As they read and respond to picture book biographies, students will see fundamental differences between the past and the present and witness the impact some people had on the times in which they lived. Though they were sometimes criticized for inappropriate or outrageous behavior, to quote historian Laurel Thatcher Ulrich's famous slogan, "Well-behaved women seldom make history." To this I would only add, or men. (While this guide is primarily concerned with the values and character traits of women who made history, it could easily be extended to include men as well.)

Description

First students read and discuss picture book biographies of women in history. With their teacher, they build a data chart of information about each woman, highlighting her historical setting, accomplishments, and character traits. Finally students apply what they learn to several writing projects focused on historical context and social change. While the focus of biography is on individuals, students will see they did not, and could not, succeed alone but were supported along the way by others.

Teacher Preparation
  1. From the list of recommended biographies, pick the books you want to use    (four to six is a good number to start with).
  2. If you only have one copy, read the biography out loud to students. If    each student has his or her own copy, students can read independently    after a short introduction.
  3. Review the blank data chart found in the Handouts for Students and each    writing assignment. Make copies as needed.
  4. You can display a large (class) copy of the chart, while students have    smaller copies.
In the Classroom: Constructing the Data Chart

[All examples are from A Woman for President: The Story of Victoria Woodhull (2004) by Kathleen Krull, illustrated by Jane Dyer]

  1. Introduce the data chart. Explain that the class will be reading books    about women who made history and filling a chart with information about    the women. Have students consider:
      • When did the woman live? How do you know?
      • How was she expected to behave?
      • What did she do instead?
      • What does this show about her character and values?
  2. Introduce each book with information about the woman and the    challenges she faced. Show a few of the pictures to add a sense of    historical context. Introduce vocabulary words essential to    understanding the book.
  3. Read the book aloud.
  4. After reading, complete a row in the chart. When the chart is completed    and you have read all the books you selected, discuss:
      • Which experiences were similar?
      • How did expectations for women's behavior differ from the way they are    today? How were they similar?
      • What character traits and values did the women share?
      • Is it true "well-behaved women seldom make history?"
  5. Based on A Woman for President, here's an example of a row from the data chart: data chart
    In the Classroom: Writing Projects—Historical Context

    The two projects below focus students' attention on envisioning the historical setting. Student handouts are provided for each project.

    One: Photograph Album with Captions

    Ask students to create an imaginary photo album for one of the women. Using "Photo Album from the Past," have students draw interesting and important moments from the woman's life. Visual material downloaded from the internet can be included to make these photos more realistic. Under each picture, students can supply captions for the photo pointing out interesting details. Here is an example of a "photo" and caption from the album of Victoria Woodhull: victoria woodhall student album sample

    Two: Imaginary Interviews

    With a partner, have students prepare for an interview with one of the women. First, students brainstorm what questions to ask, then write their questions down and provide an answer the woman would give. Have the students practice giving the interview before presenting to the class. Completed written interviews can be illustrated and collected for display or made into a class book. Sample interview questions could include:

      • In your day, what did people expect you to do?
      • What was your biggest accomplishment? Why does it make you proud?
      • How would you describe yourself?
      • What qualities do you respect in other people?

    Ask students to add additional questions. See an example of an interview with Victoria Woodhull in the Examples Packet.

    In the Classroom: Writing Projects—Character Traits and Values

    The two projects below focus attention on the character traits and values of the women studied. Student handouts are provided for each project.

    One: Character Sociogram

    This is a way to show how a person thinks and behaves and how people respond to them. An example from the packet shows Victoria Woodhull's interactions with several contemporaries. The words on the arrows show the feelings and actions of one person toward another. Though only four people are shown (besides the woman in the center), more people may be added. Using one of the shared biographies, model how to make a sociogram with the whole class. Have student partners complete a sociogram for one of the women studied. After students complete several sociograms, discuss the common traits and values of women who made history. See an example of a sociogram based on the life of Victoria Woodhull in the Examples Packet.

    Two: Concept Circles

    This strategy teaches students to see the connections between words. Using words that explore character traits and values, this vocabulary exercise gives students the opportunity to describe the women using new, or recently learned, words. From the handout provided, place a word or phrase describing character traits and values for one of the women studied in each section of the circle. Skim the biography for these words and phrases. Have student partners discuss how each word or phrase helped them understand that person. After the discussion, have students write descriptions of the woman, describing the obstacles she faced and how she overcame them. Ask students to use vocabulary from the concept circle in their descriptions. See an example of a concept circle about Victoria Woodhull in the Examples Packet.

    Common Pitfalls
    • Even though the recommended books are picture books, it may take more    than one class period to read aloud. Don't rush through the book. Provide    enough time for background information and student comments on the    book.
    • Students often want to report on everything they have learned after    listening to a read-aloud. Praise your students for learning new    information, but then focus them on the chosen topics (historical context    and efforts to promote social change).
    • For written assignments, make sure students use information from books    rather than made-up information. Have books available so students can    refer to them.
Bibliography

Chick, Kay A. "Teaching Women's History Through Literature: Standards-based Lesson Plans for Grades K–12. Womeninworldhistory.com. 2008. http://www.womeninworldhistory.com/curriculum-21.html.

Fertig, Gary. "Using Biography to Help Young Learners Understand the Causes of Historical Change and Continuity." The Social Studies 99 (2008): 147–154.

Ulrich, Laurel Thatcher. Well-Behaved Women Seldom Make History. New York: Knopf, 2007.

Zarnowski, Myra. History Makers: A Questioning Approach to Reading and Writing Biographies. Portsmouth, NH: Heinemann, 2003.

Zarnowski, Myra. Making Sense of History: Using High-Quality Literature and Hands-on Experiences to Build Content Knowledge. New York: Scholastic, 2006.

Zarnowski, Myra. "Being Teddy Roosevelt: Exploring Biographies and Overcoming Life’s Obstacles." Social Studies and the Young Learner 33 (2008): 42–46.

VoiceThread

Image
What is it?
What is It?

VoiceThread is a popular web-based tool for creating and collaborating on multimedia presentations. Voicethread allows you to create a presentation combining images and video with text and audio commentary. The internet safety component is comprehensive; access to accounts and student work is carefully controlled. It's recognized by the American Association of School Librarians (AASL) as a tool and resource of "exceptional value to inquiry-based teaching and learning."

Getting Started

First, you'll need to setup a Voicethread account through the link in the upper right hand corner of the home page.

You can experiment with the program and create up to three VoiceThread projects free of charge. (Fees are nominal for classrooms and for school-wide accounts.)

Five choices are available for adding audio: computer microphone, telephone, text, audio file (mp3 or WAV), and webcam. You'll need a microphone if you're using your computer, and Voicethread provides instructions for setup and use and comment moderation.

The About page gives directions for using VoiceThread's presentation tools and K-12 solutions gives instructions especially for K-12 classrooms and answers questions such as "How do I add students to my school or class subscription?"

Examples

Once you've created your Voicethread account, search for curriculum-related sample projects on the Browse page to get an idea of the possibilities.

As you create a test project, you'll have the option of uploading images from your computer, Flickr, Facebook, or directly from among 700,000 digitized photos from The New York Public Library. The Voicethread blog discusses these import possibilities.

Staff members at the New York Public Library also have created learning modules, grouping historical images and other primary sources by themes and categories with audio commentary from historians and archivists.

Voicethread's digital library contains articles by teachers about classroom projects—including sections with helpful caveats on challenges and setbacks in implementing their lesson plans.

For more information

For further tutorials and examples beyond the VoiceThread site, visit this educational review written by a New Zealand educational technology specialist.

Visit YouTube and search with the term Voicethread to uncover tutorials such as Embedding Voicethread productions in blogs

Applying KWL Guides to Sources with Elementary Students

Image
Article Body
What Is It?

KWL Guides—what do I know, what do I want to know, what have I learned—offer a straightforward way to engage students in historical investigation and source analysis.

Rationale

Using KWL guides in elementary history classes empowers students and teachers.

  1. KWL guides engage students via a simple format. They place the students'    observations, questions, and knowledge development at the center of    exploring historical sources. Students are able to connect new knowledge    to prior knowledge, and generate and investigate questions.
  2. Most elementary teachers are familiar with KWL guides to structure    inquiry in various subjects, from literature to science, but analyzing    primary historical sources can be a new experience, leaving teachers    hesitant to incorporate them in their teaching. Applying the KWL    approach to primary source analysis encourages teachers to adopt a    constructivist approach to history instruction, as it taps their confidence    in using a familiar strategy to teach a new subject.
Description

The KWL chart is a metacognition strategy designed by Donna Ogle in 1986. It prompts students to activate prior knowledge, generate questions to investigate, and inventory the new knowledge that emerges from investigation. The acronym stands for: K: students identify what they already KNOW about a subject. W: students generate questions about what they WANT to learn about the    subject. L: students identify what they LEARNED as they investigated. In lower elementary history studies, the entire class looks at projected images or documents and together fills out a KWL chart. In the middle grades teachers may model the process. Once students gain proficiency, they are allowed to work in pairs or groups. Primary sources can be incorporated at various times during a history lesson. Teachers may use them to introduce a unit or to expand a student's understanding and empathy for a topic. Directions below describe how to use the KWL primary source analysis during a unit, but they are easily adapted to use at the start of a unit.

Teacher Preparation
  1. Choose a source to explore with your students. Books in school or public libraries also offer historical images and documents.

    Source Subject When seeking images, artifacts, or written documents that align with your history unit, consider four ways that primary sources enhance history learning:

    1. Motivate historical inquiry
    2. Supply evidence for historical accounts
    3. Convey information about the past
    4. Provide insight into the thoughts and experiences of people in the    past (1)

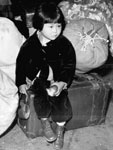
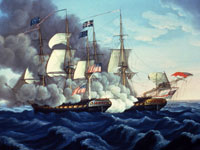
    Your source should match one or more of these criteria; they are not mutually exclusive. You may find a source that you believe will motivate your students' learning and it also provides a vivid, intriguing glimpse into the experiences of people in the past. Or you may choose to examine with your class a source cited as evidence in one of the historical accounts that you read together, and then discover the source conveys additional information about your topic. Source Format In terms of primary sources, elementary schoolchildren often engage most successfully with visual images, especially pictures that feature children or dramatic action. Don't discount written documents, however, especially in the middle grades, although you might need to abridge a lengthy document or model the process of paraphrasing with short excerpts.

  2. Copy the source to an overhead transparency or into a file for an LCD projector. You can give students their own copies to view at their desks and put in their history folders, and post one on the class's history timeline.
  3. Decide when you will examine the source. To scaffold source explorations, schedule them between reading historical fiction and/or nonfiction to provide context.
  4. Decide how to display and write on the class KWL chart. Using a transparency is fine, but could limit ongoing student access to the chart. ]KWL charts can be constructed on poster boards, whiteboards, or butcher paper for permanent display; these can be added onto as you explore other elements of your history unit. The posted chart is a visual reminder of students' growing prior knowledge as they move on to investigate other sources. When they are asked to interpret new sources, they can reference what they have studied previously. For students working in groups, make copies of the KWL chart for all students.
In the Classroom

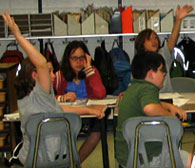
1. Review the class's history learning to this point. Have students take turns walking and talking sections of your unit timeline, or ask students to brainstorm important themes they have explored thus far. In middle elementary, ask students to pair up and explain to another student what they learned the previous day. For lower elementary, call on students at random to share their thoughts with the whole class. 2. Following this review, explain that students can explore more about (the unit topic) by studying an information source from the actual time of the historic event. To illustrate this idea, contrast the date of the source you are examining with the copyright date of a fiction or nonfiction book you have read to your class. Eventually, at the end of this activity, you will return to the book and help your students understand how its author may have examined primary sources as s/he prepared to write it. 3. Introduce the KWL chart with knowledge questions as a guide to explore a source. If you have not used a KWL before, or if students are not familiar with the format, explain what the letters stand for and how they help us look closely at a source of information, make a list of what we already know about the source, and ask questions to help us learn more. 4. Model the KWL process with the entire class. Project a source via LCD or overhead projector. Conduct the K portion of your KWL (what do I think I already know about this source). After students carefully read or view the source, brainstorm a list of things they know about the image, artifact, or document. To help students activate their knowledge, structure interactions with sources by asking:

What/who do you think is in the source? (inventory the objects in an image or the components of a written source) What do you think is happening? (summarize the action or meaning) When do you think it is happening? Why do you think it is happening? Why do you think someone created the source in the first place? How did you come up with your answers? If people appear in the document or image, how do you think they felt?

5. Conduct the W portion (what do I want to know and how can I find out more). Ask students to:

Brainstorm aspects of the source they are uncertain about Brainstorm a list of questions about the source itself Brainstorm how they might find answers to their questions

6. Conduct the L portion of your KWL (what I've learned about or from this source).

Seek answers to the questions, or return to them as you investigate other sources and topics for your history unit and as answers emerge from those explorations. If you decide to investigate some questions right away, have the entire class work together, or divide students into groups and assign each group a question to investigate. Groups can use such research resources as the internet, school media center, or oral history interviews. Give the groups any books related to their question. When you send groups to the media center/library, alert your media specialist in advance so s/he may assist students with their searches. This activity is an excellent way to introduce or reinforce the use of search engines, tables of contents, and indexes to locate information. Update the guide by inventorying what your students have learned about the source and about the larger history topic by studying this source.

7. Brainstorm and take inventory of remaining unanswered questions raised by students while investigating the source.

Common Pitfalls

Extend learning for better readers. Ask them to decipher and summarize the document. They can then share their results with the rest of the class. If you determine a document is too difficult for any of your readers to decipher, create a simpler version for students to study.

  • Copying images. Sometimes it's difficult to get a good copy. File size and type vary and may affect the quality of a reproduced image. If you find an image you want to use but it does not copy clearly, try using Google or another internet image search engine to locate that image in a different format or size.
  • Selecting documents. When a document is only available in an original handwritten form, deciphering it can pose a challenge for teachers as well as students. Try to find documents that have been transcribed into readable type.
  • Some documents are beyond the comprehension level of those students who read at or below grade level. If you want to use a source that fits this scenario, try the following:
  • A common pitfall in executing KWL is the inclination to close discussion following the L step. Authentic learning exploration begins and ends with questions. When teachers demonstrate that it's natural and desirable to have ongoing questions, they send the message that questions are a crucial part of education. Asking questions doesn't indicate a lack of knowledge, but is evidence of an active mind. To honor questioning as the foundation of learning, KWL should perhaps add a fourth step: Q.
Example

KWL Image Exploration: Segregated Public Places The history of Jim Crow laws in the U.S. is the history of segregated neighborhoods, schools, public areas, hotels, restaurants, marriage, transportation—essentially every aspect of daily life. Though these practices were outlawed by civil rights legislation in the 1960s, their legacy of poverty and prejudice persists. It is essential that today's students not only learn the history of segregation but care about its aftereffects. Photos of Whites Only and Colored signs on water fountains, restrooms, waiting rooms, and entrances to buildings are powerful resources that engage student empathy for the African American experience under Jim Crow. This KWL photo analysis is most effective when preceded by explorations of pre-slavery African cultures, slavery, the Civil War, the 13th and 15th Constitutional Amendments, and sharecropping. As the first activity that explores segregation laws, it illustrates the reality of separate public accommodation as humiliating, degrading, and a clear signal that not all people were considered equal in America.

Acknowledgments

Credit for first using KWL as a historical source analysis guide goes to the second- and third-grade teachers who piloted the Bringing History Home curriculum at the Washington Community School District in Washington, Iowa. These teachers came up with KWL as a simple alternative to the NARA historical analysis guides. I am, as always, deeply indebted to BHH teachers for their innovative, inspired ideas.

1These four effective uses of primary sources are identified by Keith Barton in Barton, K. "Primary Sources in History: Breaking Through the Myths," Phi Delta Kappan Vol. 86 Issue 10 (2005): 745-753.
For more information

See the essay Teaching Segregation History as you consider how students may react to the topic.

The materials you need to conduct this activity include a photo of segregated drinking fountains and a KWL chart. Two forms of the chart are provided: an empty one and one supplied with K questions.

For more resources about KWL guides please see Bringing History Home.

For further reading, try ReadingQuest.org's "Strategies: Making Sense in Social Studies" and Bringing History Home's bibliography of selected websites with resources for teaching segregation history.

Bibliography

Chen, Jianfei. "Online Course L517: Advanced Study of the Teaching of Secondary School Reading." Indiana University. Last modified January 2008.

Ogle, Donna. "K-W-L: A Teaching Model That Develops Active Reading of Expository Text." The Reading Teacher 39 (1986): 564–70.

Wordle

Image
What is it?

What is it?

The creators of Wordle define this free tool as a toy. Wordle is definitely fun to play with, but it's also a learning tool for visualizing and analyzing text. And it's adaptable to learning objectives for K–12. Plug a block of text, a URL, or even bookmarks into Wordle, and the program generates a word cloud—a graphic that amplifies font sizes of words based on how frequently they are used in the material you've provided.

Getting Started

To create a world tag cloud, simply follow directions on the Create page. What you don't want to miss are the opportunities to work with font, layout and color once your tag cloud is created. Why? Design choices help position words and differentiated size gradations to provide more concrete examples of the vocabulary, ideas, and concepts you're encouraging your students to explore.

Tools help teachers design Wordle clouds to emphasize learning objectives.

You can save your Wordles in the Wordle Gallery (although it will be difficult to retrieve later) or on your hard drive. To keep a copy on your computer, select the option to "open in Window" below the Wordle and take a screenshot. Frequently Asked Questions (FAQs) answer possible difficulties. Teacher Tube offers a five-minute video demonstrating the program.

Examples

Educators have generously shared examples of classroom adaptations of Wordle to build vocabulary (a useful tool for ESL learners) and to write and discuss literature; many of these examples are adaptable to analyze and simplify primary source documents in the history classroom; wordle graphics can jump start close reading of primary sources. This Slideshare presentation, Free Tools: Middle School Tech, suggests a collaborative learning exercise applicable to exploring primary source documents. Pupils looked at word clouds created from articles and tried to ascertain the gist of original articles. Half the class then explained to the other half what they thought their article was about while the teacher displayed each word cloud in turn on an interactive white board highlighting the words one at a time and extracting relevant useful vocabulary. The teacher then handed out copies of the original articles in full to pupils and discussed vocabulary further.

Wordle clouds help students learn vocabulary and extrapolate major themes.

The Boston Globe offers a visualization of The Candidate as a Pile of Words, a visualization of the blogs of President Obama and Senator McCain. Fewer examples specifically address Wordle in history and social studies instruction, but blog postings such as Rodd Lucier's Top 20 Uses for Wordle offer a number of cross-curricular examples of using Wordle to foster analytical thinking and to help explore relationships and themes. "Show Today in History stories in a new way," he suggests, and the resulting Wordle graphic on the Cuban Missile Crisis creates a picture in which the words Kennedy, Soviet, Cuba, and atomic dominate. Word Cloud Analysis of Obama's Inaugural Speech Compared to Bush, Clinton, Reagan, Lincoln's offers instant analytical possibilities. For example, Lincoln's most frequently used word in his first inaugural address is Constitution; in his second, war dominates. And beyond Wordle, blogger Terry Freedman writes Word Clouds; Tag Clouds. Which is the best software? explores a variety of tag cloud options and teaching ideas. And educator-blogger Jonathan Wylie writes about Top 10 Ways to Use Wordle's Word Clouds for Classroom Lessons. Some entries in this top ten list specifically address history; others are easily adapted. For example, instead of Personal Narratives suggested in Item One, substitute brief biographies of historic figures.

PrimaryAccess

Image
What is it?

PrimaryAccess at the University of Virginia is a web-based tool for constructing short digital movies using text, images, and narration. The goal: to guide students in effectively using, interpreting, and integrating primary source materials.  

PrimaryAccess gives project control to teachers who select and annotate the resources their students might use to create historical narratives for a 1 to 3-minute movie, a feature perhaps particularly valuable for elementary school classes where extensive web browsing is neither authorized nor available. 
 

Getting Started

PrimaryAccess requires teachers to create a personal account and a class account in order to initiate a project. Producing the narrative then provides a strong active learning experience. While the how to narration is clear, educators will want to create a couple of movies themselves to help adapt instructions to their own classrooms. 

Producing the narrative then provides a strong active learning experience.

The student must research the topic, construct meaning from the selected primary documents, craft a written story that conveys that understanding to others, and finally, create a movie that uses the documents to accompany the narration in a visually compelling manner. Teachers can guide students to construct these narratives following a typical story structure, with a beginning, middle, and end.

Directions are both concise and detailed including a Teacher's Guide and How-to video. (No software downloads are necessary in order to use PrimaryAccess, nor is it necessary to download selected materials. PrimaryAccess links directly to online resources.)  To create the narrative of the movie, an external microphone connected to the audio input of the computer is requisite, although the narration may be recorded in other programs such as Audacity and saved as an MP3.
 

Examples

The site includes example videos, including digital stories on the Civil Rights Movement and Japanese Internment

The Smithsonian American Art Museum has also incorporated PrimaryAccess, especially for teachers, into the online exhibit 1934: A New Deal for Artists with the goal of helping students (and other visitors to the site) to assimilate and present content in the documentary movie style. Access user-created movies by following the map embedded in the Flash presentation, Picturing the 1930s.