Popplet

Image
What is it?

Popplet is a tool that allows users to visualize ideas. Teachers and students can create graphic organizers, timelines, and many other forms of visual organization. Popplet's strength as a collaborative brainstorming tool, however, should not lead teachers to overlook its usefulness as an effective presentation tool.

Getting Started

Registering with Popplet takes only a few minutes and includes a tutorial that guides new users in understanding the basic features. Once registered, users can begin developing their first projects by creating a popple: a balloon or textbox. By double-clicking on the Popplet canvas, text can be added, aligned, and resized in each new popple. Likewise, videos and images can be imported via Facebook, Flickr, or YouTube, or from any file saved on the computer. Users can also use the drawing tool to freely write notes or sketch a diagram. A comment function allows other users to leave feedback on individual popples. Finally, users can take advantage of color coding to group and organize their Popplet canvases. In addition to these simple features, other tools offer added flexibility—which can be accessed by clicking on the wheel in the top menu. Users can edit entries and organize popples in a variety of way: either horizontally and vertically. Aside from Flickr, Facebook, and YouTube, Popplet also allows users to directly embed from Google Maps and Amazon. One helpful feature for teachers is found in the labs functions, where a "timewarp" displays a sliding timeline of the popplet's creation process. Finished popplets can be exported as JPG and PDF files, as well as saved and printed. A new feature is a desktop application that can be downloaded and allows popplets to be saved for offline presentations. 

Examples

Popplet is a new tool whose database of user samples is small but growing. However, a few examples demonstrate Popplet's ability to enhance the history classroom. A short history of Coke bottles is a good example of how visual displays can show change over time, or diversity, within a specific subject matter. Similarly, another example on the Popplet site focuses on Napoleon's career, mixing images with textual information.

...educators can develop Popplet displays that model historical timelines, hierarchal social systems, and other forms of organization that historians often rely on for their work.

Like another collaborative brainstorming tool, Wallwisher, Popplet is a useful tool for either teacher-directed or student-initiated projects. Teachers can use Popplet to create a variety of templates for student use of graphic organizers, timelines, or storyboards. For formal presentations, educators can develop Popplet displays that model historical timelines, hierarchal social systems, and other forms of organization that historians often rely on for their work. Popplet is also a valuable tool for collaborative planning among history faculty through its comments feature and multiple-user interface. Students will also find Popplet as a useful tool for initiating ideas for history projects or for displaying research, similar to other display tools like Glogster.

John Smith Map

Video Overview

Curator Barbara Clark Smith examines John Smith’s 1612 map of a section of Virginia, asking why Smith included what he did, why he left things out, and what he hoped people who saw this map would take away from it.

Video Clip Name
JohnSmith1.mov
JohnSmith2.mov
JohnSmith3.mov
JohnSmith4.mov
Video Clip Title
Exploring the Map
What is Important?
Different Perspectives
What Questions Can Students Ask?
Video Clip Duration
5:36
6:21
4:15
3:37
Transcript Text

This is a map drawn by John Smith who was one of the first English settlers at Jamestown. And it was first published in 1612 in England. Probably what’s most interesting about the map is just to stop and think: Who did it? Who’s it for? Why is he doing it? What’s he trying to do?

It shows us the worldview of the maker, John Smith, who draws the map. And of the audience, the people in England, members of the Virginia Company, who are investors trying to make money off of this colony of Virginia, who want to hear back that this is a good investment.

It’s a good idea to start out with a few basic orienting things. What’s the orientation? What direction are we coming from? When you look carefully at this map, you’ll see that north is not at the top of the map the way it is in most maps that we’re accustomed to and that most maps at the time in Europe would’ve done. North is to the right. If you stop and think about why that is, it really captures the point of view of somebody looking at the New World from Europe.

How would you approach it? Well, you get a hint with the picture of the ship down in the bottom left. You’re coming on a ship from Europe and this is the European point of view. There are some places, which are named clearly for European figures—Cape Charles, Cape Henry. Jamestown itself, of course, is named for King James. But most of the names are not English names. And this shows how densely populated this area was in the early 17th century by Native peoples.

It tells us something about the style of life in which you live in many different groups with different names. It isn’t clear that all of these Indian groups would’ve thought of themselves as having a common identity beyond owing political allegiance to Powhatan.

Mostly it’s an effort to get information across to the investors in the Virginia Company, who are funding his explorations. The investors did give instructions to the first group of settlers and explorers, saying, “Set up your town and then travel out from there and find out everything.” He’s particularly interested in showing this as a good investment.

He shows the Indian groups that are settled in different areas in order to convince them that there are people there to trade with, people there who can live off of this land. It’s a good land; it sustains life. He’s trying to give them information, but he’s also trying to encourage them to invest more, to have faith in this colony, to support him and the other adventurers. He is trying to be accurate. It’s one of the things you always want to know. How much is this person trying to tell accurate information to the audience. Or are they trying to give a very rosy or maybe a very negative view?

Archeological work confirms that he’s pretty accurate. There seem to be villages where he indicates villages. Maps certainly have to do with laying claim to the territory. Among European powers, the country that has drawn a map of an area does that as part of saying, “this is ours.” Smith isn’t entirely claiming this area. The English have already claimed it, although the Spanish had claimed it earlier.

And as you can see from all the different groups, lots of people claimed it earlier. All these native groups, this is their land. Smith isn’t really contesting at this point whether it’s the Indians’ land or not. Knowledge of where the people are is important in order to understand how much trade can take place in this area.

It says at the top, “Virginia,” although it doesn’t actually cover all the area that the Virginia Company claims to be Virginia.

Powhatan—that’s a name of the chief, but it’s also the name for the group of people who are parts of the empire that Powhatan rules. He’s the leader and he has all these tribes whom he protects. And they pay him tribute, tax, in the form of corn, trade goods, pelts. And that’s what makes him the powerful figure that the English have to deal with.

This helps us understand why it’s limited to this area. It’s not a map of Virginia from the point of view of the Virginia colony and its aspirations to own a great deal more of the continent. And it’s not a map of Jamestown where the English people are settled. It’s a map of Senecomaca, Powhatan’s kingdom.

There’re a couple of answers we come across from the written records. One reason he’s not showing you beyond Powhatan’s area is he’s relying on Powhatan’s Indian guides. They showed him all of the area where they could go freely. When they get to the fall line, you can see that there’re other tribes—the Manahoacs, the Monocans. The Powhatan guides aren’t going to take Smith into enemy territory. So all he can do at that point is take a record and say, “This is where these other Indians are.”

We find out from records of the Virginia Company and letters from Smith and other people in England about what they’re doing and why it’s a good idea to go to Virginia. They’re basing their idea of colonization on what the Spanish did for nearly a century in Mexico and in Peru and in the Caribbean. The Spanish go and find settled Indian groups. They’d like them especially to be rich, like the Incas or the Mayas, to have gold or silver. Then the Spanish conquer them, either through warfare or through diplomatic treaties.

They try to take over at the top so all of the gold, all of the corn, all of the beaver skins, all of the wealth that normally has gone to the dominant chiefs, the Spanish want that to come to them. And they ship that out to Spain. And that’s how they get wealthy. That’s what the English think they’re going to do in Virginia.

It’s an incredibly expensive thing to colonize. The King of England didn’t put up all the money to go settle Virginia, although the King claimed the land. They chartered a private company. In this case the Virginia Company, in which you get investors and they put in money. And they decide to support John Smith and other men who are going to go out and stake a claim and explore what’s there.

The idea of landing in Jamestown is you’ll set up a little town where you can live, and from there you’ll travel out and you’ll find wealth and riches. You’ll find Indian groups with whom you can make alliances. Find out who the important political leaders are. See if you can conquer them or get them to follow you. And see if you can follow the rivers to see if you can get farther into the continent and maybe even to the other side.

Why would Smith want to tell people in England about all these different Indian groups and their names? Aren’t these Indian groups taking up all the land that the English might take up when they come over? And the answer is, initially, that’s not the way the English are looking at it.

They’re looking at it as, “These are people whose wealth we can gain, we can get their crops, the animals they hunt.” And that’s shown up in the map.

In the upper right-hand corner, there’s part of the legend describing what’s on the map. Kings’ houses are a certain size and ordinary houses are another size. Smith is showing there’re all these chiefs and that means this an important political unit. There must be some wealth here. And that’s why this is a good place to settle.

One other aspect of the map that Smith spends a lot of time on is the rivers, showing you the bends and the ups and downs—where it’s wide, where it’s narrow. And that really shows us how he expects the Europeans to enter into the country. They enter in on ships. This is also how they will be transporting the trade goods that they’re getting from these different Indian groups.

It’s very important to the English to think about how they will get wealth back to England. They’re not yet seeing America as, “Here’s a place where we’re going to go and settle and stay.“ Instead, it’s a place we’re going to go, find riches, and return those riches back to England. Some of us may live there on these little outposts such as Jamestown, but most of us will not. And certainly the investors who’re trying to make money, most of them will not actually travel. The closest they get to adventure is reading about it and looking at Smith’s map.

In the upper left is Powhatan, the chief political leader of this time period in this area. It says underneath his name “Powhatan held this state [in] fashion,” meaning he sat and held this meeting in this way. Powhatan is the one with the pipe in his hand. Tobacco ceremonies are part of the diplomacy of the Powhatan people. And he’s got the feathers on his head and he’s wearing some beads or some decoration. And he’s up on a platform. So he’s clearly the big political leader. And beneath him are other people with a fire in this house or building.

The other Indian off to right side is a Susquehannock and he looks rather different. What it says underneath is “The Susquehannahs are a giant-like people and thus attired,” or dressed like this. He’s carrying a bow. He’s carrying a club in his other hand. He’s got an Indian pelt. So he’s depicted as a hunter.

We have here images of two different Indian groups. The suggestion is that one of these groups, the Susquehannahs, are primarily hunters and that what’s important about them is this individual hunting out in the forests. What’s important about the Powhatans is that they are a political group with this important leader.

It’s worth spending some time seeing how different those images are, particularly because we know from other sources that the Susquehannahs also had a political organization. They had chiefs; they had hierarchy. And the Powhatans also hunted. And that was one of the things the English were interested in—how do we get those pelts and furs that might be worth money back in England?

It’s a question that the map presents us with. Why is one group presented this way and the other group presented that way? The map is giving information, but it’s giving selected information about these Indian groups. If we didn’t know from other sources, we might think the Powhatans weren’t primarily hunters or the Susquehannocks didn’t have political institutions.

A choice was made by the mapmaker to emphasize something about these different groups. It tells us that he saw the Susquehannahs in one way, beyond the boundaries of the settled area, out there hunting. And he saw the Powhatans another way, in terms of their political hierarchy.

Powhatan, the paramount chief or political leader of this area, has an idea when the English arrive, too. Which is, “Here’s another tribe; maybe I can add them to the group of tribes with whom I’m allied and to whom I give protection and they will pay me tribute.” So his notion is they may be a useful additional group. They have iron goods. They have guns. They have some really useful things that would make you want to ally with them. They have copper, which is a beautiful good and a good material for making pots that last longer than earthenware. It’s what anthropologists called a “prestige good.” It makes clear that you have access to powers far away. It’s really the same as the Queen of England wearing beaver coats, which show that she has connections and control over the New World.

So from the Powhatan point of view, here’s these new people and they’re kind of interesting. They seem odd because they don’t seem to have any women. It’s hard to understand groups that don’t have women. But I think it’s quite intriguing to think of John Smith on the one hand thinking, “All right, how do I get control of Powhatan and his empire.” And Powhatan thinking on the other hand, “How do I get control of John Smith and his people.” And recognizing that they need help. These are explorers; they’re not farmers. They certainly don’t know how to grow the kind of corn that is grown in North America. The main thing they know how to do is fight and draw maps and explore. The English absolutely need the Indians to help them out.

It certainly isn’t the first place they come to. They come to Cape Charles and Cape Henry and they could’ve gone anywhere up the Chesapeake Bay or any of these other rivers. They go up the river in order to make sure it’s a little bit safer from the Spanish. The Spanish are constantly patrolling the shore of the Atlantic.

Virginia doesn’t really attract the Spanish. They’re happy with their gold from South America and Mexico and the plantation economies in the Caribbean. But they don’t really want the English to get wealthy and become greater competitors. The English know that and they go up the river far enough so they’re not really exposed.

They’re also on the river in case they need to retreat from Indians. Although they expect to be at peace with the Indians and to dominate the Indians, they also know that’s not always going to be true. So they settle right on the water, but up from the coast. It’s deep enough there. It’s not so far up that big ships can’t dock there. Those ships will supply them with food, with tools, and with new settlers. They want to set up a kind of post from which ships will go back and forth to England carrying the wealth that the settlers will be gathering from the countryside.

At the very beginning, it was much less successful than they expected. They suffered immensely from diseases and also they suffered from hunger. There was a drought, so the Indians had less corn themselves than they had normally had to trade and give to the English settlers.

The other aspect was the English settlers were so unprepared to be farmers themselves. They expected both to get food from the Indians and to be able to just gather food from the forest or gather fish from the rivers. And they did do some of that, but it turned out it was a lot harder to live than they thought. So they really needed the support of the Indians.

There was this period historians call the “Starving Time.” You can imagine being an investor in England and thinking this was not a good idea.

Part of the history behind this map is to represent the area as able to sustain life. It’s been a successful settlement so far because we’ve been able to travel throughout and gather this information. Let’s reassure the investors that there’s promise here.

After looking for gold the English try lots of different resources to send back. What they really discover is that tobacco will grow and tobacco becomes this much sought-after item in the 1620s. You can get really rich off tobacco, assuming that you can control enough land and enough labor to work it. Over the next decades, as it turns out that Virginia’s going to become a plantation economy, a society which grows tobacco, it changes the relationships tremendously with the Indians.

Within a couple of decades, there are plantations up and down the James River and it causes great conflict with the different Powhatan groups because those are lands that they use. They may not live on them in settled houses, but they use them for farming or they use them for hunting or they use them to fish along the river.

And the English have no understanding of, or respect for, the Indian’s ideas of ownership and use of the land. So over time, it becomes really clear to the Powhatans that there are more and more English. They’re here to stay. They want more and more land. And so you get a series of wars in the 1620s up through 1640s, when the Powhatans are pushed back.

I would start out with point of view. When you draw the map, you have to stand somewhere and look at the area that you’re mapping. I might ask students where Smith is standing. I guess he’s standing in the Atlantic Ocean or maybe on shipboard. He’s assuming you’re approaching from Europe.

The other thing about every map is it’s a small image of a big area. So the mapmaker had to leave a lot of things out. I would ask what kinds of things got put in and maybe what got left out. For example, we could imagine other things that Smith could’ve put on his map. We could say, well, “Why did he put on the rivers, not roads?” Well, they don’t have roads. There’re certainly paths, but the way you’re going to travel is by water.

He could’ve put on the different kinds of trees or animals that lived here. Or the different kinds of soil. There’re any number of physical features that he could have emphasized. But he was really interested in all these different Native American groups. Students could speculate: Why is that what’s most important or most interesting to the people back in England? Maybe if there had been gold, he would’ve done a map showing that.

You could ask students, to put themselves in the Native Americans’ position. What kind of map would you draw? At the very least it would be turned around, and you’d have some ships coming towards you off the Atlantic instead of sailing away from you. And the English would be this little group over here in Jamestown.

It might not look too different in some ways, but instead of these Indians, they might have images of the English settlers. And it would say, “The English are a giant people and they are thus attired. They carry these odd guns. They have no women.”

Glogster

Image
What is it?

Unlike posterboards commonly exhibited in classroom presentations, Glogster allows students (and teachers) to add sounds, videos, and graphics to text and images. These digital posters can then be shared with classmates and teachers via email, posted on class blogs, or simply accessed through the poster's URL address. There is a $5 30 day trial, and educators can also subscribe to an educator's plan that offers a variety of options depending on the specific needs of the course. A "teacher" plan accesses added features and the ability to enroll up to 200 students while a "school" plan allows an unlimited number of enrollees.

Getting Started

Signing up for Glogster (and its educator's plan) is fairly simple and takes only a few minutes. When users click on "create a Glog" they are directed to a sample poster whose elements can be edited and deleted at will.

Although many students can quickly find multimedia sources online, teachers should emphasize that the quality of these images, videos, and sounds will determine the effectiveness of the poster presentation

Before allowing students to begin a Glog, teachers should allow for some time (either at home or at school) for students to gather images, sounds, and video clips into a specific folder and save them on a computer or flash drive. Although many students can quickly find multimedia sources online, teachers should emphasize that the quality of these images, videos, and sounds will determine the effectiveness of the poster presentation. It would also be wise for students to draft the text that will appear on the poster before beginning a Glog. Elementary teachers, especially, should be prepared to assist students in finding sources and saving them in a folder. Students in grades K–3 may struggle with uploading their sources onto the poster but will find that entering text and personalizing the Glog is fairly simple. Once all the images, sounds, and videos are saved onto a folder, students can begin a Glog with either a blank template or by deleting and editing the default poster. To insert files, users have several options. In the top left corner, the "upload" button allows users to select all the files needed for the poster and save them to their Glogster account. Users can also click on the "link" button if they know the URL of their desired media sources. A third option is to simply record a video, audio, or image using the computer's WebCam and/or microphone by clicking on the "grab" button. Each time a file is uploaded a flashing star will appear next to the category in the media toolbox. Users can also upload sources specifically by toolbox category. Editing the poster is fairly simple as well. In order to change the background, select the "wall" tool and choose from the various background designs found in the different categories. The "graphics" tool also allows users to select from various categories, and the animated characters might prove popular with younger ages. Color, font, and size options in the "text" tool help students format the perfect text for the poster presentation. The only tools unavailable under the free education plan are the "data" and "drawing" tools. Once finished, students can save and publish—selecting whether the final product will be publicly visible or kept private. Even if a poster is finalized, it can still undergo editing—a nice feature.

Examples

Effective posters employee a particular theme applied in a consistent manner through the wallpaper design, font selection, and graphics. Teachers and students can begin thinking about glog design by browsing sample glogs from the site's collection of history posters (in the "Education" category).

One particularly effective poster is a cultural history of the Blues, with a rustic style and video samples of two different eras of the genre. Glogs can also be used to post assignments for students, such as this field trip to Cowpens Battlefield. Its novel use of drawing, as well as making each element a link to more expansive page, is noteworthy for demonstrating how Glogs can be given interactive touches.

History teachers will find the quality of Glogster projects will largely depend on instructions, rubrics, and exemplars that all focus on the targeted objectives of the lesson. In other words, what can students accomplish on Glogster that they could not do otherwise? More importantly, how can a digital poster enhance the learning and presentation of history? Answering these questions, and planning well ahead of time, will help teachers and students to maximize the potential of Glogster in the history classroom. In one example of Glogster in action, Amy Trenkle, a DC educator, used glogging to wrap up her 8th-grade class's school year in a unique fashion.

In terms of visual and digital literacy, Glogster can help students apply content knowledge as they create an original product that demonstrates levels of analysis and evaluation. Generating an exciting and thoughtful poster promotes the higher-level thinking teachers seek in the history classroom.

For more information

National Constitution Center: Explore the Constitution

Image
Annotation

Understanding the significance of the U.S. Constitution requires more than simply reading its text. This website provides context and tools designed to historically contextualize the U.S. Constitution and help users assess its lasting impact. An interactive Constitution lies at the heart of the website, providing line-by-line commentary by current scholars alongside excerpts from contemporary primary sources. Users can also search the Constitution in connection with specific court cases, topics, and keywords.

An interactive timeline in the exhibit "Centuries of Citizenship" provides useful background information. Additional contextual information is available in the form of a set of "fast facts"; descriptions of "basic governing principles," such as the rule of law, Federalism, and judicial review; detailed biographical information on all delegates to the Constitutional Convention; and audio discussions with scholars and pundits on topics ranging from voting to prominent court cases to women in the Early Republic. Three scholarly essays provide different "perspectives on the Constitution," reminding users that the success of the Constitution in uniting a group of diverse territories was far from assured in the late 1700s. Related primary sources in the "Founding Documents" section allow users to trace the relationship between the U.S. Constitution and the Magna Carta, the Mayflower Compact, and the Virginia Declaration of Rights.

New editions include the interactive experience "Lincoln's Crossroads," in which students face some of the choices Lincoln faced during his presidency; "A More Perfect Union," an exhibit on Barack Obama's 2008 speech on race at the Constitution Center; " and "Seize the Vote," a 4-player game testing voting rights' knowledge.

SurveyMonkey

Image
What is it?

SurveyMonkey is an online survey builder. Its ability to analyze data through various graphs is a useful way to engage students in how historians construct questions and use data to inform historical thinking.

Getting Started

To start creating a survey, users can sign up for free (basic plan) through the SurveyMonkey site, or through their existing Google or Facebook account. Once enrolled, users can begin developing their first survey by choosing a theme/template, creating a name for the survey and choosing its category, or by simply choosing an established “expert” survey template. Next, users can edit the look of the survey and begin establishing questions. Throughout the creation of the survey, users can preview at any time. The basic, free plan is limiting and users would need to subscribe to a priced plan in order to customize surveys (which is appealing at an institutional level—school district, school, athletics department, PTA, marching band—but not for individual teachers in the classroom).

In order to add a question, users can click on the appropriate box which then opens into a new window where the type of question can be selected (i.e. multiple-choice, rating, matrix of choices, comment/essay). The first step is to develop the question, which is then followed by a prompt to provide choices based on the “question type.” For example, if "multiple-choice (only one answer)” is selected, each answer option is entered in a text box on separate lines. However, if a “matrix of choices” is the preferred format, then users will have rows where they can enter secondary questions, followed by fields where column headings can be entered in relation to the weight of the option. In other words, will “Excellent” rank as a “5” or a “1” on a 1 to 5 scale?

In addition to writing new questions, users can select questions from an appropriate databank, such as "education." Once the survey is complete, users can print a copy and send the survey electronically via email. One of the best features of Survey Monkey is the visualization tool, based on the type of feedback provided. Visualization options allow users to view data from many perspectives (bar, graph, area, line.) In addition, responses can be browsed, filtered, cross-tabbed, downloaded, and shared.

Examples

So, why use SurveyMonkey in the history classroom? Teachers can use surveys not only to gauge student learning, but also to walk students through how to ask questions. Understanding how historians pose questions is an essential skill in the social studies classroom; teachers can use Survey Monkey to help students understand cognitive levels of thinking and questioning (from fact recall to analytical or evaluative). If teachers model how to construct thoughtful surveys that will yield useful results, students are one step closer to answering their own questions with well-designed data collection tools.

...Students can develop surveys that critically reflect on a previous unit, in order to collectively discuss what they learned and what material still requires attention. This can be valuable ahead of AP exams, midterms, and final exams.

Using SurveyMonkey as an instructional tool is a great way to engage students in curriculum development. In this example, a teacher instructs her students to construct a survey on immigration. In the comments section, you can browse through the student-created surveys to see some examples. Unfortunately, most online examples are not produced by students. Most teacher-produced surveys tend to ask students to assess their teacher's instruction or are geared towards colleagues in the field of teaching. Hopefully, as survey-building tools become more commonplace, more student-produced surveys will appear online. On a final note, teachers should be aware that learning how to construct surveys is a valuable lesson for students, but learning how to construct questions that yield valuable data is even more important . . . but not easy. Wording of questions, understanding the target audience, and minimizing bias are all concerns students should be thinking about in constructing poll questions. But introducing students to these challenges can help them begin to understand why historians must think about these concerns in the process of analyzing historical events. One Teacher's Experience: Bridget Federspiel, Teachinghistory.org Teacher Representative Bridget Federspiel I have used SurveyMonkey for numerous projects. While completing a Teaching American History (TAH) grant proposal, I needed to collect information about the education background and professional development activities of my colleagues. I created a 10-question survey and sent the link in an email. My students have used SurveyMonkey to collect data for use in a National History Day project. The students created a survey and posted the link on their Facebook page. First the students made a list of questions for their survey. They wanted to gather information about how often students use particular Internet sites for research. The students created 10 multiple-choice questions for their survey. (Multiple-choice questions worked best due to the fact that it didn’t take too much time for people to answer the questions.) The questions ranged from the vague (how often do you use the Internet for research?) to the specific (how often have you used the Library of Congress site to search for information?). Each student then linked to the survey on their Facebook page, asking their friends to answer the survey. The students collected over 500 hits on their survey. SurveyMonkey tallied the answers for them, and the students used the information to create graphs of their results, indicating the most popular Internet sites used by the students.

For more information

SurveyMonkey's free basic plans provides users with unlimited questions and responses, custom survey design and URLs, security features, and the ability to create an Excel export and printable PDF. Additional pay plans add random assignments for A/B testing, question and answer piping, question randomization or flipping, and text analysis for open responses; the advanced plan also offers survey URLs, logo and branding, and the ability to decide where your respondents go after they complete your survey. Users should also note that other survey-building tools are quite popular online, such as Polldaddy.com and Zoomerang. In this brief article, a comparison is made between SurveyMonkey, MySurveyLab, Zoomerang, and FluidSurveys. Because each one of these programs adds features on a fairly regular basis, it is best to examine the various programs' websites for a more up-to-date comparison. One teacher reflects on the use of Polldaddy and SurveyMonkey as a useful tool for class presentations.

YouTube

Image
What is it?

YouTube is a popular video hosting tool that allows users to create and upload videos as well as browse submissions by other users. At more than 1 billion views per day, it is the most accessed video hosting site on the Web, producing both challenges and rewards for educators.

Getting Started

The YouTube video hosting site, like the Google search engine, has so utterly dominated the market that there are probably few people who haven't heard of it—amazing for a company only six years old! With success, however, comes obstacles for educators. The content on YouTube is diverse and many school system administrators have blocked YouTube for that very reason: just as students can find interesting and educational videos to better understand history, they can also be distracted by non-educational content (some of which might be inappropriate). Regardless of school system filters and restrictions, YouTube can enhance the teaching of history. Here are some tips and considerations to keep in mind. One strategy is to use YouTube for planning purposes at home or at work. Whether you sign up for an account or simply browse, begin by looking through available YouTube channels. YouTube EDU (youtube.com.edu) offers videos aimed at educators from many institutions of higher learning. A quick search for "civil war" within the YouTube EDU portal yields a variety of engaging videos that provide usable content (note: many of the videos in this search are lectures, but others include vodcasts—such as an examination of Winslow Homer by Duke professor Peter Wood).

Examples

Here are a few suggestions on how to best search for educational videos in the classroom:

Teach students how to search online wisely.
  1. Set up your own channel. This approach requires a bit of work up front, but it provides a resource that can be used repeatedly. And once searching for history videos becomes second nature, it becomes easier to teach students how to search for quality content on YouTube. As you find course-appropriate videos, click on the down arrow button next to "Add." Here, you have two choices: either add the video to "favorites" or create your own playlist. "Favorites" automatically displays in your course YouTube channel. In order to display a personalized playlist, however, you must be logged onto your YouTube account and in your specific channel. There, you will find a user menu at the top and be able to select "Videos and Playlists." Check the playlist box, and then check the specific title of your desired playlist. Your channel will refresh and display the specific playlist underneath "favorites." Once you collect a number of videos in the course channel's "Favorites" category, or add them to a specific playlist, students can select from videos approved for the course.
  2. Teach students how to set up their own "History" channels. After setting up a course-specific channel with favorite videos and user-generated playlists teach students how to create their own channels and playlists. This is ideal for long-term projects. Students can also add videos to the course YouTube channel by emailing you the link to a particular video, or if you have created a student-accessible account, students can add videos directly. Specific guidelines and monitoring, though, are highly recommend to avoid unwanted videos on a course channel.
  3. Search for reputable organizations on YouTube. Find channels created by educational organizations such as the Library of Congress, National Archives, TimeLife, or the U.S. Holocaust Memorial Museum.
  4. Use existing channels as a gateway to other sites. For example, TED.com offers videos from TED (Technology, Entertainment, Design) talks around the world. It hosts videos both on its own site and on YouTube. Arrangements like this provide educators some flexibility by using YouTube as a "gateway" to other video sites. For example, a quick exploration of TED videos via the tags page leads users to talks on history that can be used to generate discussion in class.
  5. Teach students how to search online wisely. Teaching students how to become digitally-literate is now part of many social studies teachers' job descriptions. Too often, we expect students to be more savvy than their elders in using new-media technologies . . . and sometimes they are. Social studies teachers, however, can teach students how to maximize the use of online tools for the research, writing, and production of history. Searching for "Civil War" or "Jefferson" is unlikely to yield desired results (unless students want to watch Jefferson Airplane and Guns N' Roses music videos). Encourage students to use specific search terms and broaden from there if necessary. For example, specifying the "American Civil War" will provide better search results than simply searching for "Civil War." "U.S. Civil War battles in western North Carolina," however, may be too specific to generate good results. Search for a particular event ("Battle of Bull Run") will help, as will using first and last names when searching for YouTube videos on famous personalities in history—such as "Thomas Jefferson."

"Wait! YouTube is blocked at my school!"

Here are a few options that might work:

  • If YouTube is blocked at your school, use write-ups like this Tech for Teachers entry (as well as other education articles) to see if school system IT personnel can allow password-protected access to YouTube.
  • Ask the school system's IT personnel to unblock your teacher-generated course (or teacher) channel on YouTube. You may want to add to this list any organizational YouTube channels of importance to your teaching, such as the Library of Congress or the JFK Library. Providing a particular list of URLs for content-specific YouTube channels will increase your chances of accessing valuable videos. This is a much easier request than providing hundreds of URLs for individual video clips.
  • If all else fails, you may be able to download YouTube videos at home for use in the classroom. Many free sites can convert YouTube videos into files that can be played on QuickTime, Real Media Player, or Windows Media Player. Sites like Convert Direct or Media Converter will convert YouTube videos into an .mp3, .wmv, .avi, or .mov file. Pay close attention to copyright restrictions before copying online content.
  • TubeChop is an online tool to cut, or chop, a particular portion of a YouTube video—perfect for showing a specific clip for classroom instruction. Users drag the beginning and end cursors to desired location, chop, and TubeChop provides a URL address via their site and an embed code.

In short, YouTube offers teachers a wide variety of materials to use in the classroom. As with any online tool, careful consideration is necessary before students begin using YouTube for historical research and projects. Videos are not a solution to ineffective lessons, but when used in a specific—and targeted way—they can enhance well-designed lesson plans, engage visual learners, and help make history come alive for students.

For more information
  1. Baker, Richard Beach & Frank W. “Why Core Standards Must Embrace Media Literacy.” Education Week, June 22, 2011. http://www.edweek.org/ew/articles/2011/06/22/36baker.h30.html
  2. Hammond, T. C., & Lee, J. K. (2010). "Editorial: Digital video and social studies." Contemporary Issues in Technology and Teacher Education, 10(1). http://www.citejournal.org/vol10/iss1/socialstudies/article1.cfm
  3. Lesson Plan Idea: Using YouTube in a social studies/geography lesson.
  4. A small but helpful list of links to history-focused YouTube videos.

Locate Yourself on a Map of the Americas

Teaser

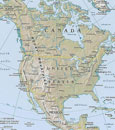
Young students locate themselves on a map and explore spatial relationships among geographic features.

lesson_image
Description

Young students locate themselves on a map and explore spatial relationships among geographic features.

Article Body

This is a straightforward lesson that introduces K-2 students to the concept of geographical location and scale. Using a variety of different maps, the lesson helps students understand the way that countries are situated within continents, states within countries, and cities within states.

Designed for a single-period, the lesson begins with students identifying the continent and country in which they live. Then, students begin to move to progressively more specific scales, locating the state or district in which they live, and eventually their school. Along the way, the plan calls for discussion of the number and size of states and districts, and the relative scale of different cities and towns.

The lesson is built around National Geographic’s MapMaker kit for the Americas—part of their larger MapMaker kit collection. For first-time users, video tutorials are available, and each kit enables the user to download, print, and assemble maps of varying scales. Map sizes range from “mega maps” designed for walls to one-page outline maps designed for individual study.

The strength of this lesson is that it introduces a key concept in historical thinking: geographical location and spatial relationships. By helping students understand the relationships between and among various locations, it establishes an important foundation for students in early elementary grades to learn about historical context. The website isn’t always the most intuitive to navigate, but persistence pays off with high-quality free resources.

Topic
Geographical location and spatial relationships
Time Estimate
50 Minutes
flexibility_scale
3
Rubric_Content_Accurate_Scholarship

N/A, the focus of this K-2 lesson is geography.

Rubric_Content_Historical_Background

N/A

Rubric_Content_Read_Write

No

Rubric_Analytical_Construct_Interpretations

No

Rubric_Analytical_Close_Reading_Sourcing

Yes, requires close reading of maps.

Rubric_Scaffolding_Appropriate

Yes

Rubric_Scaffolding_Supports_Historical_Thinking

Yes

Rubric_Structure_Assessment

Assessment checks for understanding of geographical relationships, no criteria.

Rubric_Structure_Realistic

Yes

Rubric_Structure_Learning_Goals

Yes

Little Bird Tales

Image
What is it?

Finding digital tools for social studies in the elementary classroom, especially in the early grades, can be a bit difficult. Little Bird Tales is a helpful tool in making social studies come alive for young students through its simplicity and marriage of visuals and sounds.

Getting Started

Registering with Little Bird Tales (LBT) is quick and easy; the focus on small learners means that privacy concerns are respected: the site contains no ads, merchandising, or external links, and only requires a valid email to sign-up. LBT also offers a teacher account, which is accessible via an email request (teachers should provide the same email used to sign-up). Before working with students, teachers should be aware of the technical specifications, such as supporting browsers, image file size, and storage capacity—the FAQ page addresses these points fairly well.

Once an account is activated, creating a digital tale is fairly simple. Click on "create a new tale" to construct the tale cover. Users can either draw an image—using the built-in art pad—or upload a saved image (note: minimum image size is 600x420 px). Add a title, submit author information, and a record an audio introduction to finalize the tale cover. Users should also test microphone quality for volume and clarity before proceeding with new pages.

Each subsequent page follows the same procedure, and the size of the final project is only limited by the tale box capacity in your account. The main difference from the cover page is that students can enter text for their product—an ideal feature that reinforces reading and writing, while providing students a "script" for their sound recording. Page order can be easily rearranged at any time by dragging each page into the desired order in the sidebar found on the right.

Users can resume editing their tales by logging back in, selecting "My Tales," and clicking on the notepad icon. Other icons on the "My Tales" screen include a play option (to see the video in progress), an email icon to share the video, and a trash icon to delete the tale project.

Once the video tale is completed, users proceed to step three in order to share the tale via email—regardless of whether users choose to keep the video private or make it public. Users who choose to make the video public can do so by clicking on the account homepage (house icon) and selecting "public" under the cover page image (note: Little Bird Tales moderates all videos before they become public).

Examples

It is highly recommended that teachers create a "test-run" project ahead of time before working with students. In addition, it might serve well to have students prepare all images and script beforehand. Users can create their own artwork using the built-in drawing pad, but teachers may need access to a scanner to create image files of original student artwork on paper (note: images and scans should be saved in .jpg, .png or .gif).

Little Bird Tales works well because it captures the imagination, creativity, and voice of the child in a free and easy to use platform.

The strength of Little Bird Tales is the ability for children to tell stories that can be autobiographical (my life, my community, my school, my family), biographical (U.S. presidents, world history figures), or related to other aspects of the early grades social studies curriculum such as the environment, economics, civic ideals, or global communities. Little Bird Tales works well because it captures the imagination, creativity, and voice of the child in a free and easy to use platform. Public Tales on the LBT site include a civics project on American symbols, a story on "daddies", a tale on regional history, a silent tale on global cultures and clothing using beautiful imagery, and an inspirational video by a young runner. Middle school and high school students can also benefit from LBT, as evidenced on a video dealing with homelessness in America. In our experience in working with a 1st-grader, the initial day of trying out LBT was a learning curve for her but she caught on quickly. With simple guidance, she was able to do all the work (although uploading images needed more hands-on assistance.) By the half-way point, she was typing, recording her voice, saving her work, and moving on to the next slide. Fatigue did settle in after a while, so preparing all materials and images beforehand helped her. She also discovered LBT's ability to rearrange pictures in any order—a useful benefit whenever she changed her mind after previewing the video. The student found the playback of the recording useful and empowering; immediately recording a passage again helped her get the video "just right." It took her about 2-3 hours in total to finish the project. Keeping this one experience in mind, it might be best for teachers to first try LBT by having each student create one or two slides for a class video. For example, in a 50-states project, each student could easily adopt one or two states and create a few slides which would allow the entire U.S. to be included in a video project. This model could likewise work for U.S. presidents, famous American citizens, local communities, or other topics with a large number of elements. Such an introductory approach serves teachers and students alike. Children can become familiar with technology in a limited way by creating only a few slides. For their part, educators can invest limited curriculum time for a collective project, before expanding a video project to a more extensive one for individual students.

For more information

Teachers, review the specific features provided by the "Teacher Account," including class and school management.

For more on the tool, read Discovery Education Blog on Little Bird Tales

Laura Jernegan: Girl on a Whaleship

Image
Annotation

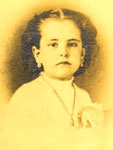
In 1868, Laura Jernegan, six-year-old daughter of a whaling captain, put to sea with her parents and younger brother. This website, created by the Martha's Vineyard Museum, explores her family's four-year whaling expedition, focusing on Laura's own diary.

Two narratives ground the exhibit: "The Story of Whaling" and "Laura's Story." Each narrative is divided up into three sections—"Before the Voyage," "The Voyage" and "After the Voyage"—and consists of 14—15 individual "chapters," each a short essay of approximately 300—1600 words. "The Story of Whaling" describes the rise and fall of the whaling industry and the nature of a whaling voyage, including preparation and hiring crew.

"Laura's Story" narrates the voyage of the Roman, the ship on which Laura and her family set sail. The voyage included a stay in Hawaii, mutiny, and the Roman's sinking in the Arctic (everyone survived). "Laura's Story" also looks at the lives of Laura and her family before and after the voyage, as young children and as adults. Each essay include links to images, descriptions, and other sections of the website that clarify and enrich the text.

For Laura's own description of her time at sea, "Explore Laura's Journal" lets visitors browse her 43-page journal. Written in a child's bold handwriting, the journal is short and easy to read, and can be viewed in the original scans, as a text transcript, or with a magic lens feature that translates the writing into print as the mouse runs over a page.

Further background information supports the two narratives and Laura's journal, including:

  • "About Whales," a mini-exhibit answering basic questions about six whale species;
  • an interactive timeline reaching from 1774 to 1955, including both general world history events and whaling events;
  • "Explore the Ship," a diagram of a whaling ship that visitors can click for information on crew positions and parts of the ship; and
  • a "Map of Whaling."

This interactive world map lets visitors display features from six sets of information, turning each set on or off and overlaying them. The sets include the four routes of the Roman's journey, three typical whaling routes, posts and sites important to whaling, 1878 whaling grounds for four species, major ocean currents, and whale migration patterns for three species.

Finally, visitors can view zoomable photographs of 175 different whaling-related objects in "Artifacts," read the descriptions of 15 crew positions in "Meet the Crew," and browse 16 pieces of logbook art, 36 photos, and 53 whaling-related images in the "Picture Gallery." An A-to-Z glossary offers definitions for 180 historical and whaling terms. Visitors can also explore the biographies of five people, including all of the members of the Jernegan family and, in "More About," can read 10 more 1,000-3,000-word essays on subjects like race and whaling, women and whaling, and 19th-century children's literature.

In the "For Teachers" section, educators can download two units on whaling: a four-lesson unit for grades 1–3, or a six-lesson unit for 4–5. "For Further Study" features a bibliography of 75 books for children and adults and eight annotated links.

A thorough website centered around a very unique primary source—use it to invite young children into history through the voice of a peer!

Finding a Speaker Willing to Use Digital Networks

Image
Question

Is there a historian that would be willing to Skype a 4th-grade classroom on the American Revolution?

Answer

There are two levels to your question—how does one find a historian who would speak to a 4th-grade class, and how does one find a historian who will Skype into the classroom? The first question is much simpler than the first. In my experience, historians greatly value current and future students of the discipline, so I often find they are quite receptive to opportunities to talk about their subjects. At the American Historical Association we maintain fairly wide-ranging databases of faculty in almost every field of specialization, and regularly suggest names of specialists that might speak on particular historical topics.

While a growing number are willing to experiment with technologies such as Skype, most tend to just dismiss them as too much trouble

The next question you should ask is—how generally you want someone to speak on the topic? For instance, would you be looking for someone who could provide a broad overview and then take questions from students, or would you be more interested in someone who could talk in some greater depth about a specific aspect of the Revolution? There are hundreds of historians who work and teach in this area of American history to choose from, but that is where the added criteria about finding a historian who will Skype into the classroom creates a complication. In a survey of historians conducted last year, AHA found that they are much more likely to use technologies for personal research than interpersonal communications and teaching. That statistic certainly bears out in my work with other members of the discipline. While a growing number are willing to experiment with technologies such as Skype, most tend to just dismiss them as too much trouble. I often have to coax historians to participate in meetings with Skype, even though they often find it all much simpler and easier to use than expected. Hopefully, as these technologies become more ubiquitous that problem will disappear, but for now it would significantly complicate your request. I can't think of any databases other than our directories of history departments and members. (Unfortunately they are gated, though I am always happy to dig into them for anyone who writes or calls looking for help.) Part of the problem may be that I am a little too stuck in the world of academics. The best first step for finding a potential speaker is probably to just look on your bookshelves for the authors of books on the subject, or even Wikipedia, which has a pretty good list of popular surveys on the topic. From there, a quick Google search on the author's name will usually take you to their faculty page, which will almost always have an email address. You really don't have to be shy about writing to ask them if they would be willing to speak to your class. A simple and direct request, noting that you are trying to develop your students' appreciation of history and desire to help them understand how history gets made should elicit a generous response. Even if they cannot assist, they are likely to have a student or two who also writes on the subject and could also be asked to serve. In my experience, most historians are happy to assist as time and opportunity allows.

Bibliography

Ask a Master Teacher

American Historical Association Accessed March 2, 2011.

Humanities and Social Sciences Online. Last Modified March 2, 2011.

OIEAHC - Omohundro Institute of Early American History & Culture. "Institute Colloquium." Accessed March 2, 2011.