Animoto

Image
What is it?

Animoto takes photographs and allows users to add sound and text, as well as control some editing of the video project, in order to share stories through a short video presentation. Students will find the ability to express themselves through new media tools an attractive aspect of Animoto, and teachers can utilize this tool as a way to bridge curriculum and student engagement or develop digital storytelling projects. For students and teachers tired of PowerPoint presentations, Animoto is just as easy to use and provides a wider multimedia experience.

Getting Started

Pre-planning is a helpful first step in creating your video project. Gather all images and video clips and save them in a desktop folder. If a particular soundtrack serves the needs of the project, make sure the sound clip or song is in .mp3 format. Finally, on a piece of paper, sketch out the storyboard for the video—in particular the placement of text in the video. Animoto offers a handful of different account types that vary in price from personal to business.  The "Professional" account priced at $22/month ($264/year) is the most common and offers HD quality videos, more than 25 professional fonts, and pre-built storyboards.

Once images and videos are uploaded, users can click and drag images at will in order to construct a desired sequence. Other features allow users to spotlight certain images or videos for a more focused display during the final presentation...

After users open an account, the first step is to upload photos and videos via three options: from files on the computer, from Animoto's own collection of photographs, or from another website. Uploading images and videos from the computer allows users to select multiple files and conduct a batch upload. Once images and videos are uploaded, users can click and drag images at will in order to construct a desired sequence. Other features allow users to spotlight certain images or videos for a more focused display during the final presentation, add text slides, rotate and/or duplicate images, and delete any unwanted selections. It is worthwhile to note that one of Animoto’s biggest drawbacks is the limit placed on text entries. Text restrictions may prove to be frustrating for users, but one simple way to bypass these limits is to create a PowerPoint slide with the desired text, save that PowerPoint slide as a .jpg image, and then import the file as a picture into Animoto. Step two directs users to add a music file, or soundtrack, to the video either through Animoto’s own selection of songs or your own .mp3 files. Users can also select at which point the music begins. The final step is the editing process and finalization, where users can establish the speed of transitions, the design template, and select whether the video is short (30 seconds) or full length. After all selections are made, users go to the final section where the credit information is provided for the title of the video and the creator(s). Here is where Animoto users will find a second frustration: once everything is ready to go, users select “create video” and the process of finalizing the video can often take quite a while. Nevertheless, Animoto emails video creators once the video is finalized . . . so you don’t have to wait around. (Update: Animoto’s site updates may have fixed the speed delay in finalizing videos.)

Examples

Teachinghistory.org used a quick mock-up video at the 2011 AHA conference to show attendees how five simple images can tell a story. Other video examples include The American History of Chocolate, The Great Exchange, and Civil Rights.

For more information

Animoto’s website, as well as their education page.

USA Today’s blog TechnologyLive looks at the updates and improvements of Animoto.

Review an abstract on "Animoto and language acquisition in the classroom." İrgin, Pelin and Yildiz Turgut "Using Animoto for Language Education" The International Journal of Learning 16 (2009): 1-8.

Students Working in Local Historic Preservation

Image
Article Body
What Is It?

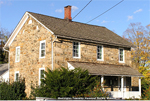
History comes alive when students volunteer at their local historical society museum and they learn the art and value of historical preservation. This service-learning project bridges the needs of a museum that was understaffed with the opportunity for students to practice being historians.

Rationale

Every community across America has a story to tell through its architecture, its people, its use of space, its resources, and its role in the larger American narrative. Our town has a rich history that dates back to the colonial period and like many small towns, we have a historical society with a museum that houses a rich collection of historical documents and artifacts that tell the story of our past. However, because of limited funds, a lack of proper materials for preserving items of historical value, and few volunteers, we were in danger of losing much of this collection. As a history teacher I’m always searching for ways to make the study of history relevant to my students. Providing them with an opportunity to volunteer at the museum seemed like a perfect way to marry the interests of our local community with my objectives as a history teacher. I hoped that through this experience my students would develop greater appreciation for preserving history and an understanding of the methods used in historical preservation. This partnership could also help bring the museum into the 21st century by creating a database of the museum’s collection that could be shared with the public and school groups. In addition it would give students a glimpse into the work of historians, preservationists, archivists, and archaeologists.

Description
As a history teacher I’m always searching for ways to make the study of history relevant to my students

I contacted the director of the historical society museum to discuss the possibility of using students in the museum to help with their work. The staff was cautiously optimistic, though concerned about adolescents working with valuable documents. When they agreed, I asked four of my capable, dedicated students who had expressed an interest in this work to help me launch the program. Each year I have added students to the group and currently 14 students work one to two hours weekly under the supervision of a volunteer museum staff member. It has been rewarding to observe my students doing work of great value, and it provides the museum with the work it needs to give the community a glimpse into their past.

Teacher Preparation/Procedure

1. Contact your local historical society or museum and ask what opportunities are available for your students. I made an initial phone call to introduce myself and to ask about possible projects. I then visited the museum to meet the director and to work out details of the project. 2. Determine the interest level of your students. Students are always looking for ways to improve their chances at college acceptance. This opportunity was intriguing because of its uniqueness and because it would provide them with community service hours that many need for scouting, National Honor Society, or just because they want to be more involved. I also introduce them to the value of historic preservation and help them to recognize the community need to preserve the artifacts and documents housed in our museum. 3. Get approval from school administrators. 4. Provide students with permission slips to be completed by their parents. 5. Conduct an orientation meeting for students and museum workers. This is held at the historical society museum and the museum staff introduces the students to the workplace and discusses the type of projects they will work on. A survey form is provided to the students to gauge their interest and availability. 6. Create a schedule for volunteers indicating dates and hours they are expected to work. I post this in my classroom so that I know who is working on a daily basis. I also maintain an email chain that is shared with the museum staff. 7. Students must have transportation to and from the museum. Students in my district are bused so they are able to use the school buses to get to the museum after school. Parents must provide transportation home. 8. Visit the museum periodically when students are working to encourage them and see their progress. I volunteer one day a week myself and work along with the students, although this is certainly not necessary for the program to be successful. 9. At the end of the season, the museum hosted a special presentation for students, parents, and school administrators to showcase the work of the volunteers. It included a PowerPoint presentation featuring each student and the work that he/she accomplished. This was a wonderful celebration to demonstrate the students’ accomplishments and efforts. 10. Contact your local newspapers to advertise what students have done for the community. This will go a long way in getting support for your efforts and in encouraging more students to participate.

Pitfalls
  • Be sure the students understand the seriousness of their work and the importance of honoring their commitments. You may want to wait for the school year to be underway before beginning. We actually begin in January and end in May. By then I know my students better and can determine who is best suited for the program.
  • We volunteer during two different sports seasons so the group I begin with may not be the group I end with. Be open to substituting students over time. I don’t turn anyone away even if they cannot commit to the entire program.
  • Students should discuss carpools and transportation issues.
  • Have a phone/email chain for messages and communication.
  • Inclement weather and vacation schedules should be discussed.
Be sure the students understand the seriousness of their work and the importance of honoring their commitments
Additional Resources for Teachers

National Trust for Historic Preservation This site provides teachers with a rationale for teaching historic preservation and a series of articles and model lesson plans that can be incorporated into K-12 classrooms. The focus is on teaching students the value of preservation and to provide them with opportunities to be actively involved in the history of their community through preservation projects. Examples of articles range from how to conduct oral histories to how to “adopt” a historic site. Advisory Council on Historic Preservation A step-by-step approach to describe what a historic preservation service learning project looks like. The Advisory Council on Historic Preservation, in concert with the Preserve America Foundation, is committed to encouraging students to take on service learning projects that will enhance their understanding of American history and allow them to gain a greater appreciation for preservation efforts. The site also includes articles highlighting the commitment of our President and First Lady in recognizing the contributions of citizens who effectively engage in historic preservation projects. National Council for Preservation Education Guide to undergraduate programs in preservation. Teachers and guidance counselors might find this helpful in advising students who have a particular interest in historic preservation programs. Teaching with Historic Places Provides teachers with lesson plans that focus on students acting as historians as they learn about sites that are listed on the National Registry of Historic Places. The lesson plans are categorized by state, theme, time period, and skills. The intent is that students will learn history in a more active way and come to appreciate our nation’s cultural resources.

Acknowledgments

A special thank you to the members of the local historical society who have patiently guided my students in the art of preservation and provided us with a firsthand opportunity to learn history.

Mind Mapping: Visualizing Historical Thought

Image
What is it?

Mind Mapping applications are tools that allow students to develop a physical representation, a blueprint of their thinking that goes from the concrete to the more abstract. Mind Maps provide a clear and organized visual snapshot of how the ideas and information are outlined in one’s head. This way one can see where ideas need to be further developed and how all the information is linked. This snapshot is developed and analyzed by the student. He or she identifies the logical flow of ideas connecting one to the next and building on each in a web-like form. Mind Mapping is truly a revolutionary way of thinking and learning!

One Teacher's Experience:

As an educator I have found the electronic tool of Mind Maps to be pivotal in the success of some of my students, particularly when looking at students who are visual learners and mathematical/logical learners. I have also found that students in the special education classroom benefit from Mind Mapping. The tool allows them to demonstrate their understanding without the rigor of extensive writing. It also allows them to monitor their own understanding, and thus helps them continue to build toward metacognition . . . every educator’s dream.

Getting Started

Below are just a few of the many Mind Mapping sites available. I happen to be partial to Mindjet, but click on the links and check them out for yourself.

Examples

Furthermore Mind Mapping can be used in the following ways. Please note: this list details just a few ways to use this tool. There are countless ways to incorporate it into your classroom.

  • Vocabulary development—detailing what the word is, what it’s not, and examples
  • Outlining an essay or other form of writing
  • Viewing and analyzing differing points of view of two historical figures/events in history
  • Developing a timeline of a historic event
  • Comparing and contrasting events and people in history or present day issues
  • Identifying the main event and detailing the cause/s

My History at School

Teaser

To make something real, make it personal. Abstract concepts can best be understood when applied to individual experience.

lesson_image
Description

Access 7 activities which introduce the evidentiary and narrative aspects of history to young students. Students familiarize themselves with these topics by exploring their own past school experiences.

Article Body

This collection of activities found on the Bringing History Home website introduces first graders to important historical concepts. Through exploring the history of their time at school, students learn about topics such as chronology and historical context as well as how to identify and question different types of primary sources. While these concepts may seem fairly sophisticated for first or second graders, the activities introduce them in accessible and engaging ways. There are seven activities that make up this instructional unit. Each activity can stand alone as a single class lesson or can be combined with others for a multi-day lesson or unit. The first activity asks the question, "What is history," and distinguishes between fictional stories and stories about things that actually happened. Understanding history as a story is a central theme throughout the plan, and the subsequent activities focus on the centrality of evidence in creating historical stories.

Understanding history as a story is a central theme throughout the plan. . .

Activities three, four, and five introduce students to various types of evidence historians use to make sense of the past, through examining school artifacts such as a newsletter and cafeteria menu. In the final activity, students work as a class to construct a mind map about the history of their year at school. Students are then asked to draw a picture that illustrates one of the concepts from the mind map. Finally, students can be assessed by asking them to identify types of evidence that can provide particular types of information about the school. With a focus on making connections to students' experiences and teaching them that history is a story based on evidence, these clear and kid-friendly activities are an elegant way to introduce key aspects of history to young elementary students. Designed for first graders, these activities can be useful for both younger and older students.

Topic
Chronology, Historical context
Time Estimate
1-7 days
flexibility_scale
2
Rubric_Content_Accurate_Scholarship

Yes
Introduces students to core characteristics of the historical discipline.

Rubric_Content_Historical_Background

Yes

Rubric_Content_Read_Write

Yes
However, teachers must find text-based artifacts about their school (e.g. a newsletter) to use in the lesson.

Rubric_Analytical_Construct_Interpretations

Yes
Students are asked to analyze multiple pieces of evidence in order to construct a history of their time at school.

Rubric_Analytical_Close_Reading_Sourcing

Yes
Students are introduced to sourcing and are asked to consider source information in several activities. See this example. Questions are used to demonstrate the close reading of multiple kinds of sources.

Rubric_Scaffolding_Appropriate

Yes
A very accessible introduction to the idea that history is more than just a set of facts.

Rubric_Scaffolding_Supports_Historical_Thinking

Yes

Rubric_Structure_Assessment

Yes
Includes an assessment activity and rubric.

Rubric_Structure_Realistic

Yes, but no estimated times are provided for instruction.
A few activities rely on specific texts but substitute texts can be used.

Rubric_Structure_Learning_Goals

Yes

Religious Orders of Women in New France

field_image
Question

What services did women of religious orders provide in New France?

Answer

Women of religious orders were active in New France mainly in founding schools and hospitals. Three religious orders were present almost from the time of the earliest French settlements. Jesuit Relations reports, first published in 1611, inspired many founders of these religious communities to travel to New France. Reports narrated the adventures and trials of the earliest Jesuit missionaries who accompanied French explorers and trappers. The religious orders of women that soon followed established the first schools and hospitals in the colony and were among the first women to arrive in New France. The most important of these communities were:

Ursulines

The Ursulines were the first nuns to arrive in New France, in 1639, led by Marie de l'Incarnation. She and the other Ursulines who accompanied her established a convent in Quebec, where they started the first school for girls in North America. The pupils were both Native and French girls. Ursuline communities and schools spread throughout New France, eventually reaching as far south as New Orleans, where a community was established early in the 18th century. As their communities spread west, they founded schools to educate Native American girls.

Hospitalières de Saint-Joseph

These Augustinian religious women also came to Quebec in 1639 and founded a hospital, the Hôtel-Dieu in Quebec (the first in North America north of Mexico). They staffed another, the Hôtel-Dieu, in Montreal in 1645. The Hospitalières also founded schools for girls, including nursing schools, as well as other institutions to care for the poor and the sick.

Congrégation de Notre-Dame

St. Marguerite Bourgeoys began this noncloistered religious order and, in 1658, established a girls' school in Montreal. This was the first of many boarding schools and day schools run by the order throughout New France. The first bishop of Canada, François de Montmorency Laval, highly encouraged and supported these communities of religious women.

For more information

The Virtual Museum of Canada, Seasons of New France.
Quebec City's Chapelle et Musée de Ursulines.

Ursulines of Canada.

Some from Marie de l'Incarnation to her brother.

Montreal's Musée des Hospitalières de l'Hôtel-Dieu.
Montreal's Marguerite-Bourgeoys Museum, Notre-Dame-de-Bon-Secour Chapel.

Canada's First Hospital, Hôtel-Dieu of Quebec City.

The Augustinian Sisters and Quebec City's Hôtel-Dieu.

Also very useful for understanding the role of nuns and sisters in New France:
Robert Choquette, "French Catholicism Comes to the Americas," 131- 242, in Charles H. Lippy et al. Christianity Comes to the Americas 1492-1776. New York: Paragon House, 1992.
W. J. Eccles. "The Role of the Church in New France," 26-37 in Eccles, Essays on New France. Toronto: Oxford University Press, 1987.
W. J. Eccles. The Canadian Frontier 1534-1760. Albuquerque: University of New Mexico Press, 1983.
Thérèse Germain. Autrefois, les Ursulines de Trois-Rivières: une école, un hôpital, un cloître. Sillery, Quebec: A. Sigier, 1997.
Colleen Gray. The Congrégation de Notre-Dame, Superiors, and the Paradox of Power, 1693-1796. Montreal: McGill-Queen's University Press, 2007.
Dom Claude Martin. La Vie de la Vénérable Mère Marie de l'Incarnation, première supérieure des Ursulines de la Nouvelle France. Paris: L. Billaine, 1677.
Peter N. Moogk. La Nouvelle France: The Making of French Canada: A Cultural History. Lansing: Michigan State University Press, 2000.
Marcel Trudel. Les Écolières des Ursulines de Québec, 1639-1686: Amérindiennes et Canadiennes. Montreal: Hurtubise-HMH, 1999.

Bibliography

Library of Congress, France in America, collection of textual sources.
This includes links to the full text of the following:
Pierre Francois Xavier de Charlevoix. History and General Description of New France, 6 vols. New York: Francis P. Harper, 1900.
Chrestien Le Clercq. First Establishment of the Faith in New France, 2 vols. New York: John G. Shea, 1881.
John Gilmary Shea. Discovery and Exploration of the Mississippi Valley. Clinton Hall, NY: Redfield, 1852. Vol. 4 of Benjamin Franklin French, ed., Historical Collections of Louisiana.

The Library and Archives of Canada, full text of the 40 volumes of the Jesuit Relations.

An anthology of selections from the Relations:
Allan Greer. The Jesuit Relations: Natives and Missionaries in Seventeenth-Century North America. New York: Bedford/St. Martin's, 2000. Bedford Series in History and Culture.

Images:
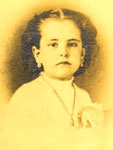
Detail of illustration of Marie de l'Incarnation, from Claude Martin, Marie de l'Incarnation, Ursuline de Tours: Fondatrice des Ursulines de la Nouvelle-France.

Marguerite Bourgeoys, Musée Virtuel Canada, "Des saisons en Nouvelle-France."

Truth in Transit: Crafting Meaningful Field Trips

Image
Article Body

Dawn. The Blue Ridge Mountains, of Pennsylvania, in the western distance, down Chambersburg Pike have an ethereal purple hue as the sun captures their crest. Closer to the ground where we are standing the mist is beginning to lift this mid-October morning. Students and chaperones huddle close together to ward off the autumn chill. All is quiet for this moment I have planned. Reaching into my satchel I pull out my set of Tibetan bells. Asking for perfect stillness from my students and chaperones I bring the bells together. As their ring echoes and trails off, I invoke the Spirit of History to be with us this day as we explore the site of the largest battle of the Civil War. Seven hours later we will head back to West Springfield High School, and my students will never look at a historic site in the same way again.

. . . my students will never look at a historic site in the same way again.

This article will help you to craft deeply rich learning experiences for your students. The lens through which we will use to explore this topic is my annual pilgrimage to Gettysburg National Military Park. Any of the strategies modeled here can be easily adapted by you to use at any historic site you choose.

Prep Work

For any field trip, preparation is a necessity and that includes planning

  • the logistics of getting there,
  • making sure your students are fed, and
  • figuring out how, what, and where you want your students to learn.

Planning is essential, and yes it will take hours, but in the end everyone is rewarded for your hard work. Before you take students, visit the site yourself, several times if necessary. Speak with site staff about your visit and keep a sharp eye and ear attuned to the narrative told at the site. Pick up tidbits along the way that you can use to transform the total experience. If the site has audio-visual programs look at them and determine if you want your students to see them. Doing so will help you to determine your time frame for visiting the site. Your use of time is crucial, particularly if you are visiting a large site such as a battlefield.

Using Student Historians

Early on I learned that what makes a field trip more meaningful for students is getting them involved. I don’t want to simply be a tour guide. For our trip to Gettysburg I ask for student volunteers to teach all of us about what happened to certain individuals at site specific locations, what I term "battlefield vignettes." Working with the National Park Service staff at Gettysburg I assembled file folders of information about seven or eight people who were part of the Gettysburg story. Student historians are then given these folders about a week before the trip to help them to prepare for their presentations. At different stops along the way, we disembark from our motor coach, and the student historians share what they have learned about these characters and what happened to that person at the specific site from which they are speaking. This provides an optimum experience on a variety of levels; it sharpens students speaking skills, it allows peers to see others in action, and it forces the student historians to "get into" the story of their character and be a historian.

. . . student historians share what they have learned about these characters and what happened to that person at the specific site from which they are speaking.


The Teacher's Role on Site

My role on the trip is to provide necessary background information about the battle as we drive along in our bus. At different places we stop I will read dramatic primary source accounts of key moments in the battle. Before I read I ask everyone to take their minds' eye back to that time and place and settle in with the moment of the past. On the crest of Cemetery Ridge, at the Angle, where Pickett's Charge was repulsed, I read several eyewitness accounts of the actual combat that took place where we are standing as well as reflections on the site that were written the day after the battle was over. These prove to be powerful and moving as history becomes transcended.

Assessment

It is important to have students reflect on their experience and the best way to do that is to have them write reflective journal entries about their visit. (See here for example of prompt.) Entries are crafted to plumb not only the intellectual components of their visit but also their feelings, affirming what Ralph Waldo Emerson famously wrote, "There is no truth but in transit." Field trips can be the ultimate learning and teaching experience and provide you and your students not only a slice of history but a lifetime of memories as well.